Example Playthrough
Star Commander is a card game of exploration, colonization, commerce, and conflict. The goal in a game of Star Commander is to control known space, defeating your opponents and their would-be interstellar empires.
The game is comprised of 270 cards, broken up into different piles and decks.
- 3 Domain decks (Industry, Politics, and Science) of 30 cards each
- 1 Planets deck of 25 cards
- 147 ships and stations
- 4 Starting Planets
- 4 Scouts
It also uses colored cubes and money counters to represent planetary developments and credits, respectively.
Note: All card art displayed in these photographs is temporary, and used for prototyping purposes only. All rights belong to their original creators.
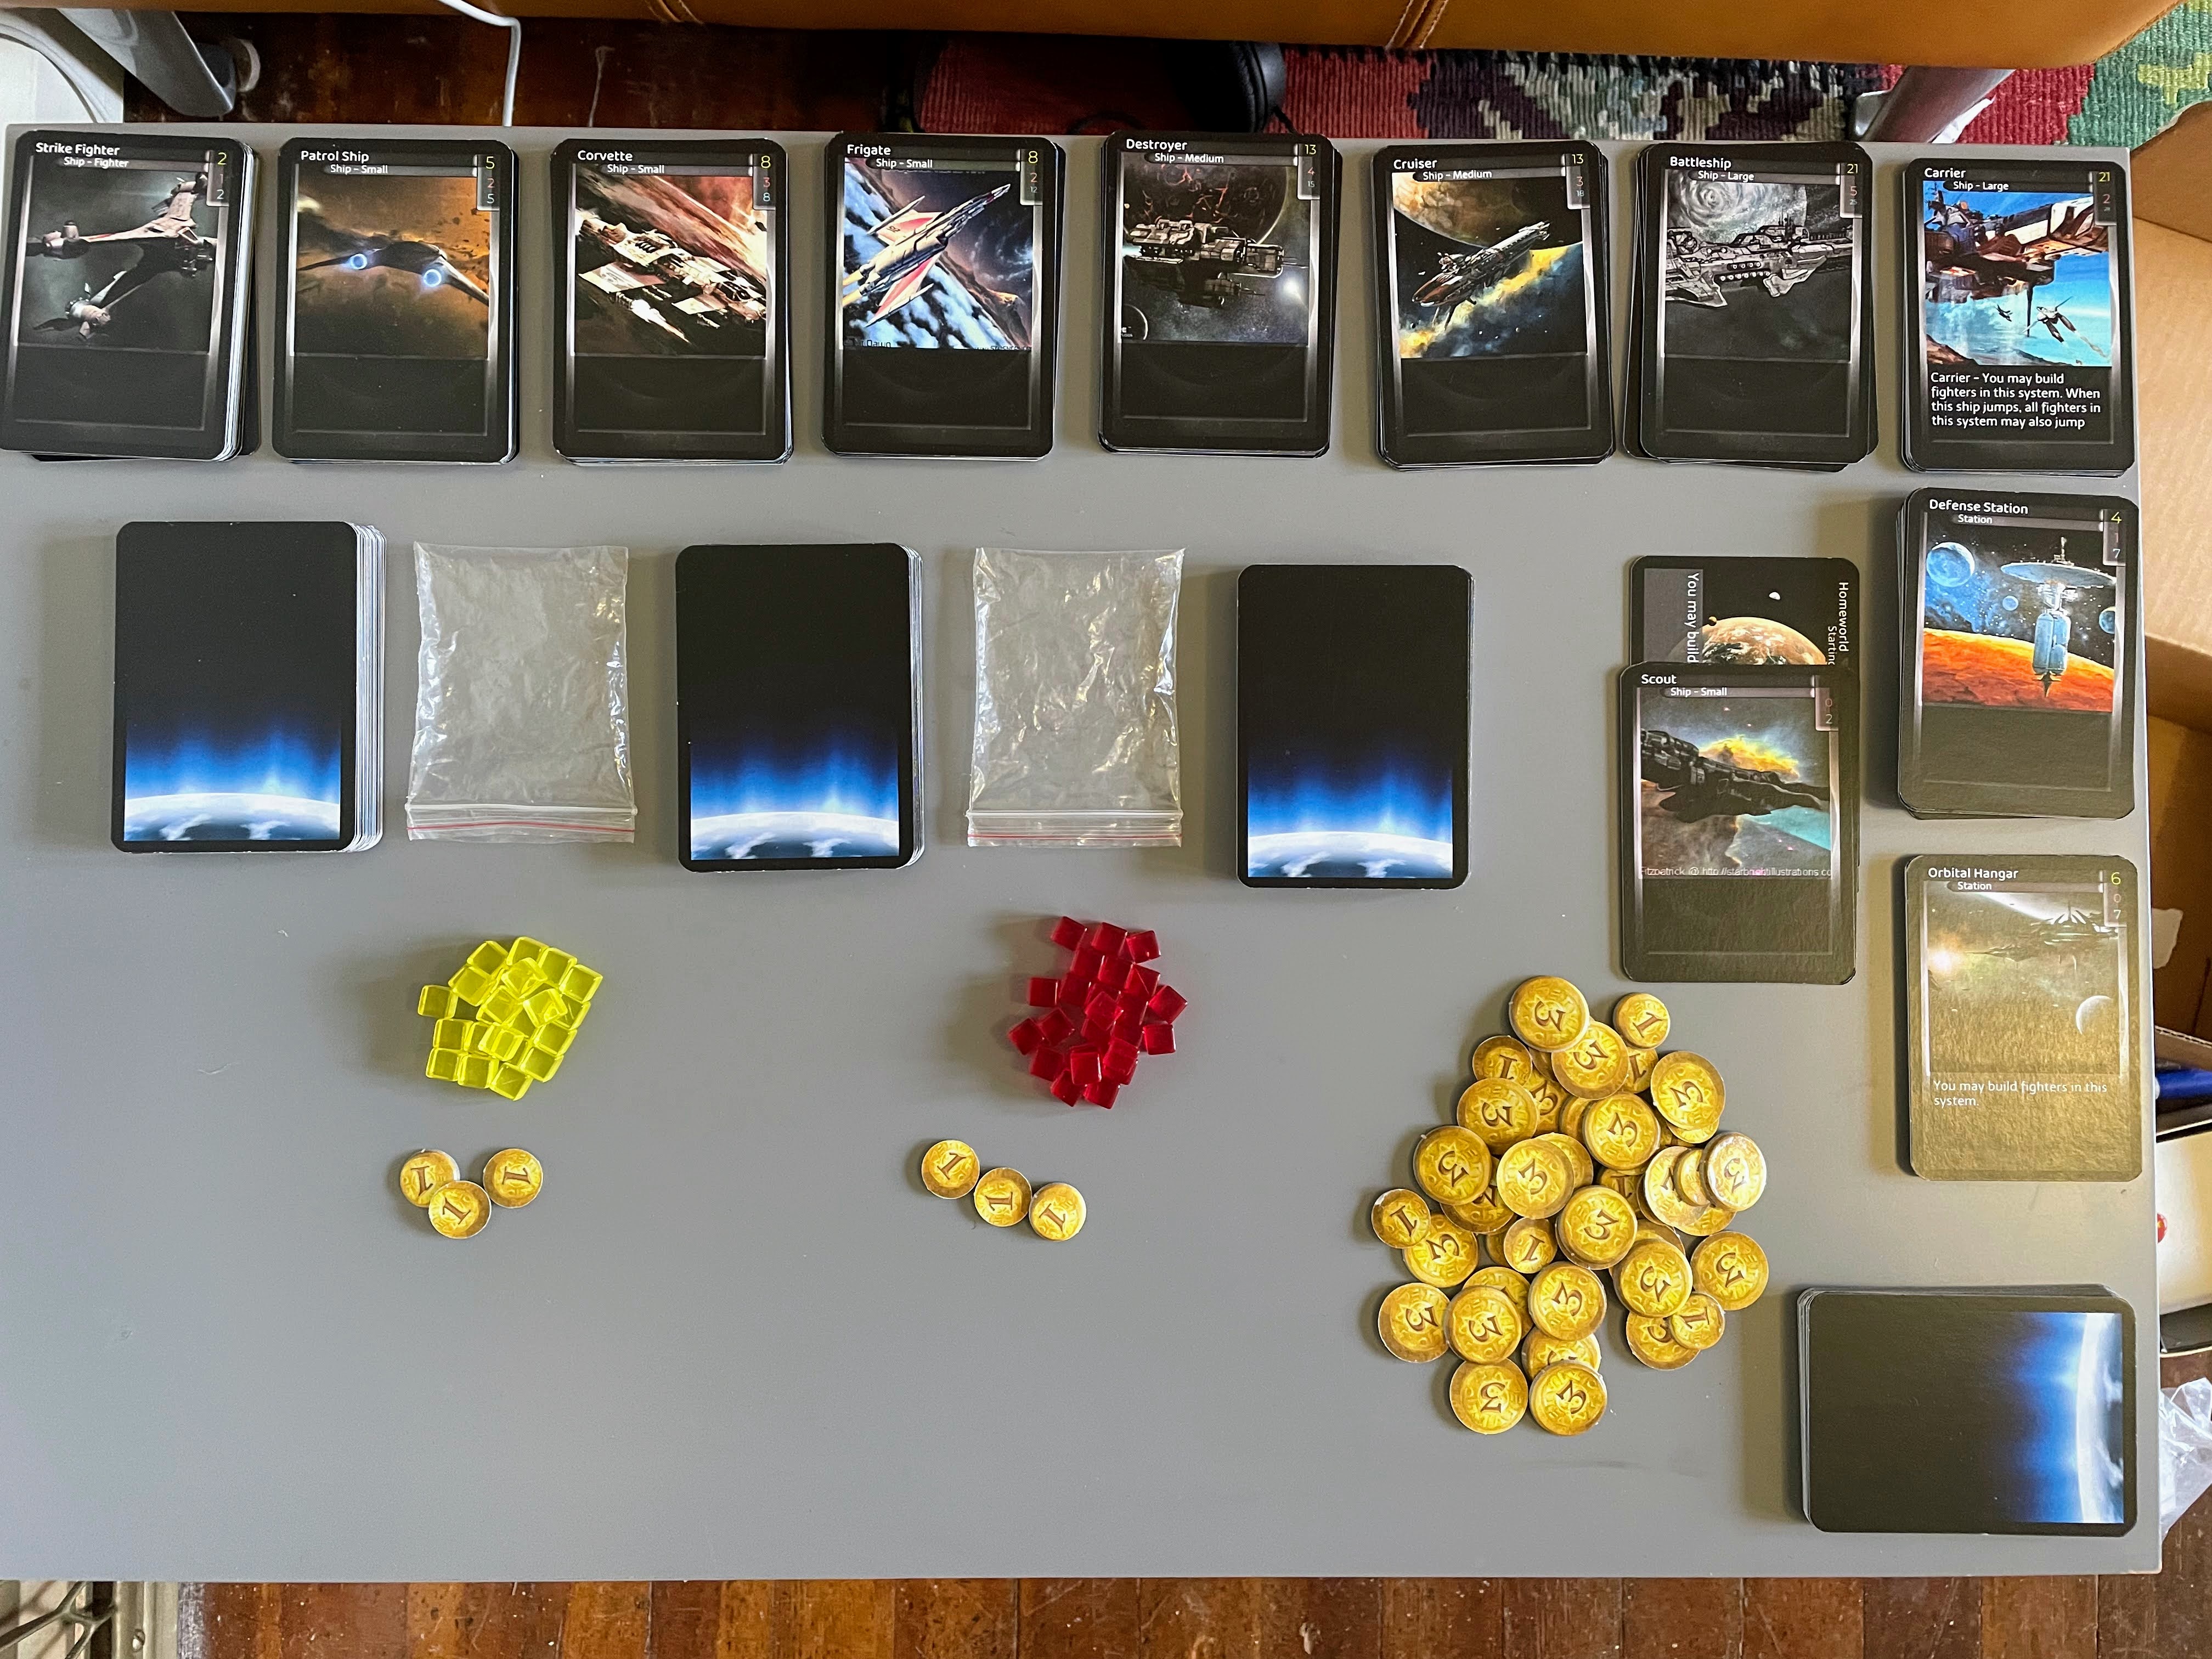
All of the cards and Tokens to play Star Commander are set up and ready to play.
Setup
To start, the Planets deck is shuffled, and a grid of planets is placed face down on the table. Two corners of the grid are removed, and replaced with starting systems. A Scout is placed at each starting system, as well as a development counter for the player initially controlling it.
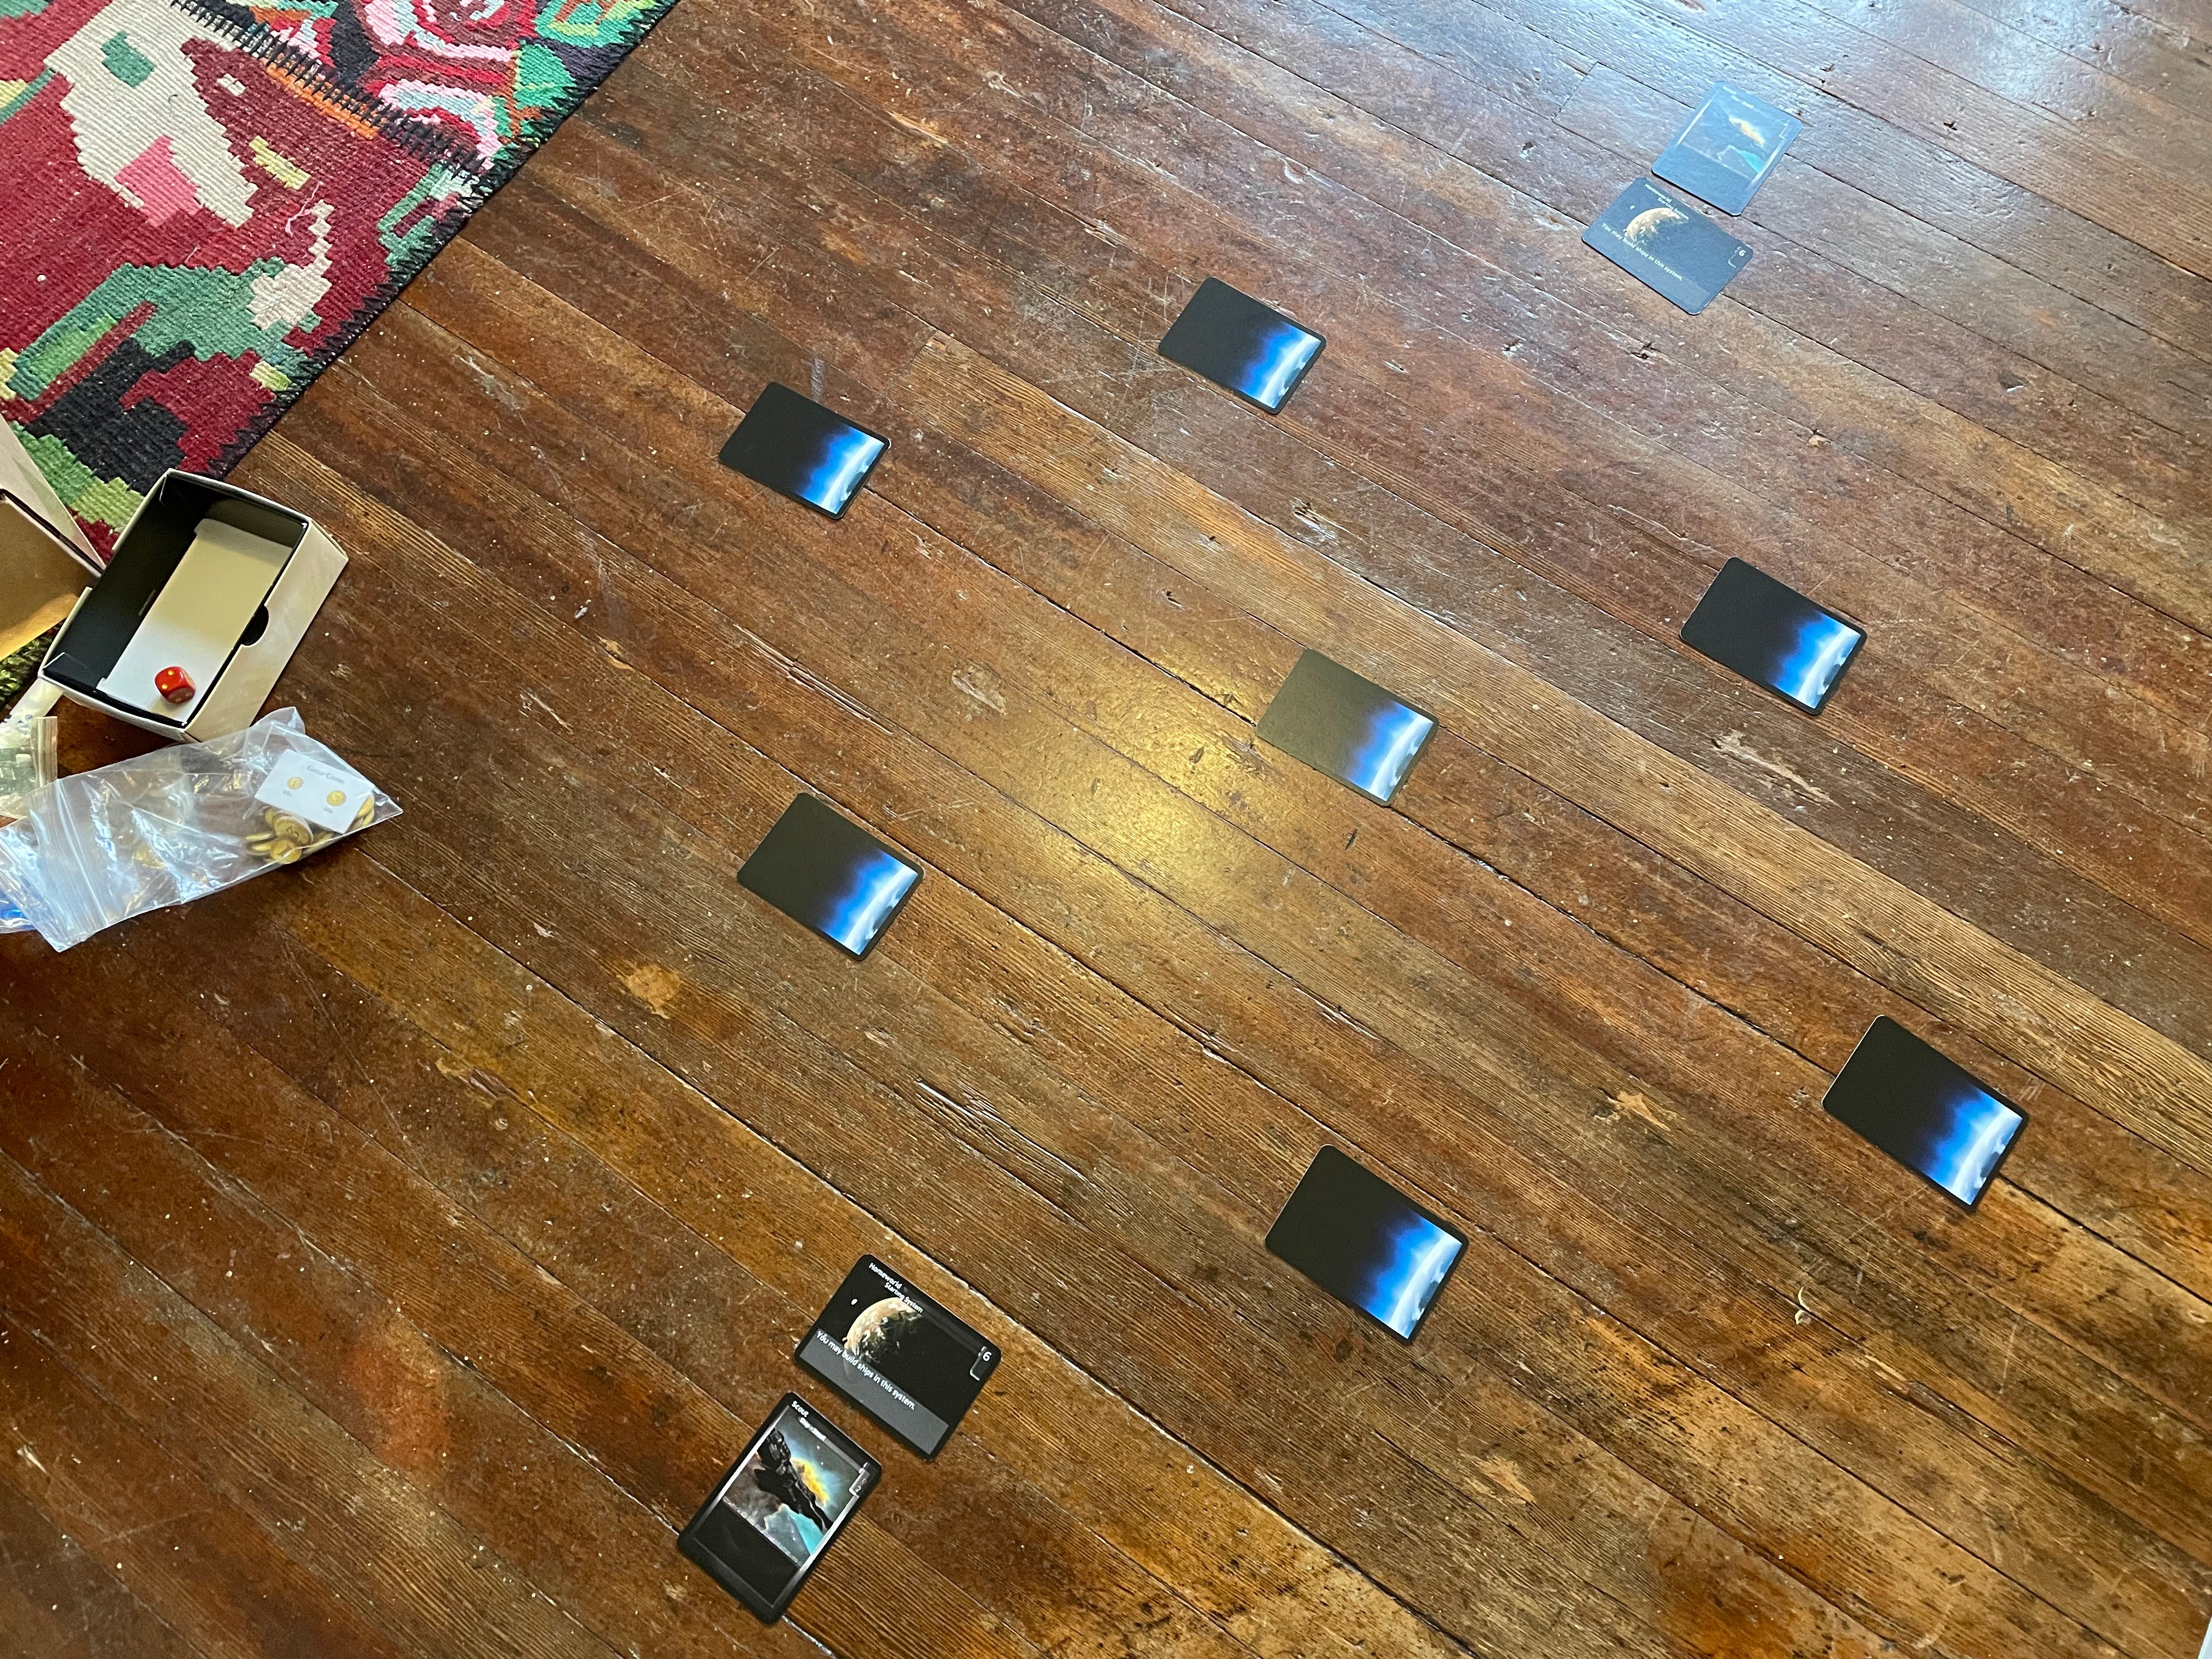
Games of Star Commander can be played in 3x3, 4x4, or 5x5 sizes (or you can make your own!)
Taking a Turn
Players take turns gaining credits (1 credit for each development), then moving their ships and performing actions. Some of the actions you can take include:
- Moving a ship to another system
- Discovering a new planet
- Colonizing new worlds
- Building new ships
- Invading enemy systems
When a ship you control enters a system that hasn't yet been explored, you "discover" it by flipping the Planet card face up. Some systems have abilities that trigger when they are discovered (such as drawing cards from the Domain decks), while others (like this Trade World) provide other resources at the start of your turn.
Discovering a new system does not give you control over it, however. To control a system, you must build a development on it. The first development costs 1 credit, with each subsequent development consting an additional credit (a second development costs 2, a third costs 3, etc). System cards have a number in the top right corner, which represents the maximum number of developments in a given system.
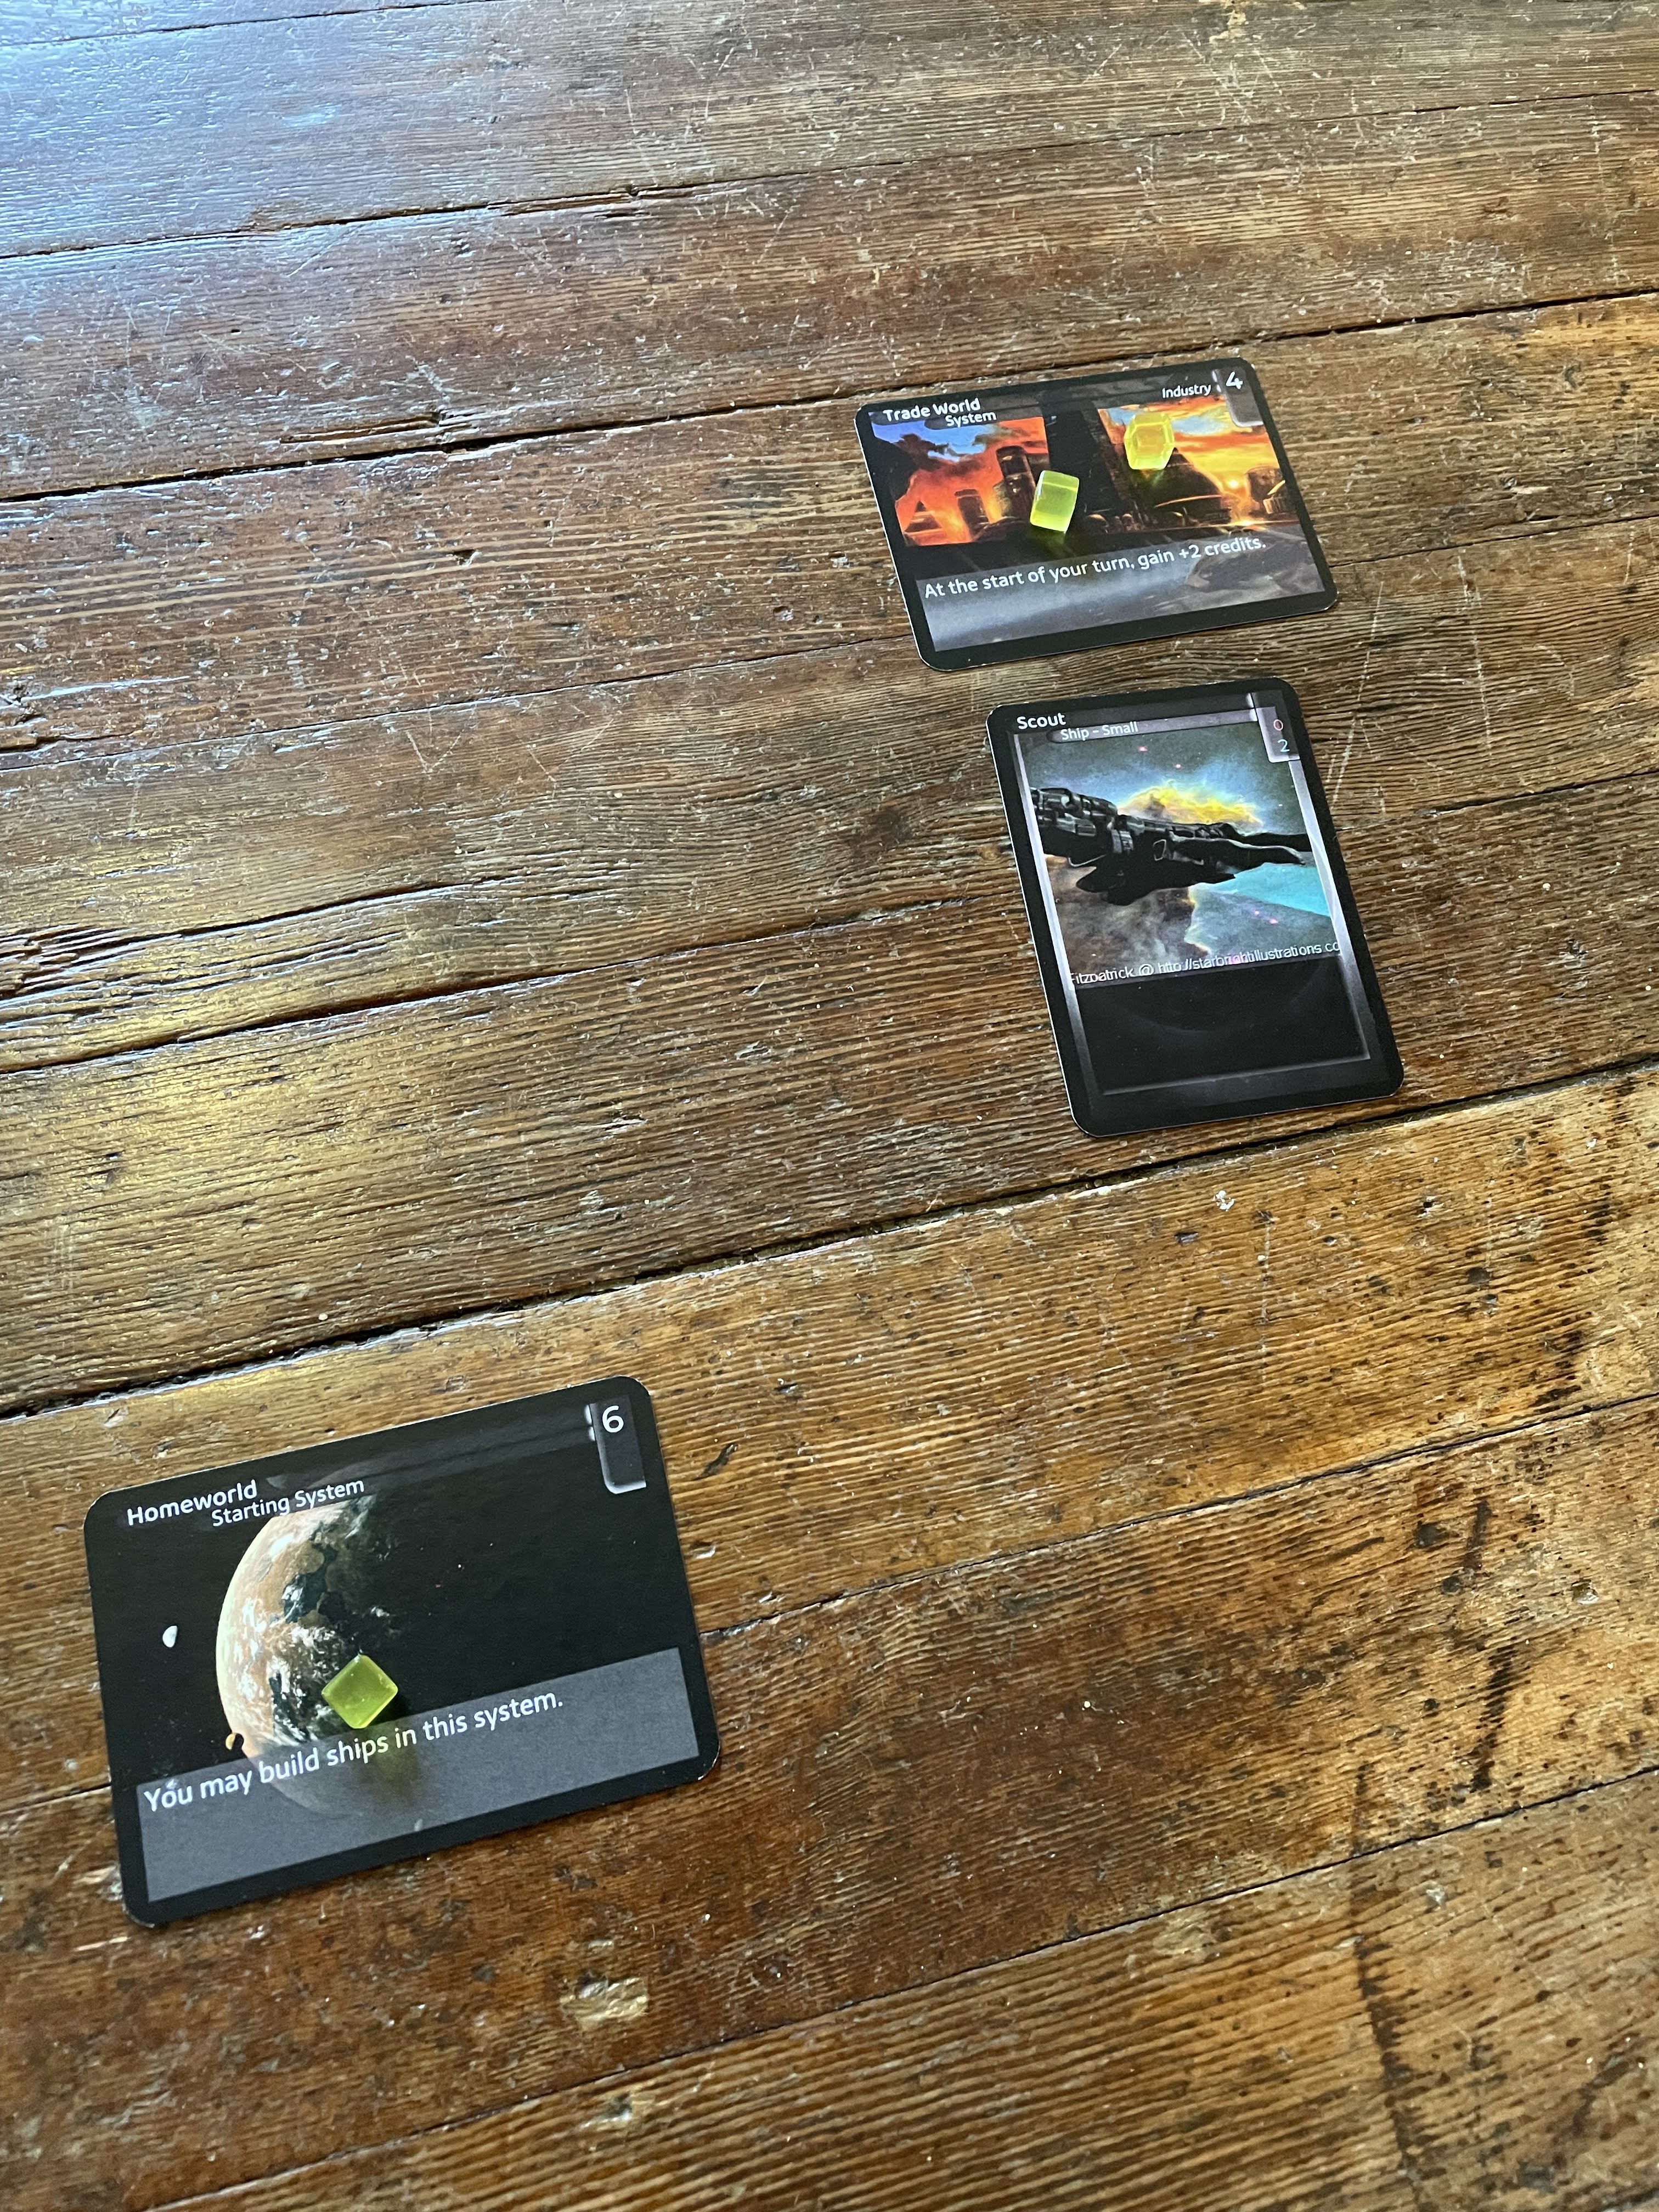
A Scout has discovered a Trade World, and the player built two developments on it.
Domains
Each system also has a Domain. There are three Domains - Industry, Politics, and Science. These three domains have different focuses, and play out with different strategies:
Industry
- Primary resource: Credits
- Early strategy: Rush
- Late strategy: Big Ships
Industry cards are focused on building up a strong, stable economy. Industry cards often provide additional credits, with the goal of bringing the largest ships to bear against your opponents. Other cards support your large ships, either by providing additional ways to deal damage, or repairing your ships so that your investments aren't destroyed so easily by the enemy.
Politics
- Primary resources: Developments
- Early strategy: Strong Defenses
- Late strategy: Lots of Ships
Politics cards are all about controlling your opponent's actions, preventing them from gaining an advantage over you. Early on, politics cards are great at playing a defensive roll, while you build up your board presence with Defense Stations and fighter ships. Once the opponent has lost the initiative, technologies allow for your fleets of small ships to advance, overwhelming your opponents with sheer numbers. Cards like Sabotage, Intercept Orders, and others manipulate the ships and cards your opponents have, ensuring you are always in control of the situation.
Science
- Primary resource: Cards
- Early strategy: Find Technologies
- Late strategy: Better Ships
Science cards expand the possibilities of your ships and stations, outpacing what your opponents can do. While your opponents are jumping from one system to the next, your ships are going straight for their homeworld! If an enemy fleet is approaching, you can play Interdiction to prevent it from moving any closer for a turn. Later in the game, your advantage comes from the number of technologies you possess, enabling faster, more powerful ships that can withstand any number of enemies.
At the start of each turn, the active player rolls the Domain Die. If the value on the die matches a system's Domain that they control, they draw a card. (For the purposes of the prototype, 1-2 is Industry, 3-4 is Politics, and 5-6 is Science)
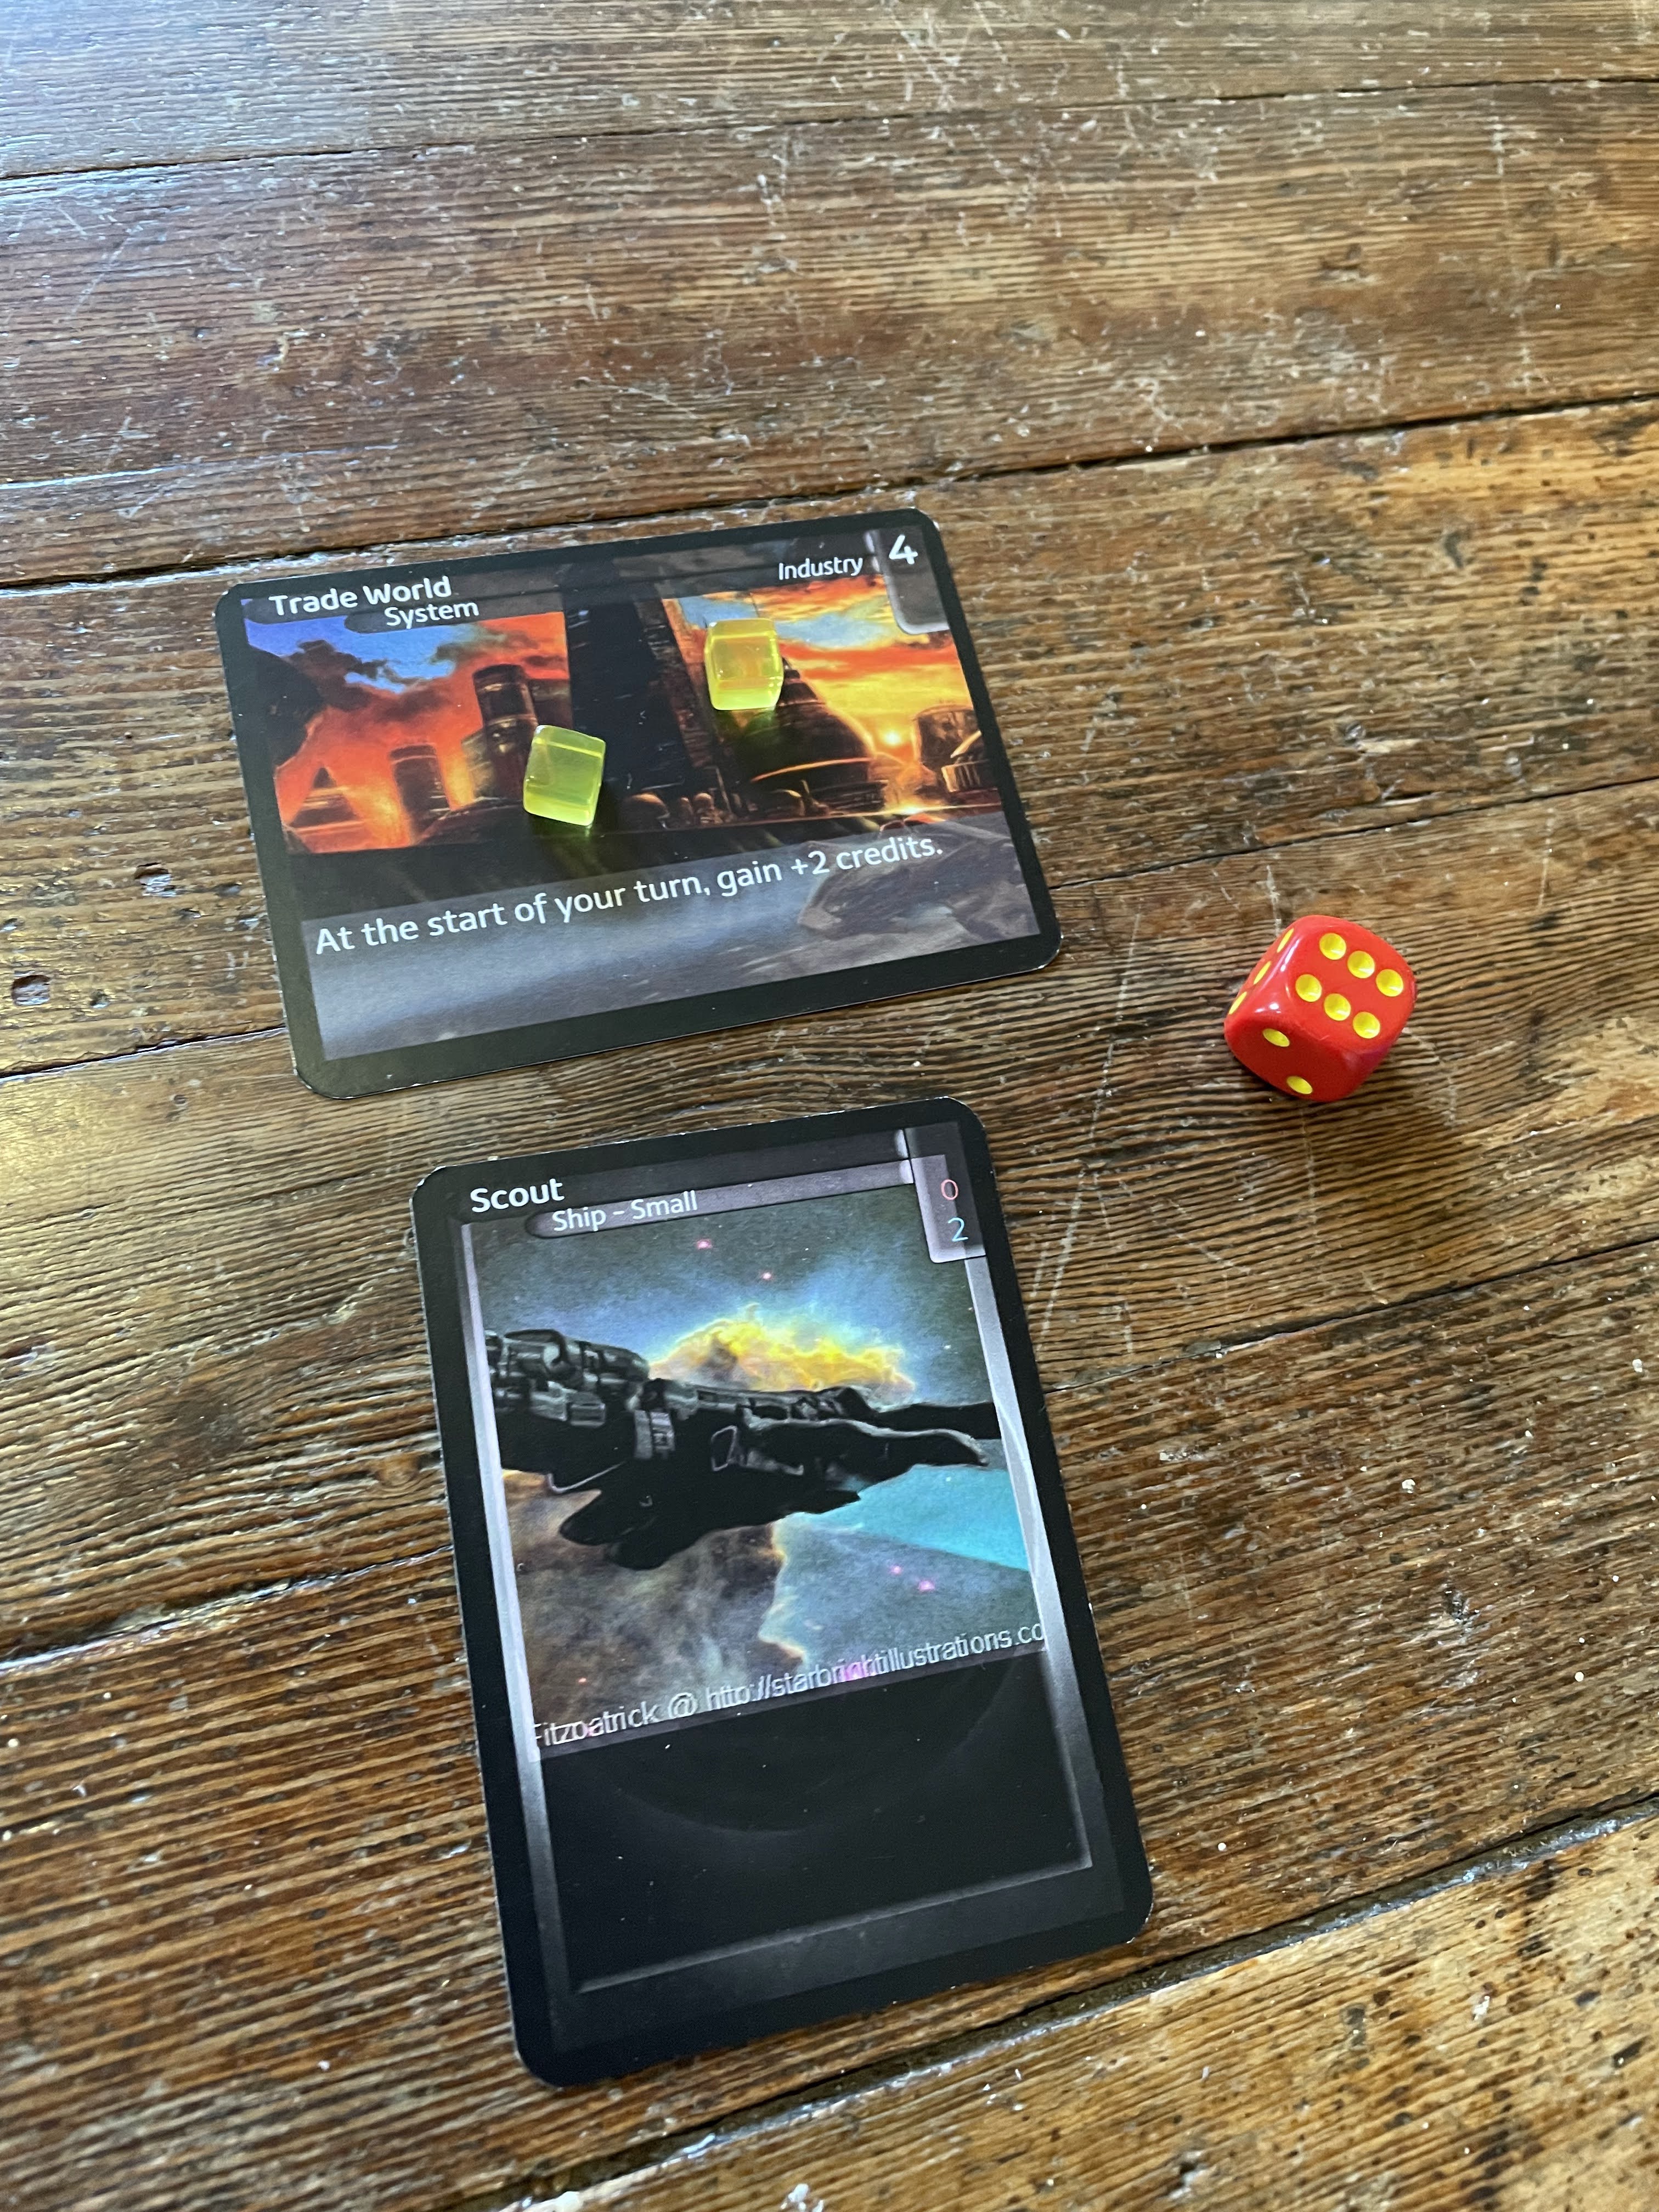
The Domain Die came up a six (Science), which means that the player does not draw a card this turn.
There are three kinds of cards that can be drawn from the Domain decks:
Stations
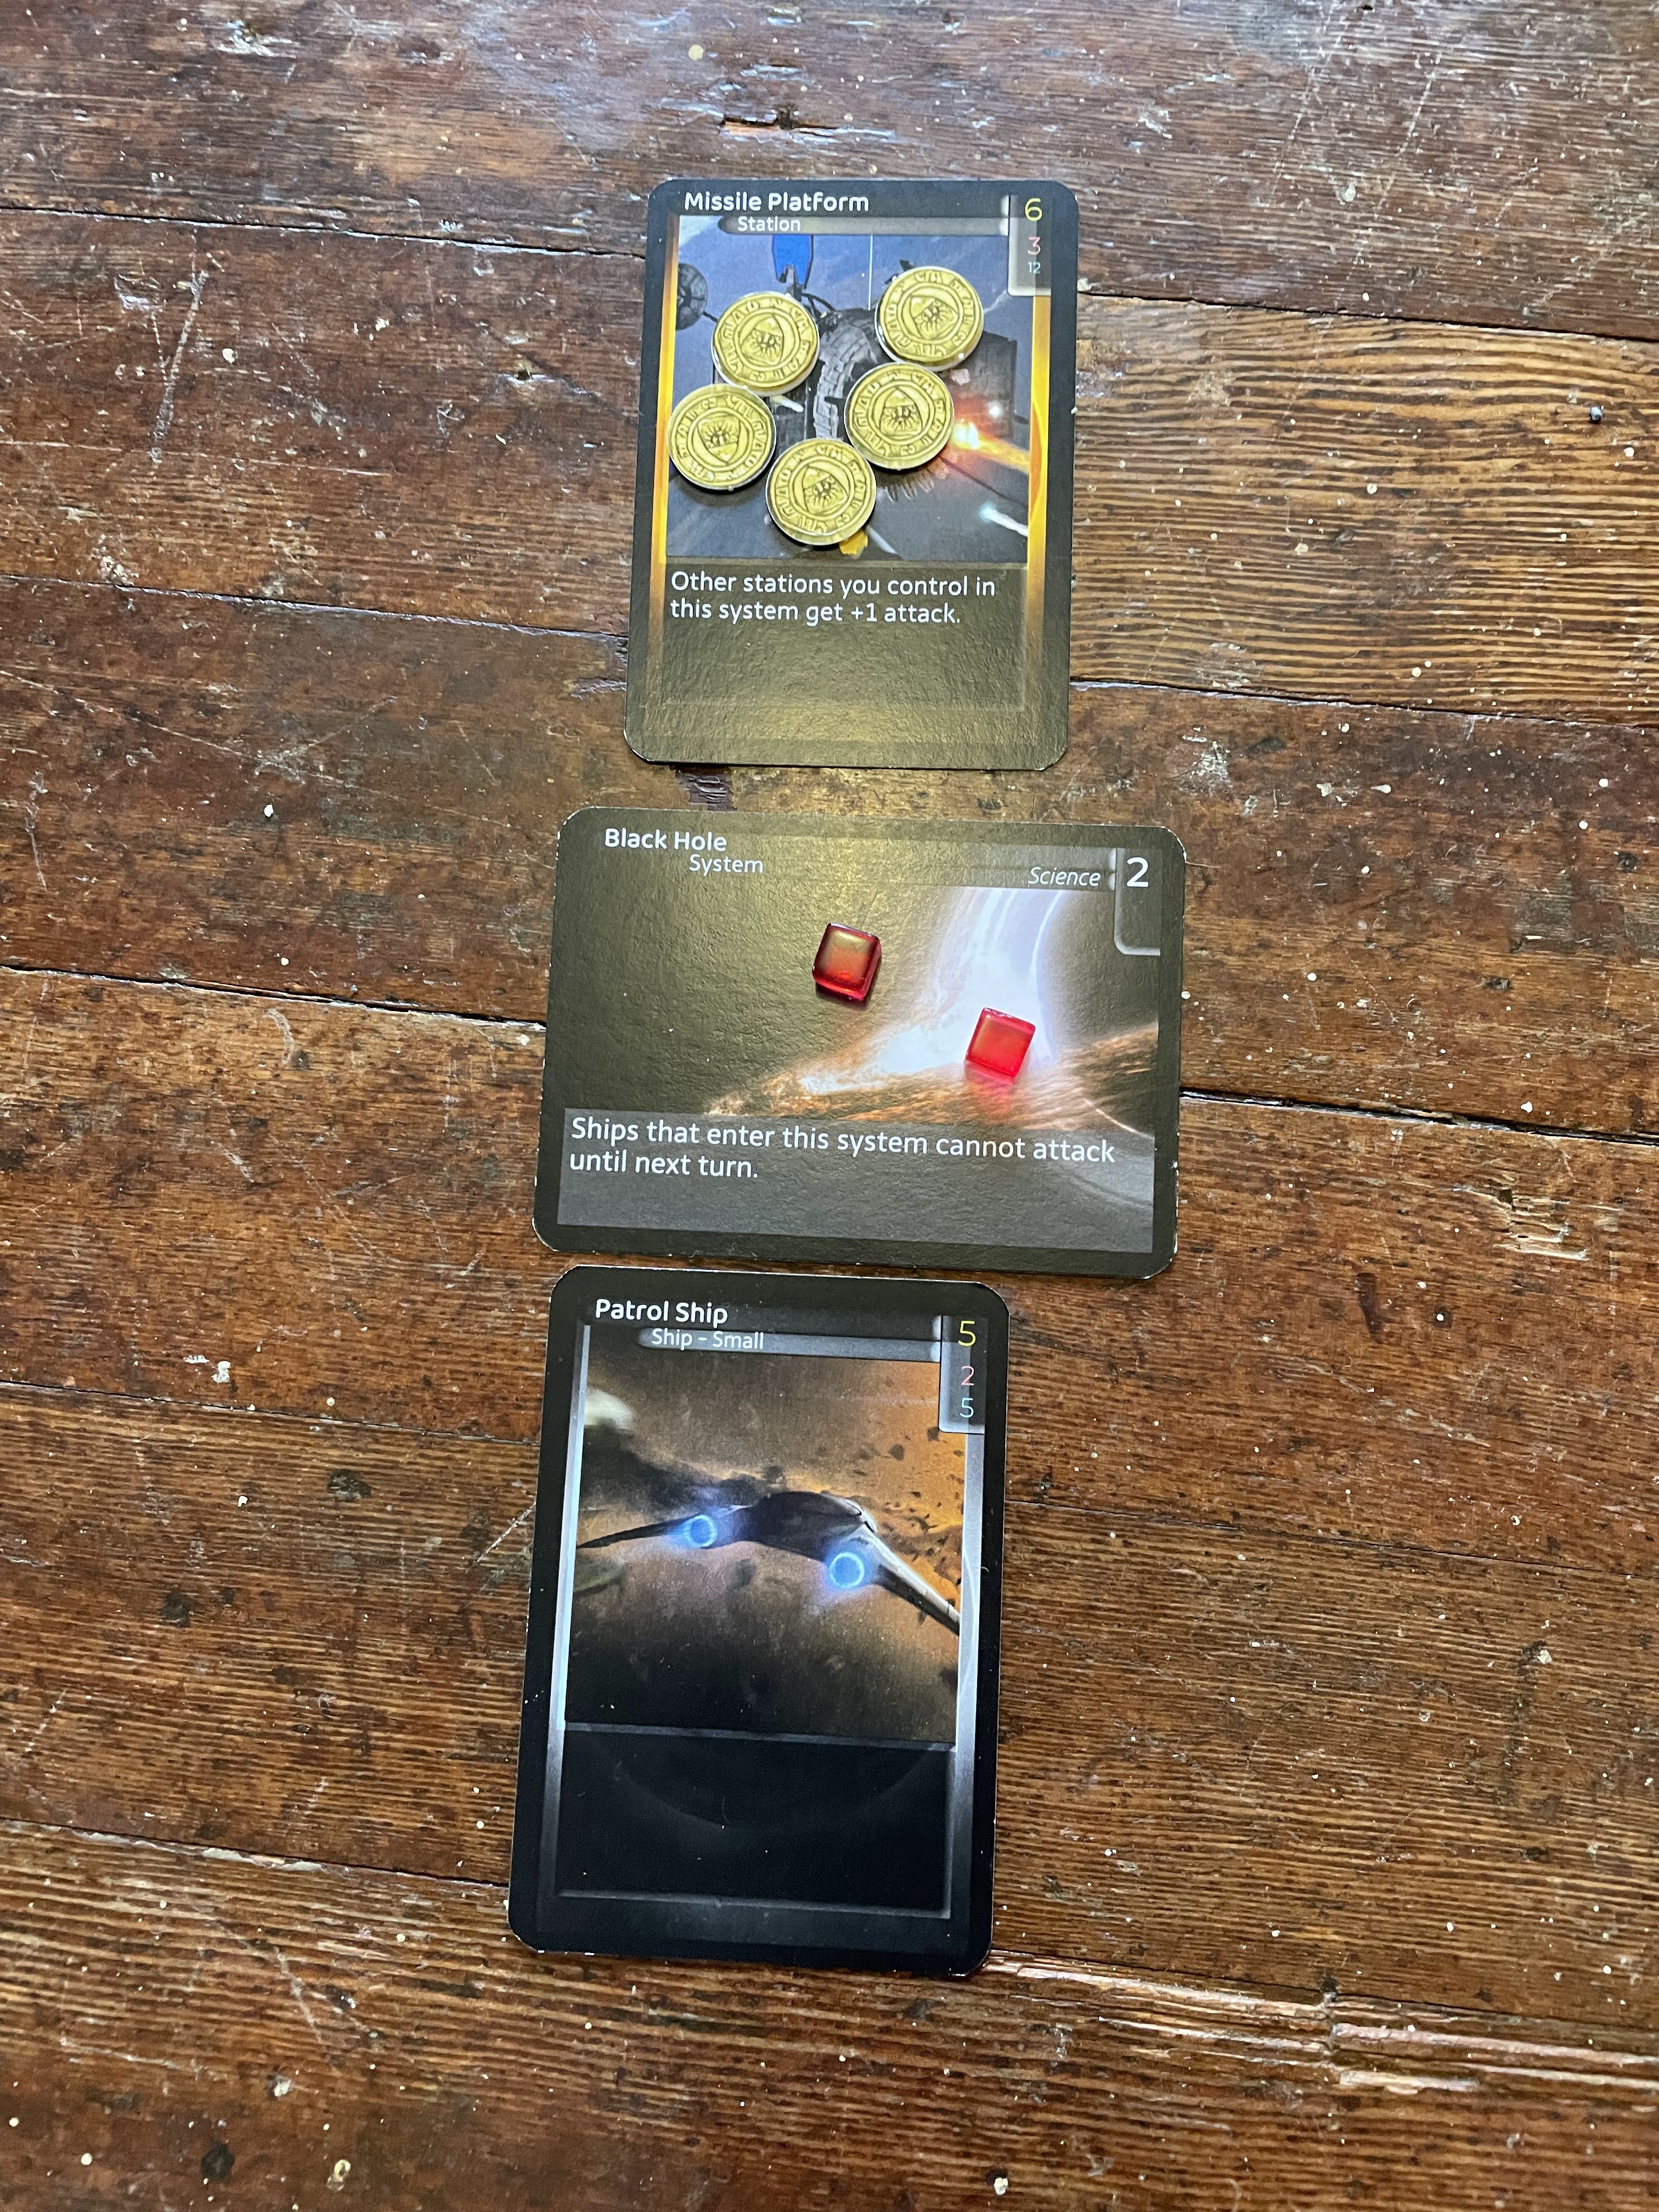
Station cards are structures built in systems. Unlike ships, they cannot move between systems. They typically provide some benefit, such as additional credits per turn. One station, the Defense Station, is always available to build and does not have to be drawn (more on generic ships and stations later). You may only have a number of stations up to the number of developments in a system.
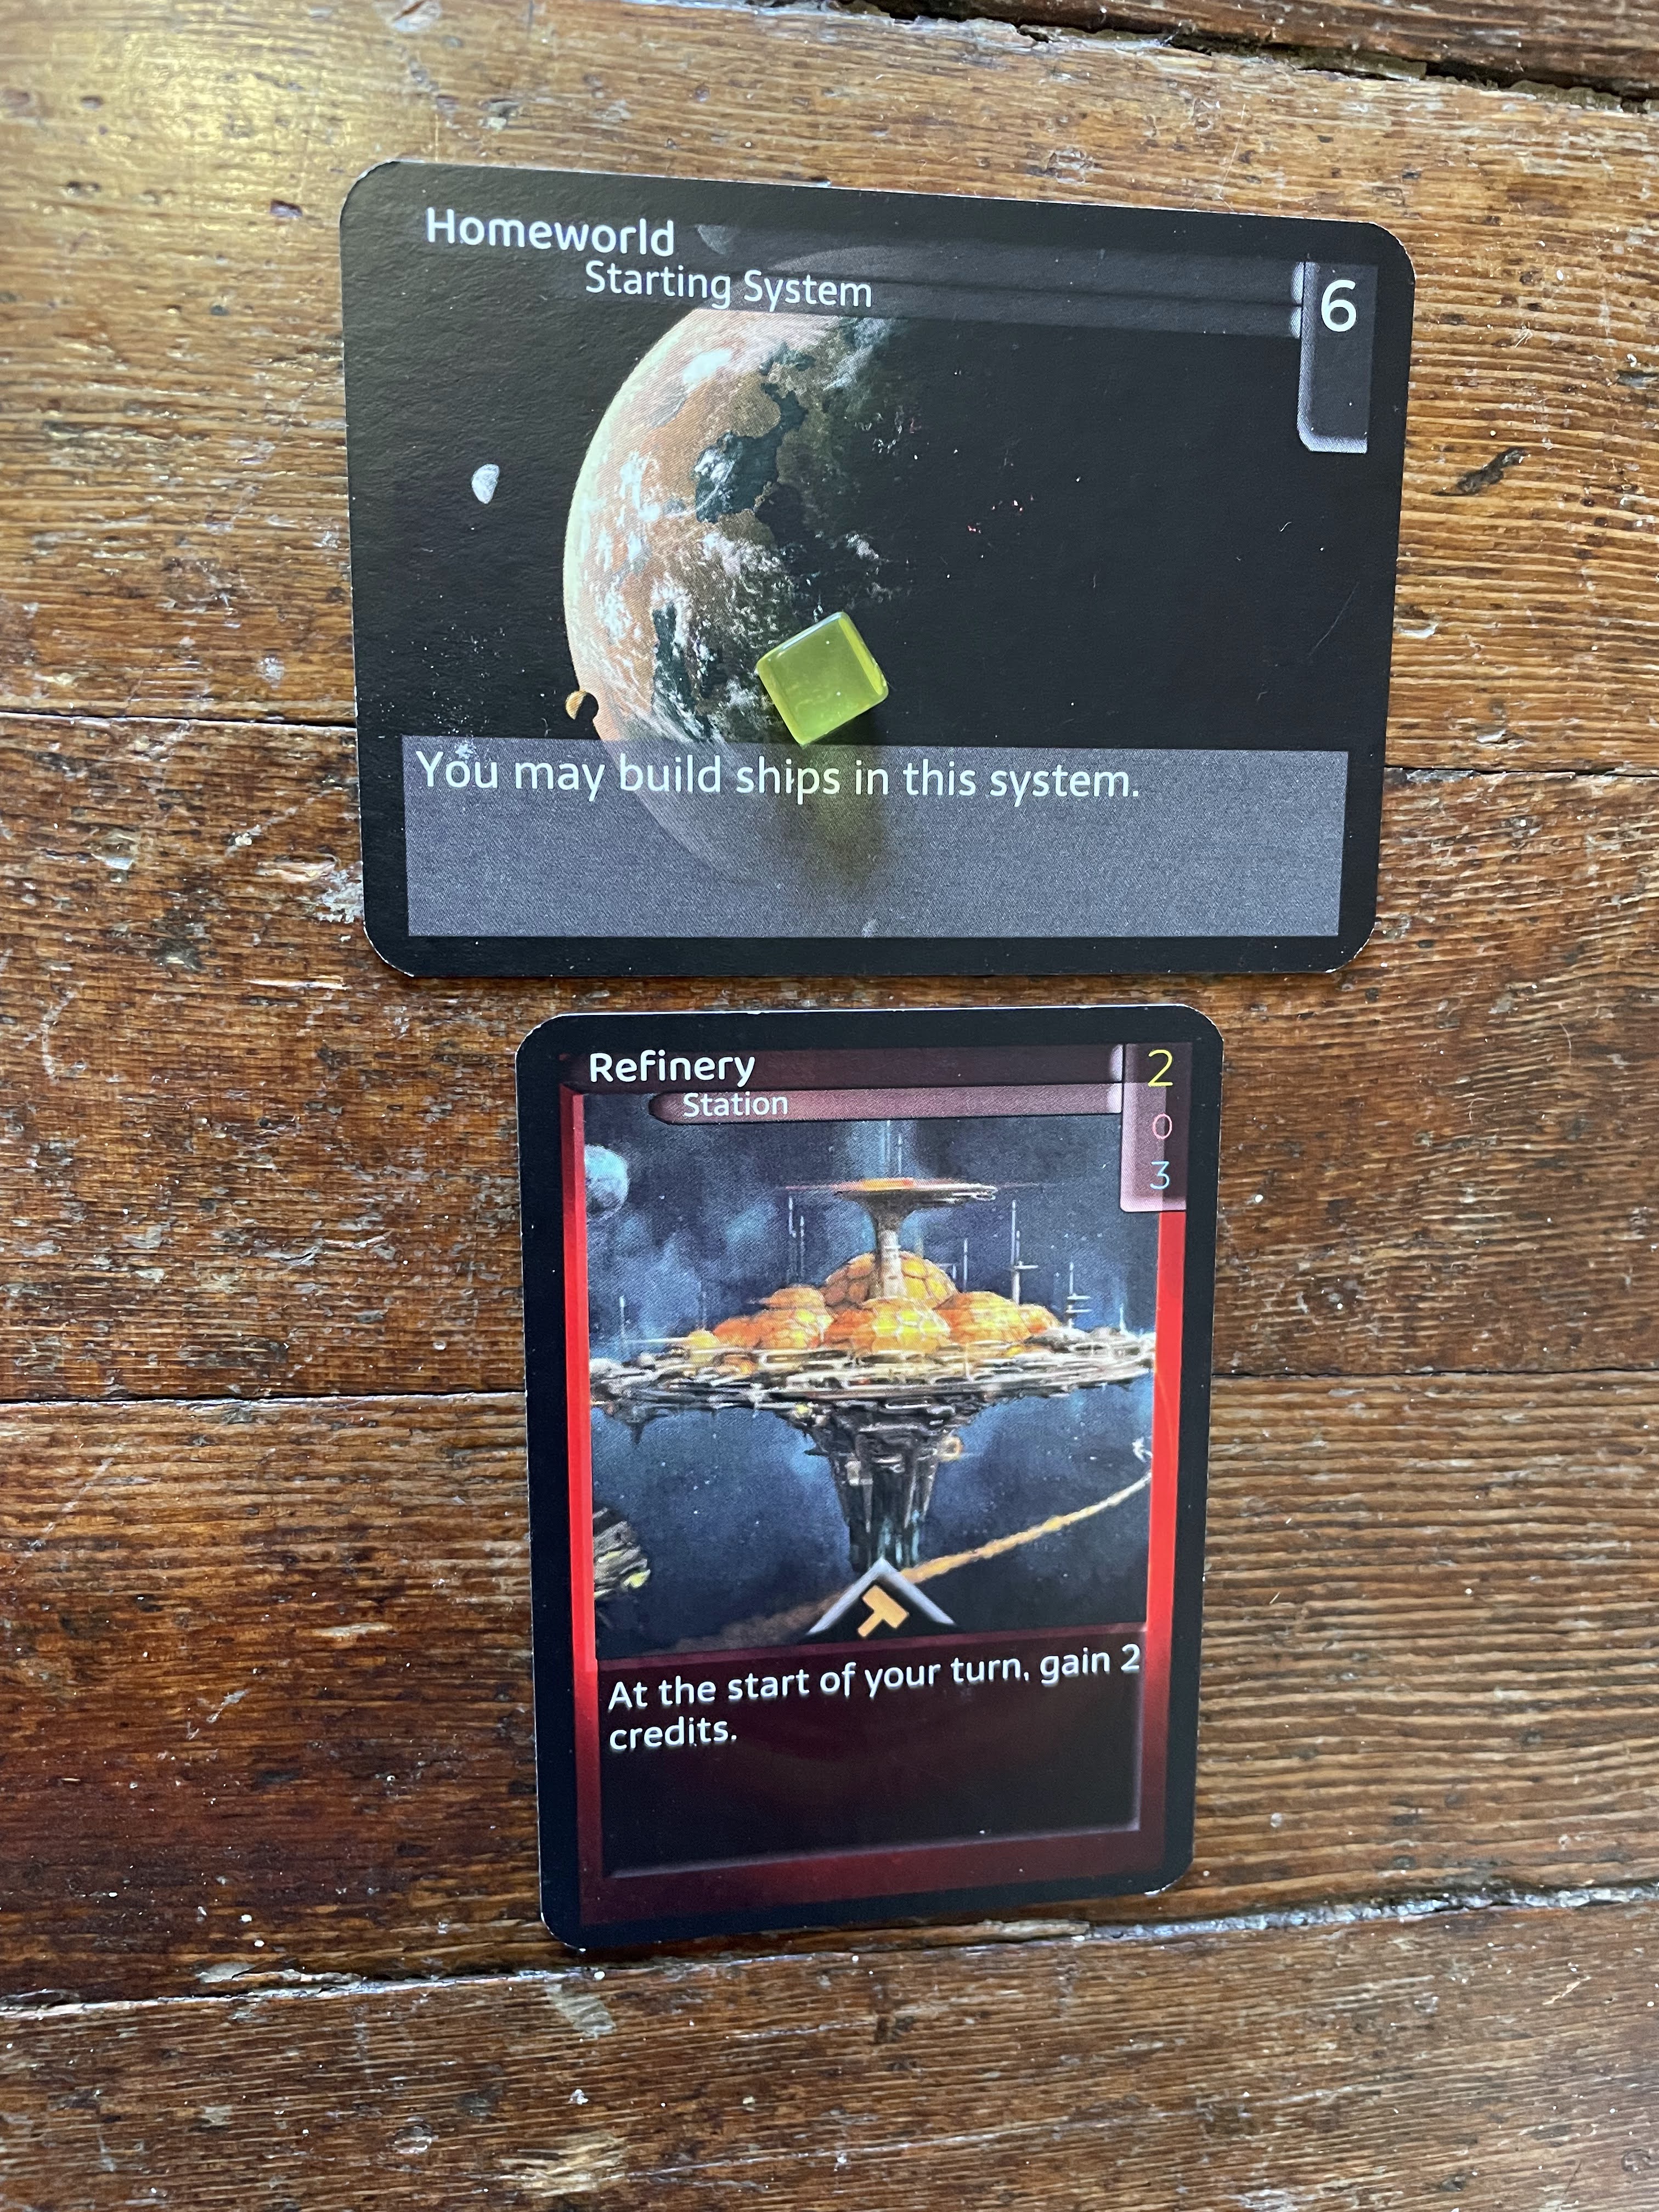
The yellow player has constructed a Refinery in their starting system.
Commands
Command cards are one-time use effects. Commands are played from your hand for free (no credit cost), and the action is performed. Some actions are beneficial to yourself or your ships and stations, while others harm your opponent.
Technology
Technology cards provide a permanent beneficial effect to you or your ships. Some technologies increase the number of credits you earn each turn, while others (such as the Enhanced Jump Drive) allow ships to jump more than once system each turn.
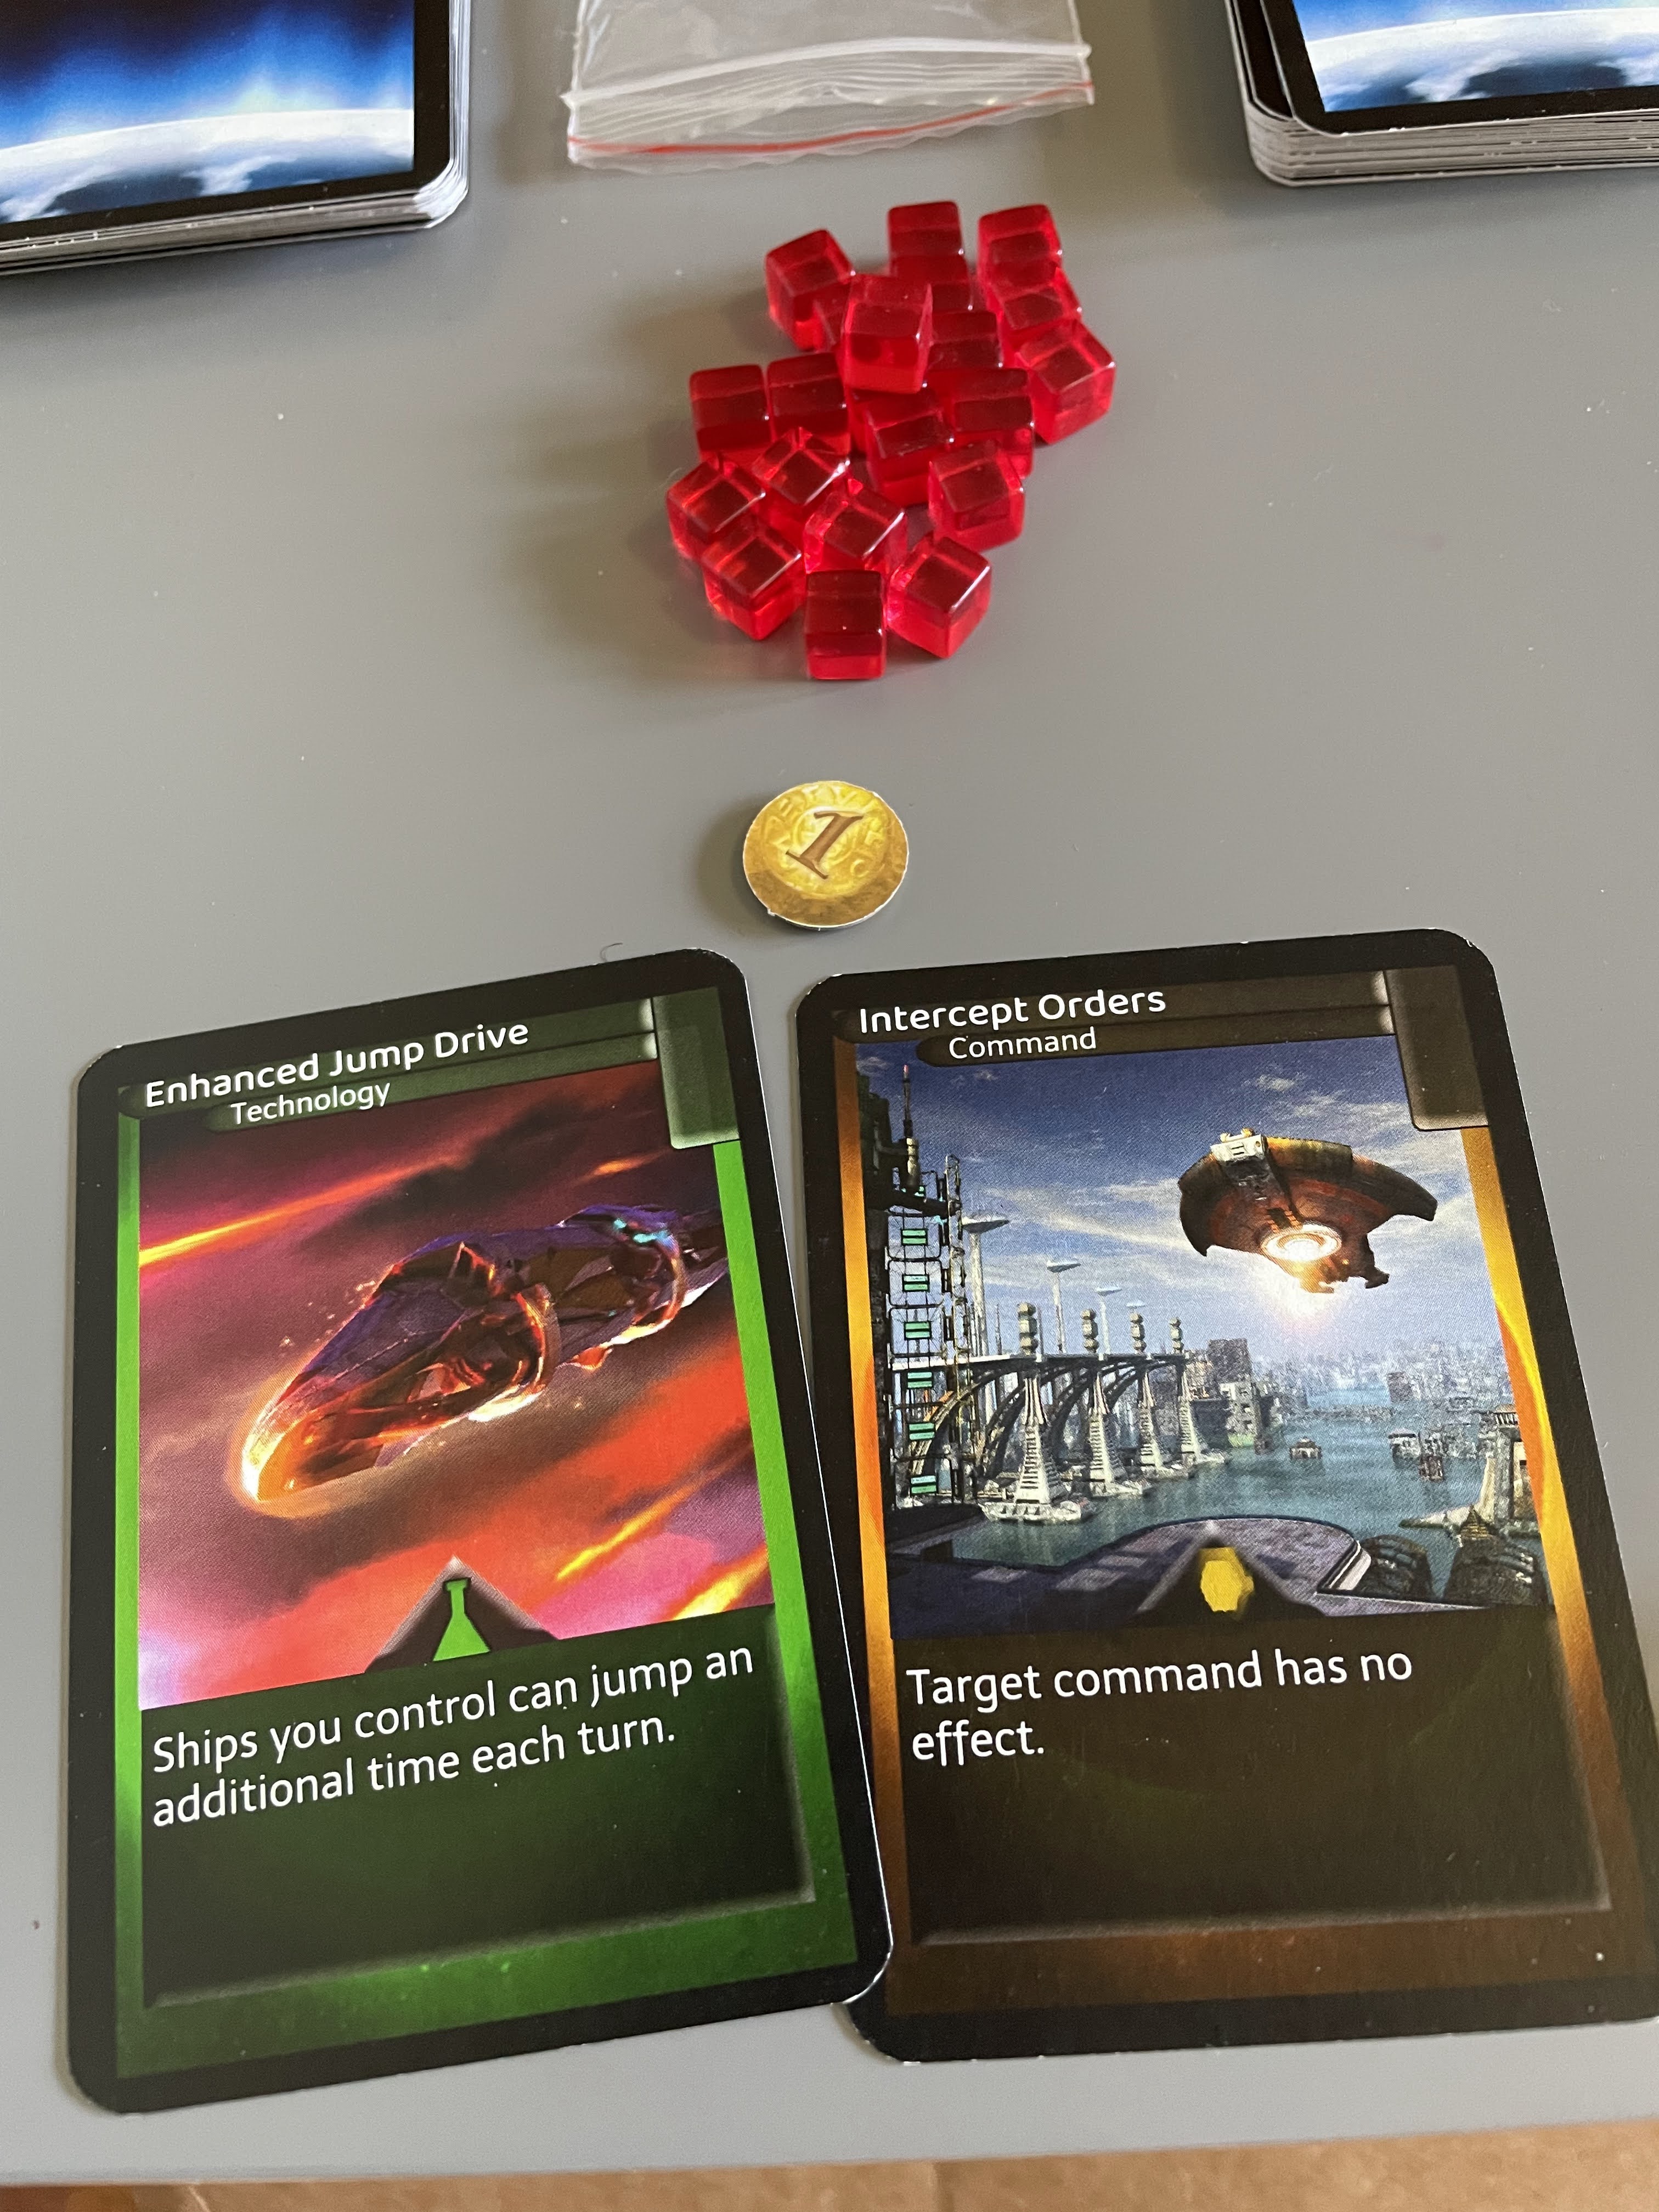
The red player has drawn both Intercept Orders and Enhanced Jump Drive.
Building Ships
Obviously, a lone Scout is not enough to conquer the galaxy! As part of your turn, ships can be built in your home system (or another Capital System). Each ship has a cost associated with it, which must be paid in credits.
- Patrol Ships cost 5 credits
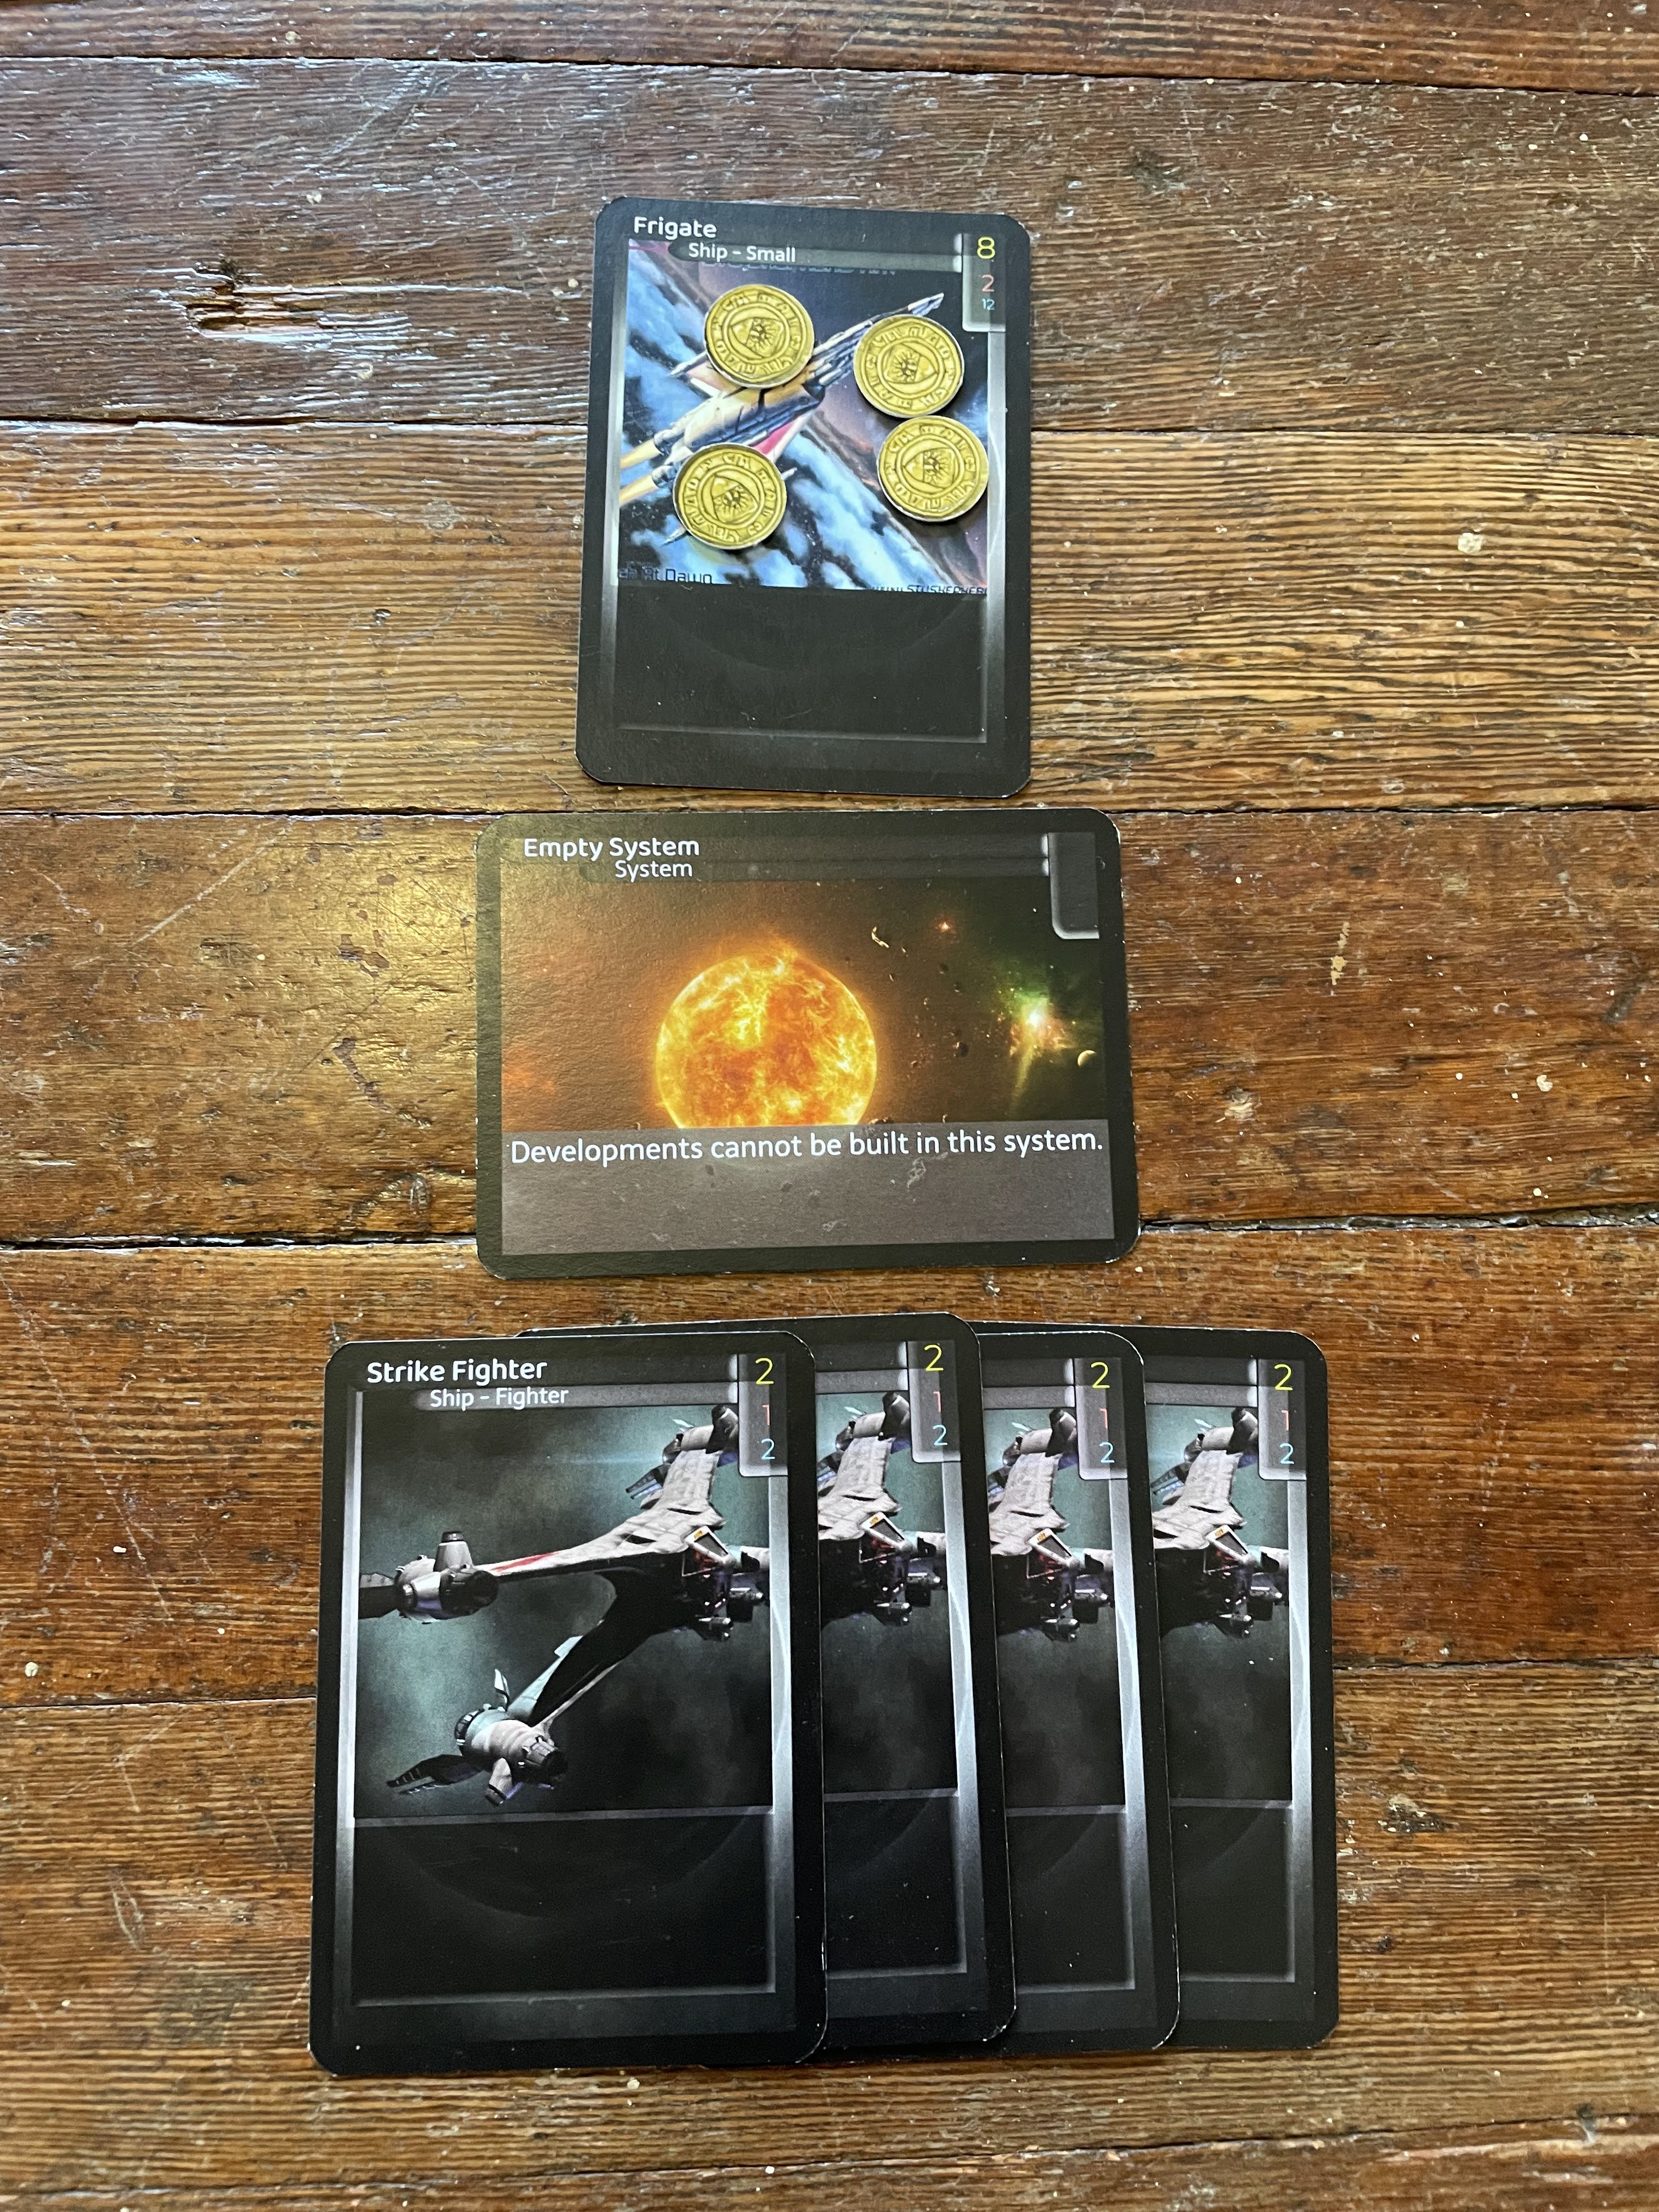
- Corvettes and Frigates cost 8 credits
- (https://www.starcomgame.com/card-database?selectedCard=Destroyer) and Cruisers cost 13 credits
- Battleships and Carriers cost 21 credits
When a ship is initially built, it is placed in your home system (or a Capital System you control). It cannot move until your following turn, so plan ahead! On each following turn, ships can move one system per turn, following the diagonal lines on your system grid.
In the early game, you will typically build smaller ships, like the Patrol Ship. But later in the game, you can choose to build larger ships, or more smaller ships. It's up to you to make the correct decision for your empire!
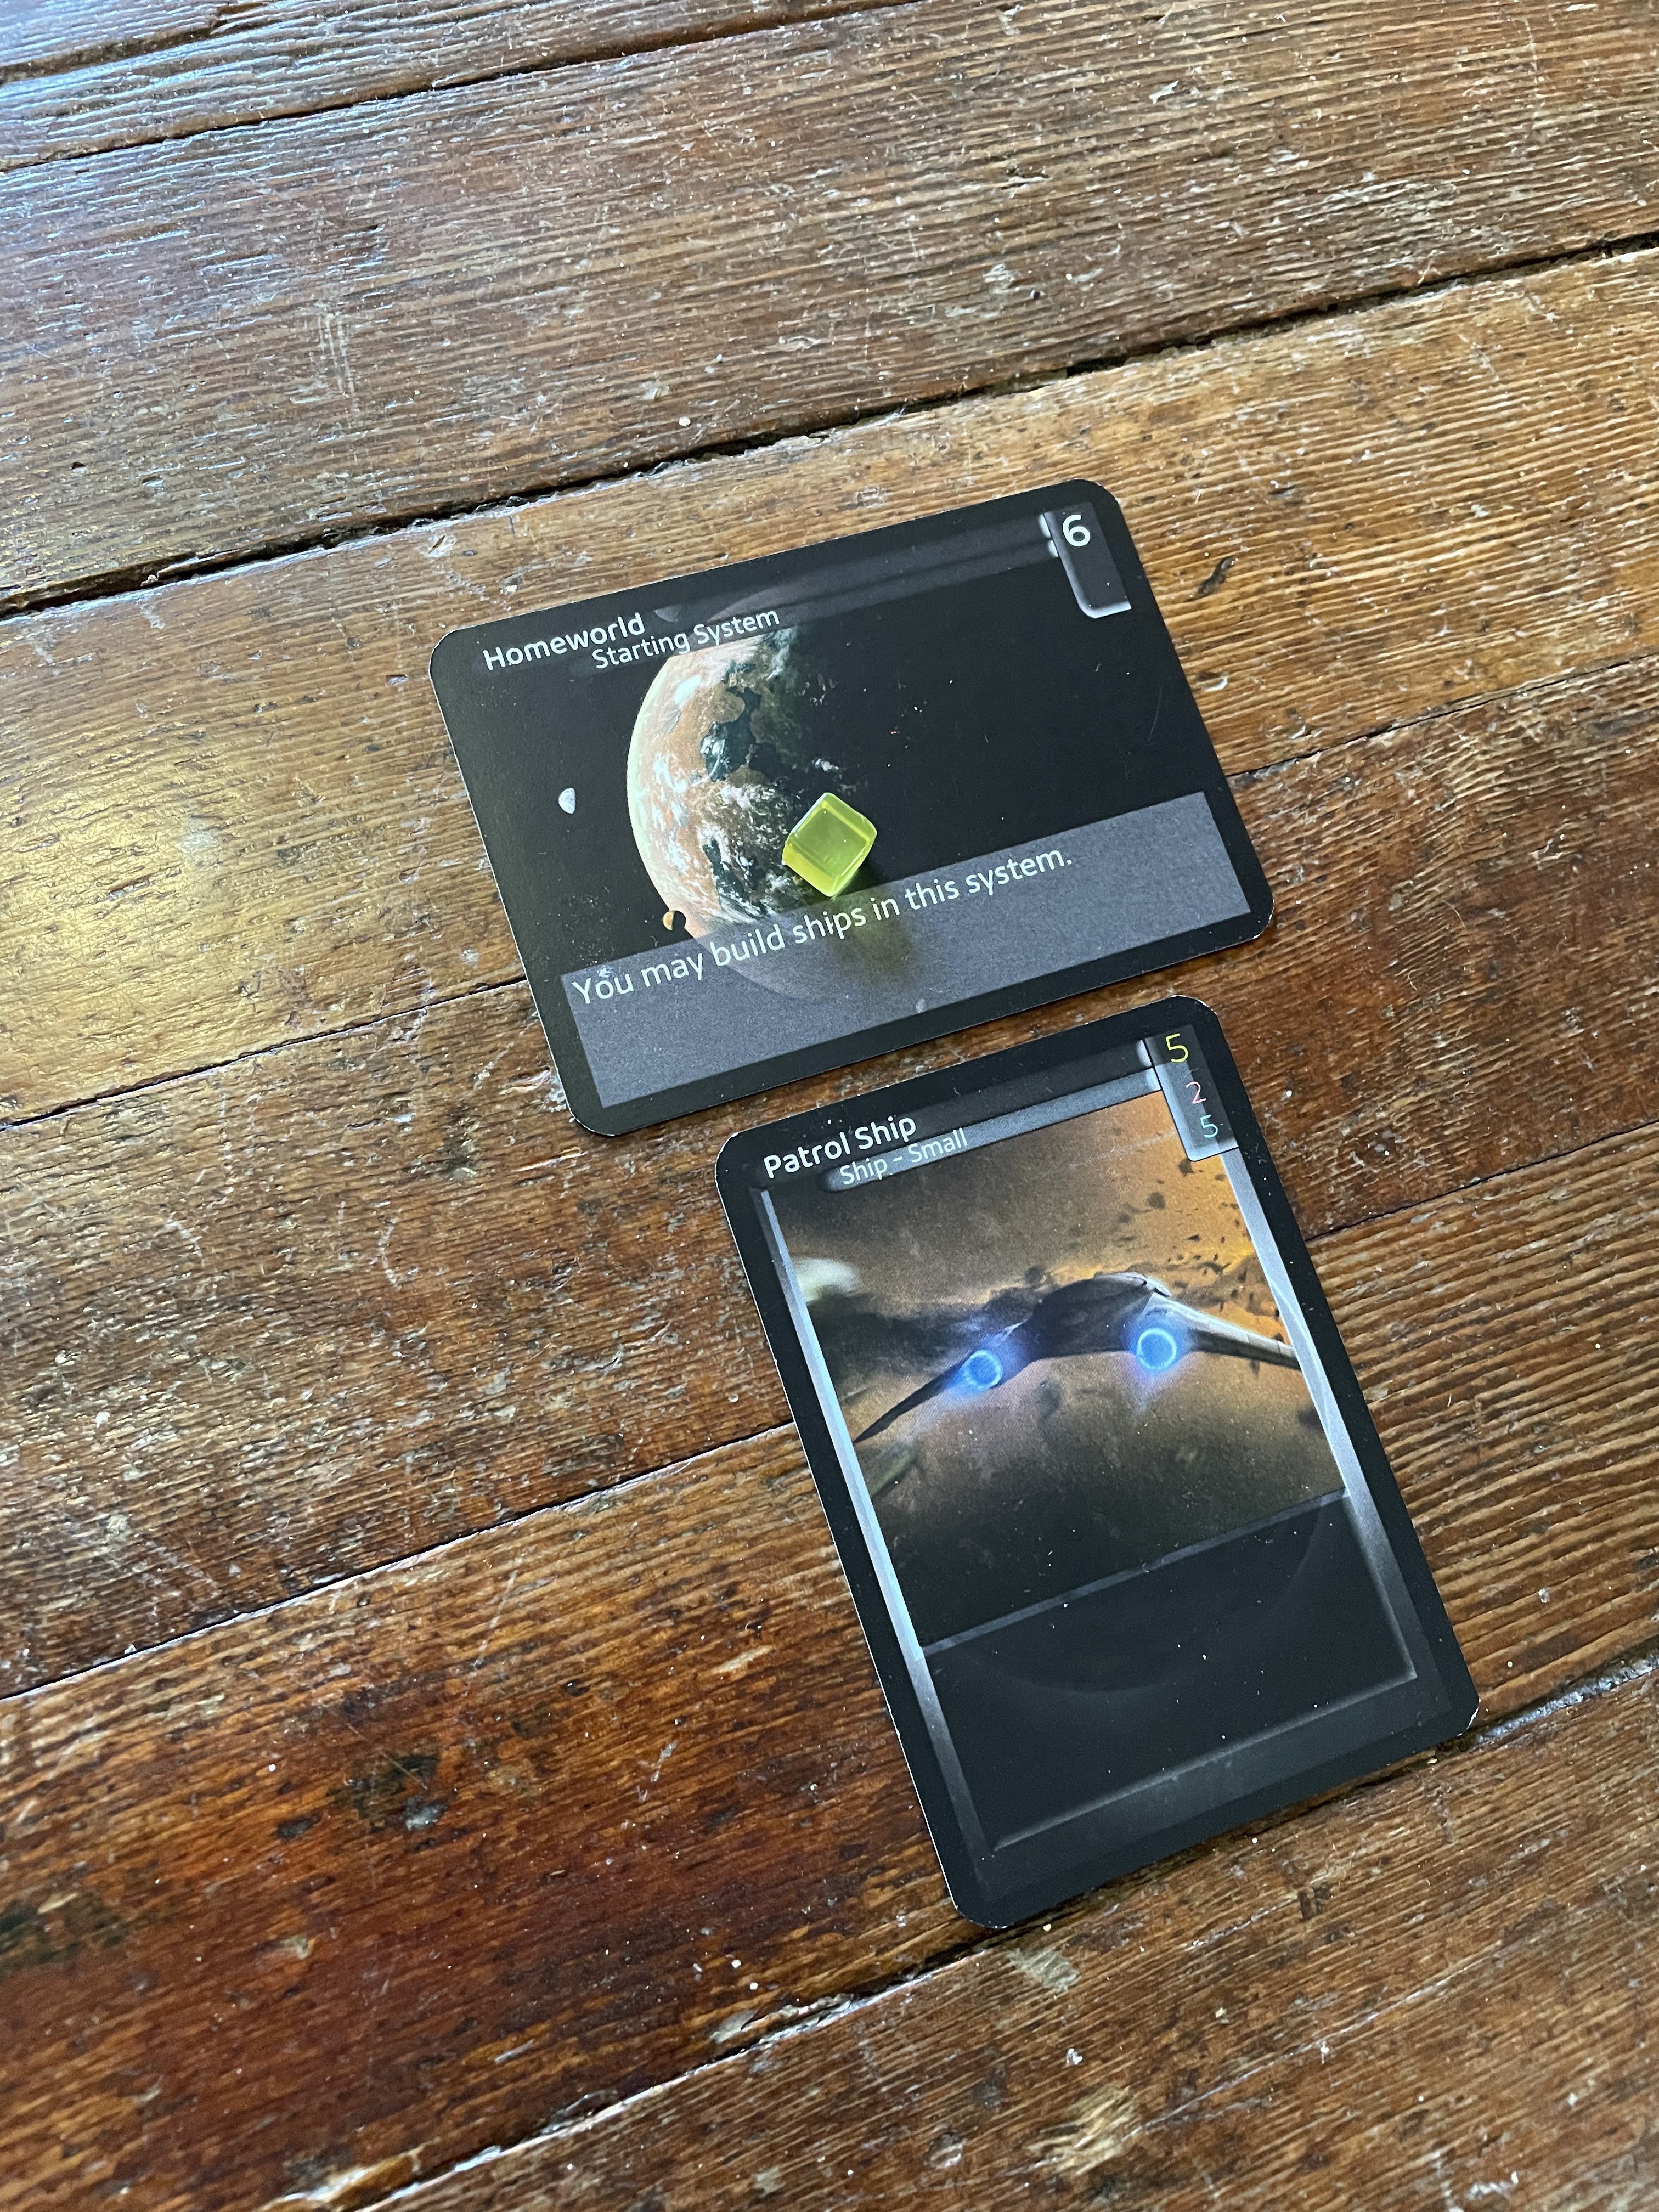
The yellow player built a Patrol Ship. What are they up to?
Combat
One of the key aspects of Star Commander is combat. When trying to control known space, conflict can and will happen between empires. Combat occurs when ships or stations from two or more players are in the same system at the same time.
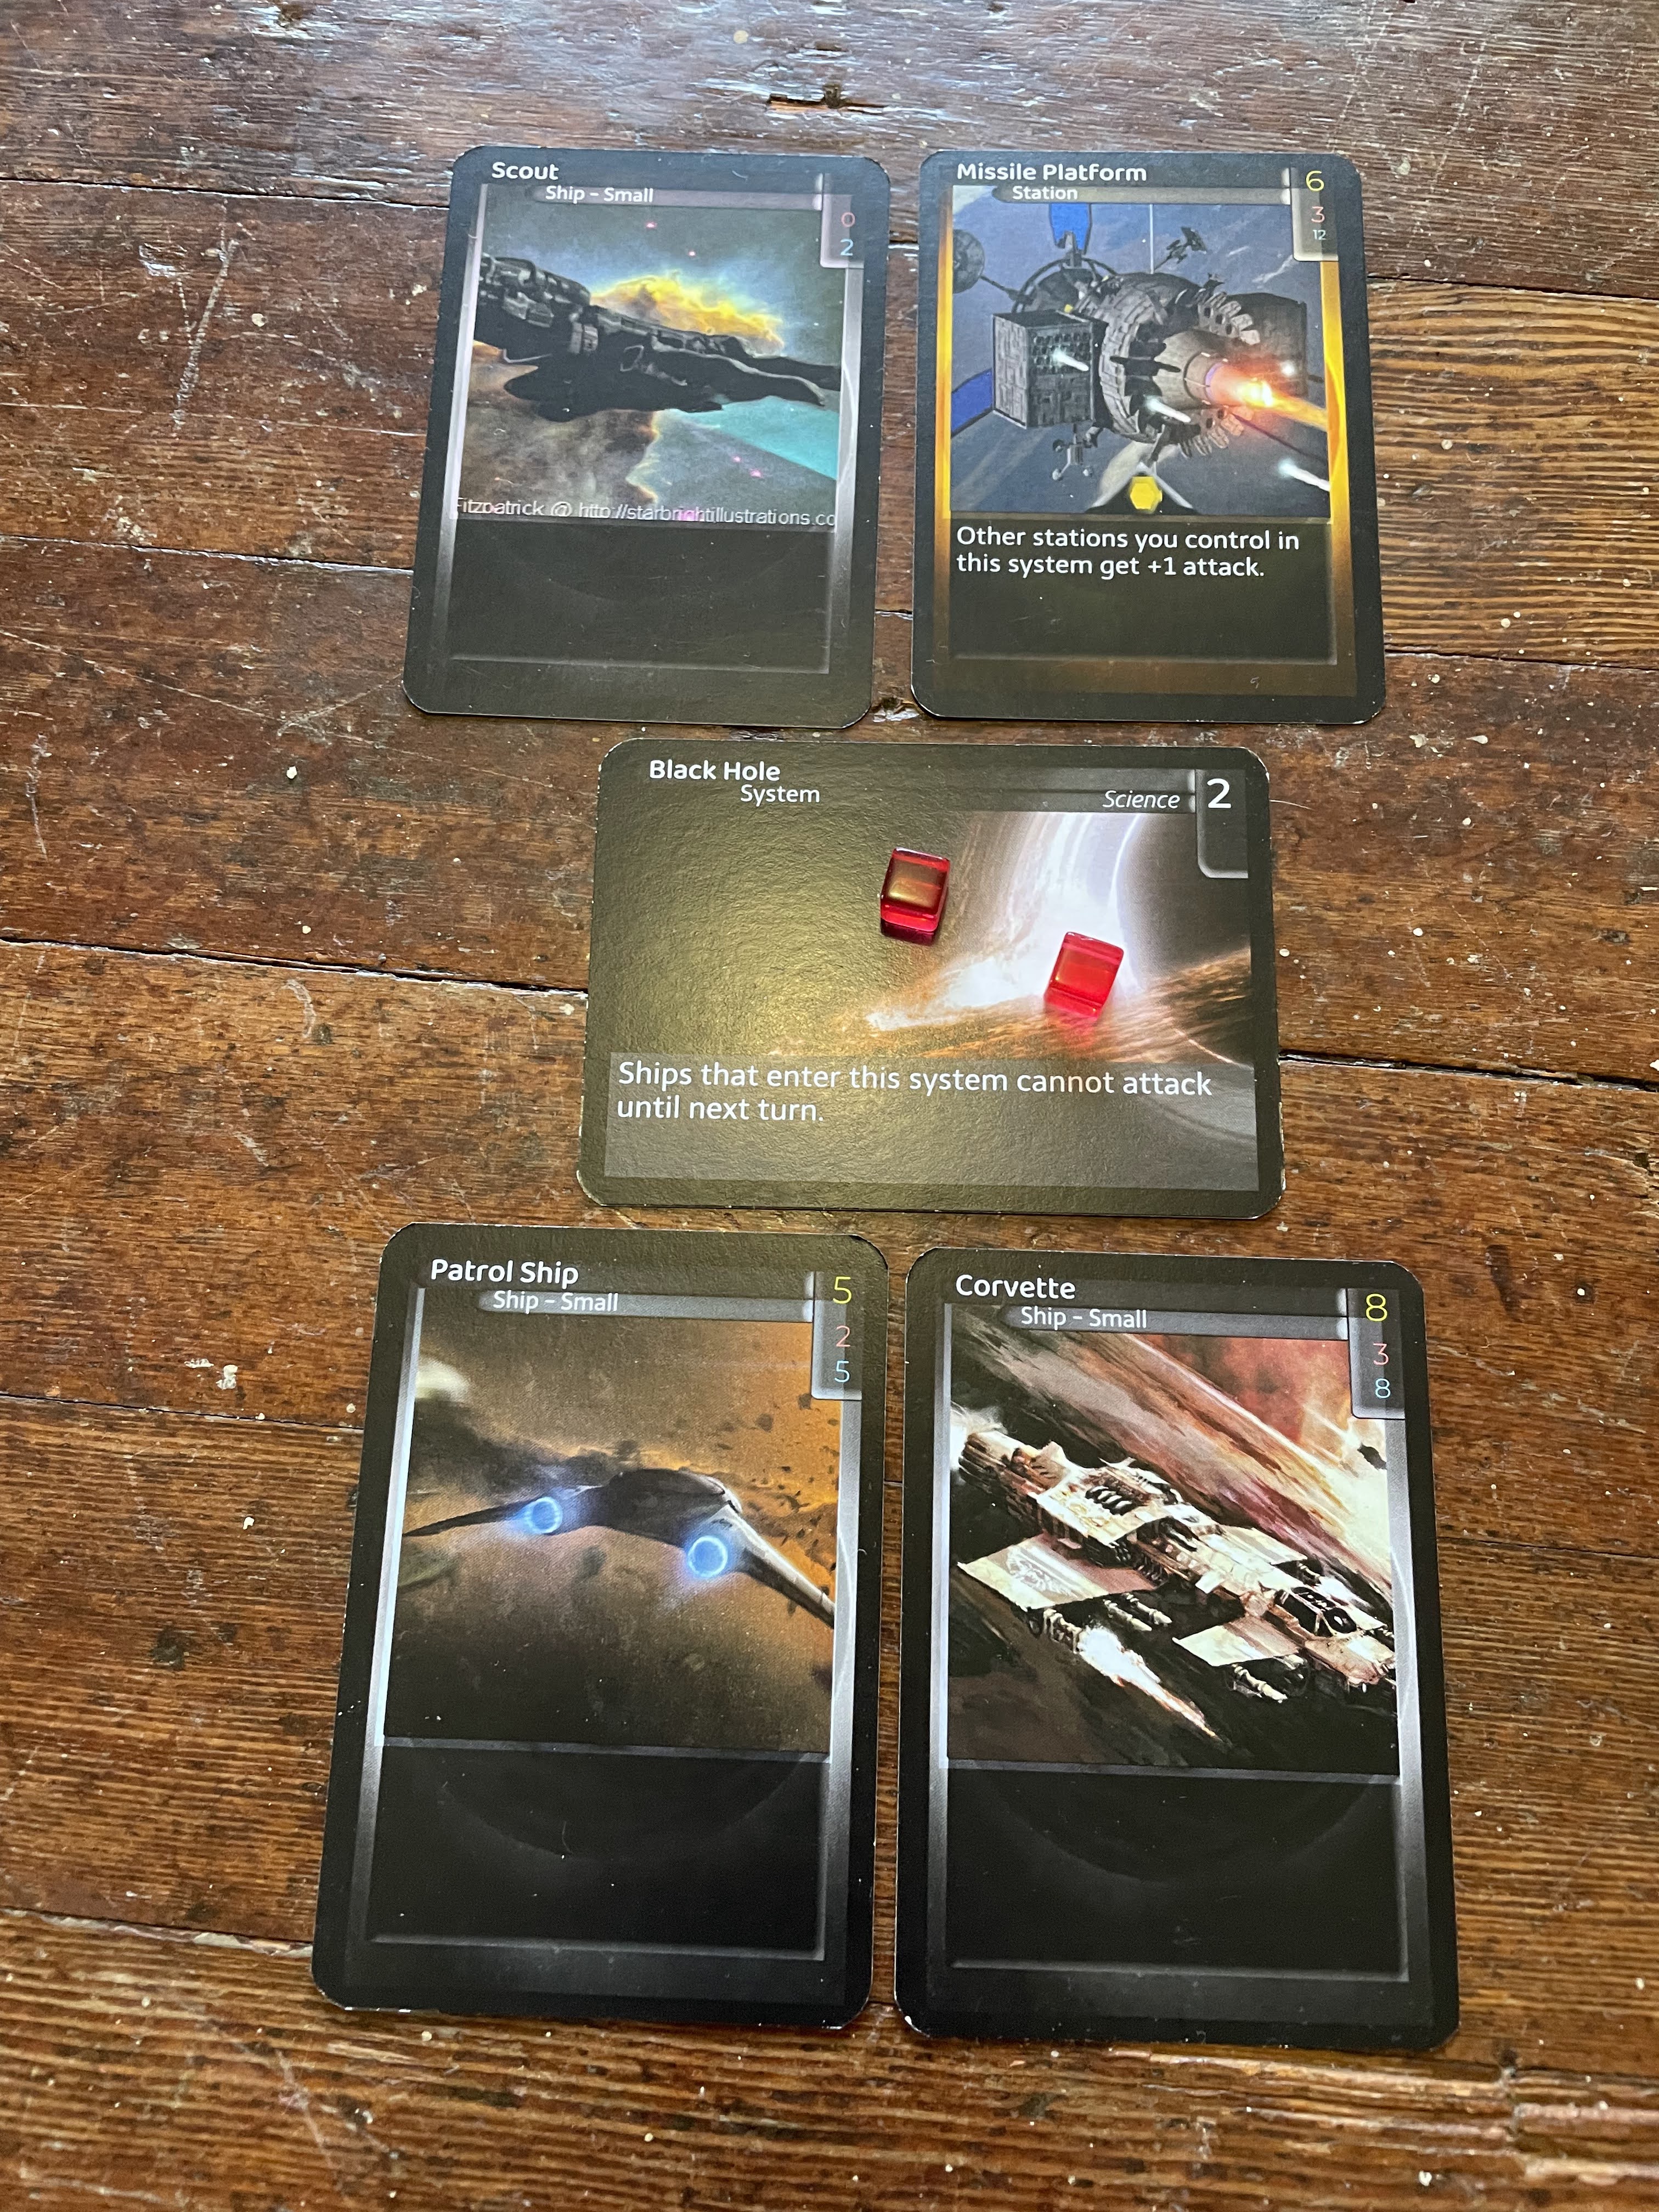
The yellow player has launched an attack! A Patrol Ship and Corvette are attacking a Scout and Missile Platform.
Playing Commands
Commands can be played during combat to enhance your own ships (or harm your opponents'). Whenever a command is played, the other player has a chance to respond, either with an ability or another Command card. For example, if the yellow player players Maximum Firepower to increase the attack of their ships, the red player can play Intercept Orders in response, and prevent it from having any effect.
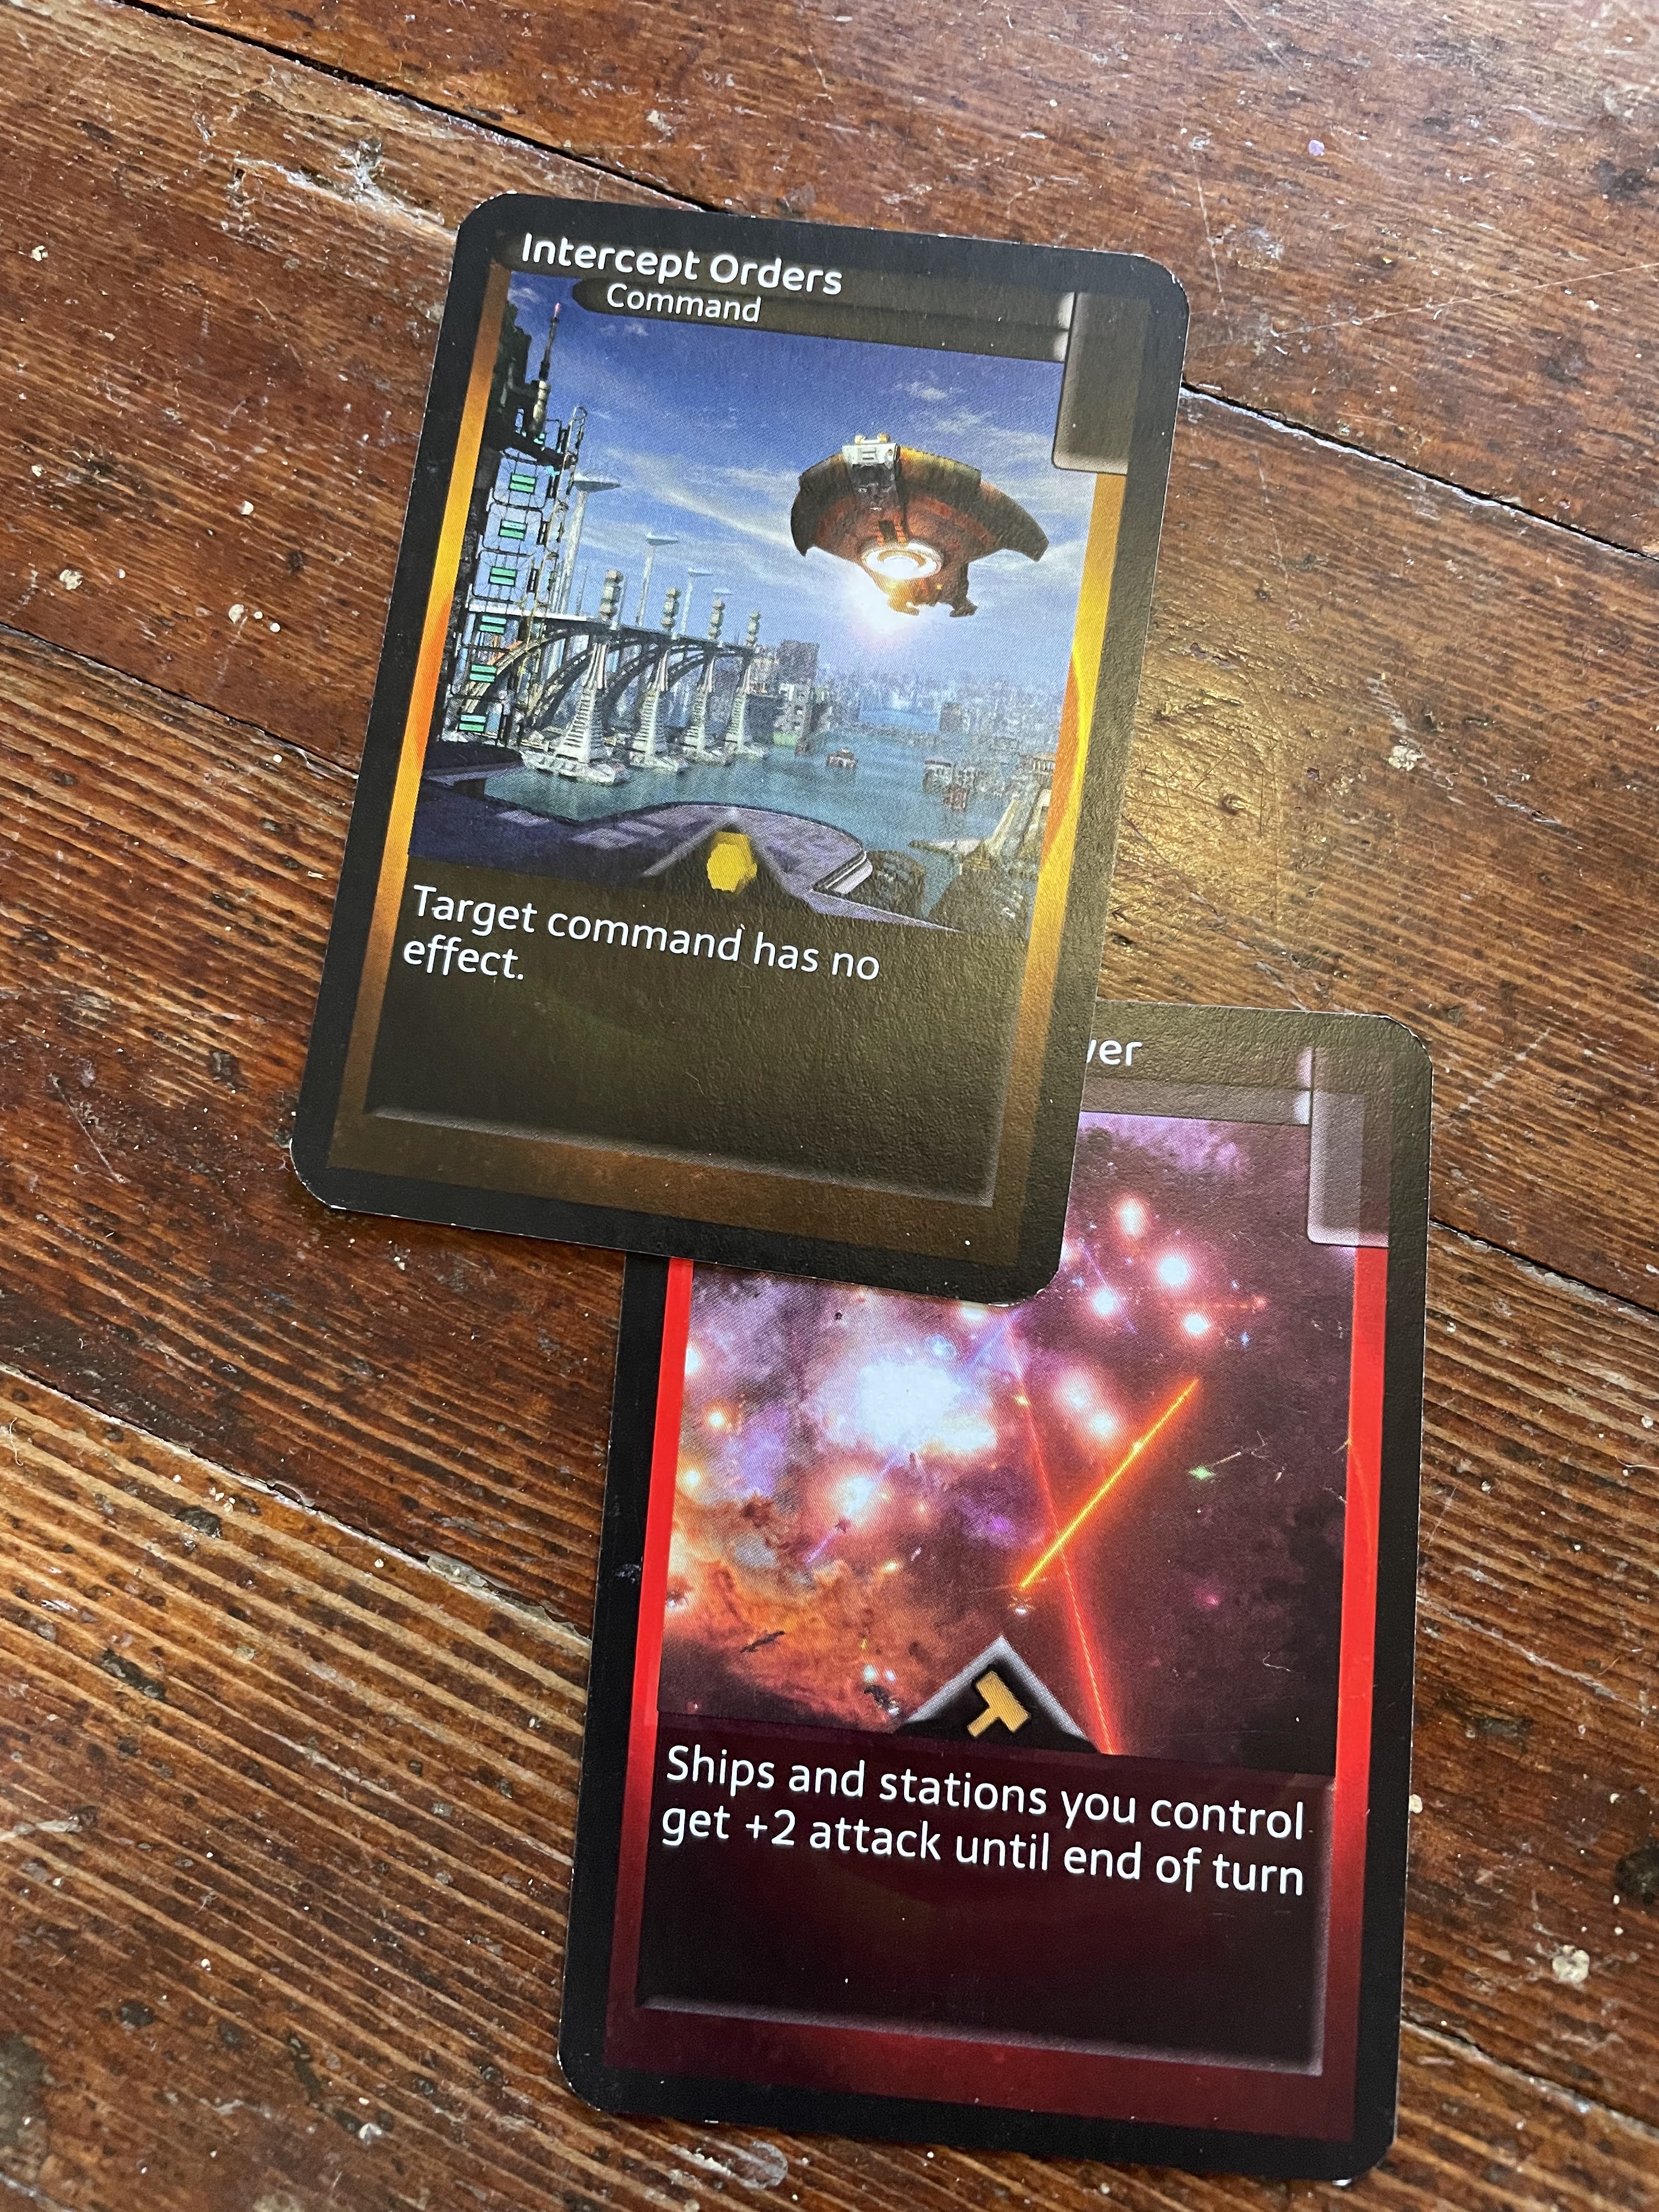
Intercept Orders prevents Maximum Firepower from having any effect.
Assigning Damage
Each ship or station with an attack value greater than 0 assigns its damage to a target. Then, with damage assigned, players may take actions (such as commands). For example, if a ship is going to be destroyed, its controller could choose to use Ram in response, sacrificing the ship for maximum effect.
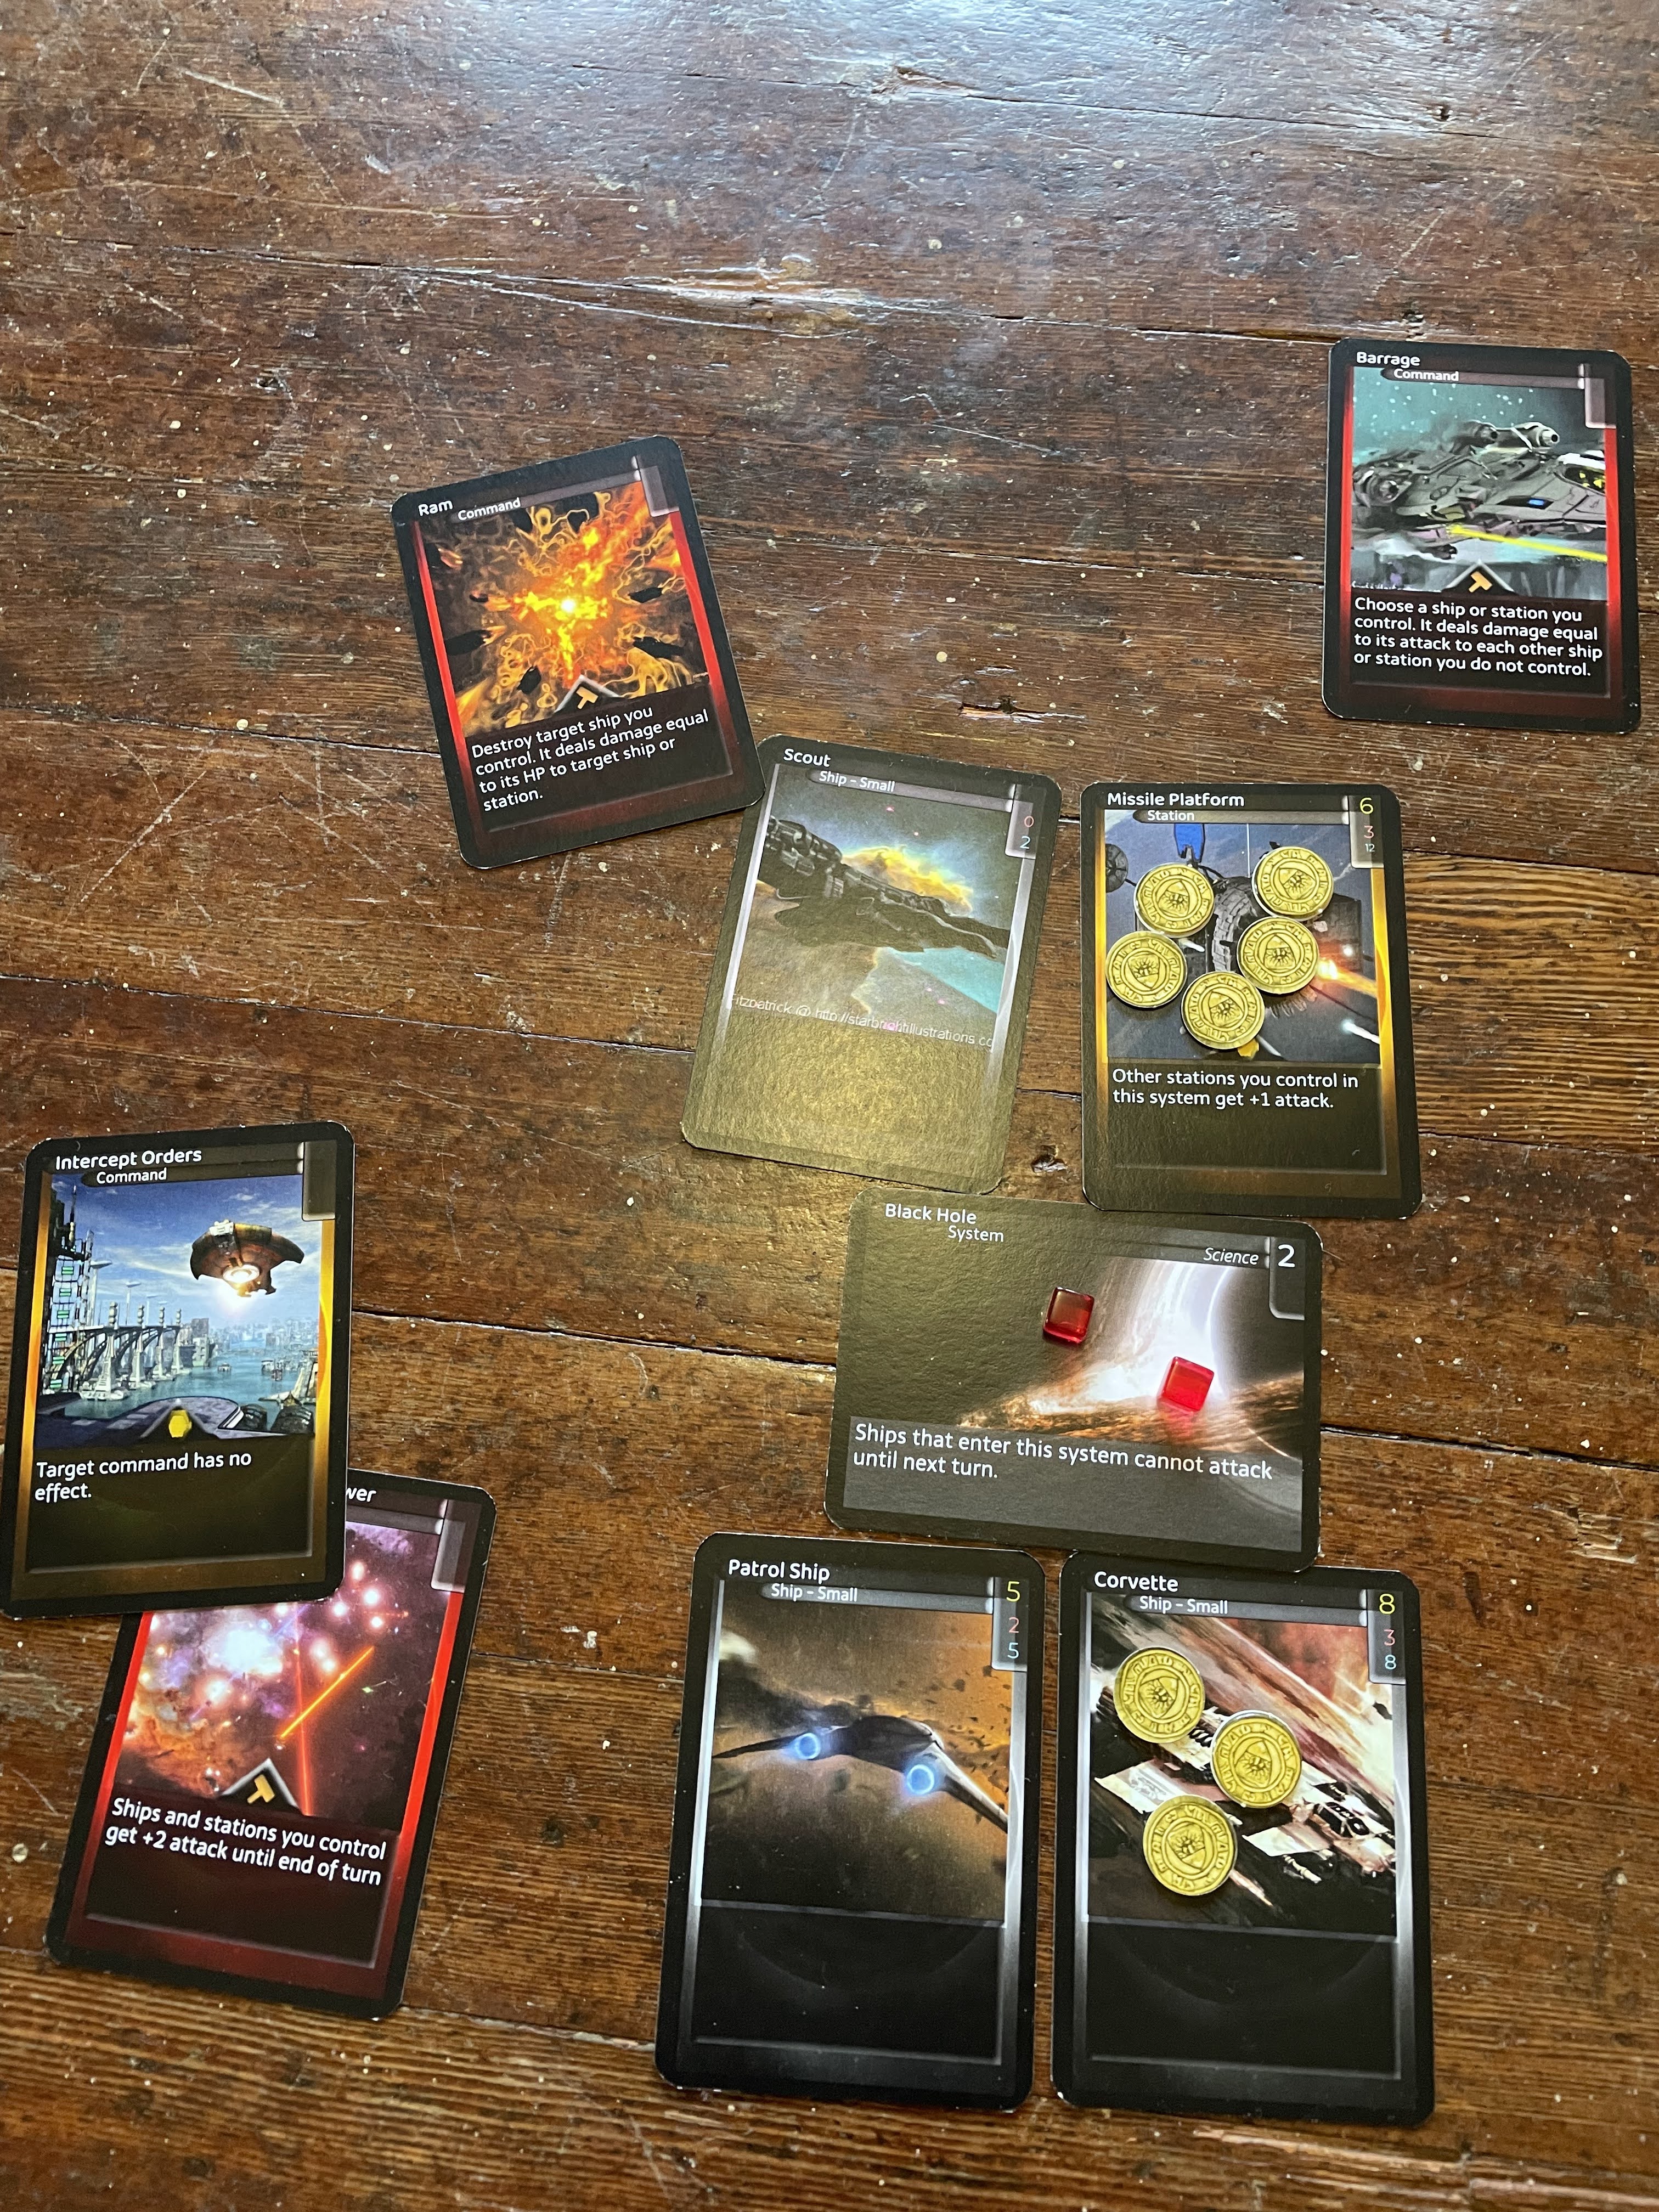
The red player is using Ram to sacrifice their Scout in order to deal extra damage to the Corvette, and Barrage to finish it off!
Once damage has been assigned, and all responses have been resolved, damage is applied and any destroyed ships are removed from play. All commands are discarded after their effect takes place.
Once damage is applied, the destroyed ships are removed, and the commands are discarded.
Conquering a System
When no enemy ships remain in a system, and you have ships (not fighters) equal to or greater than the number of developments in that system, you take control of it (referred to as conquering a system). When you conquer a system, remove all of the other player's development counters, and place one of your own. Conquering a system resets its development level to 1.

The red player has conquered the Asteroid Field system with two [Patrol Ships](https://www.starcomgame.com/card-database?selectedCard=Patrol_Ship!
Fighters
Fighters are a special kind of ship. Smaller than Patrol Ships or Scouts, fighters rely on hangars to station and refuel. Also, fighters are unable to jump between systems themselves. The simplest (but most expensive) way to move fighters around is with a Carrier.
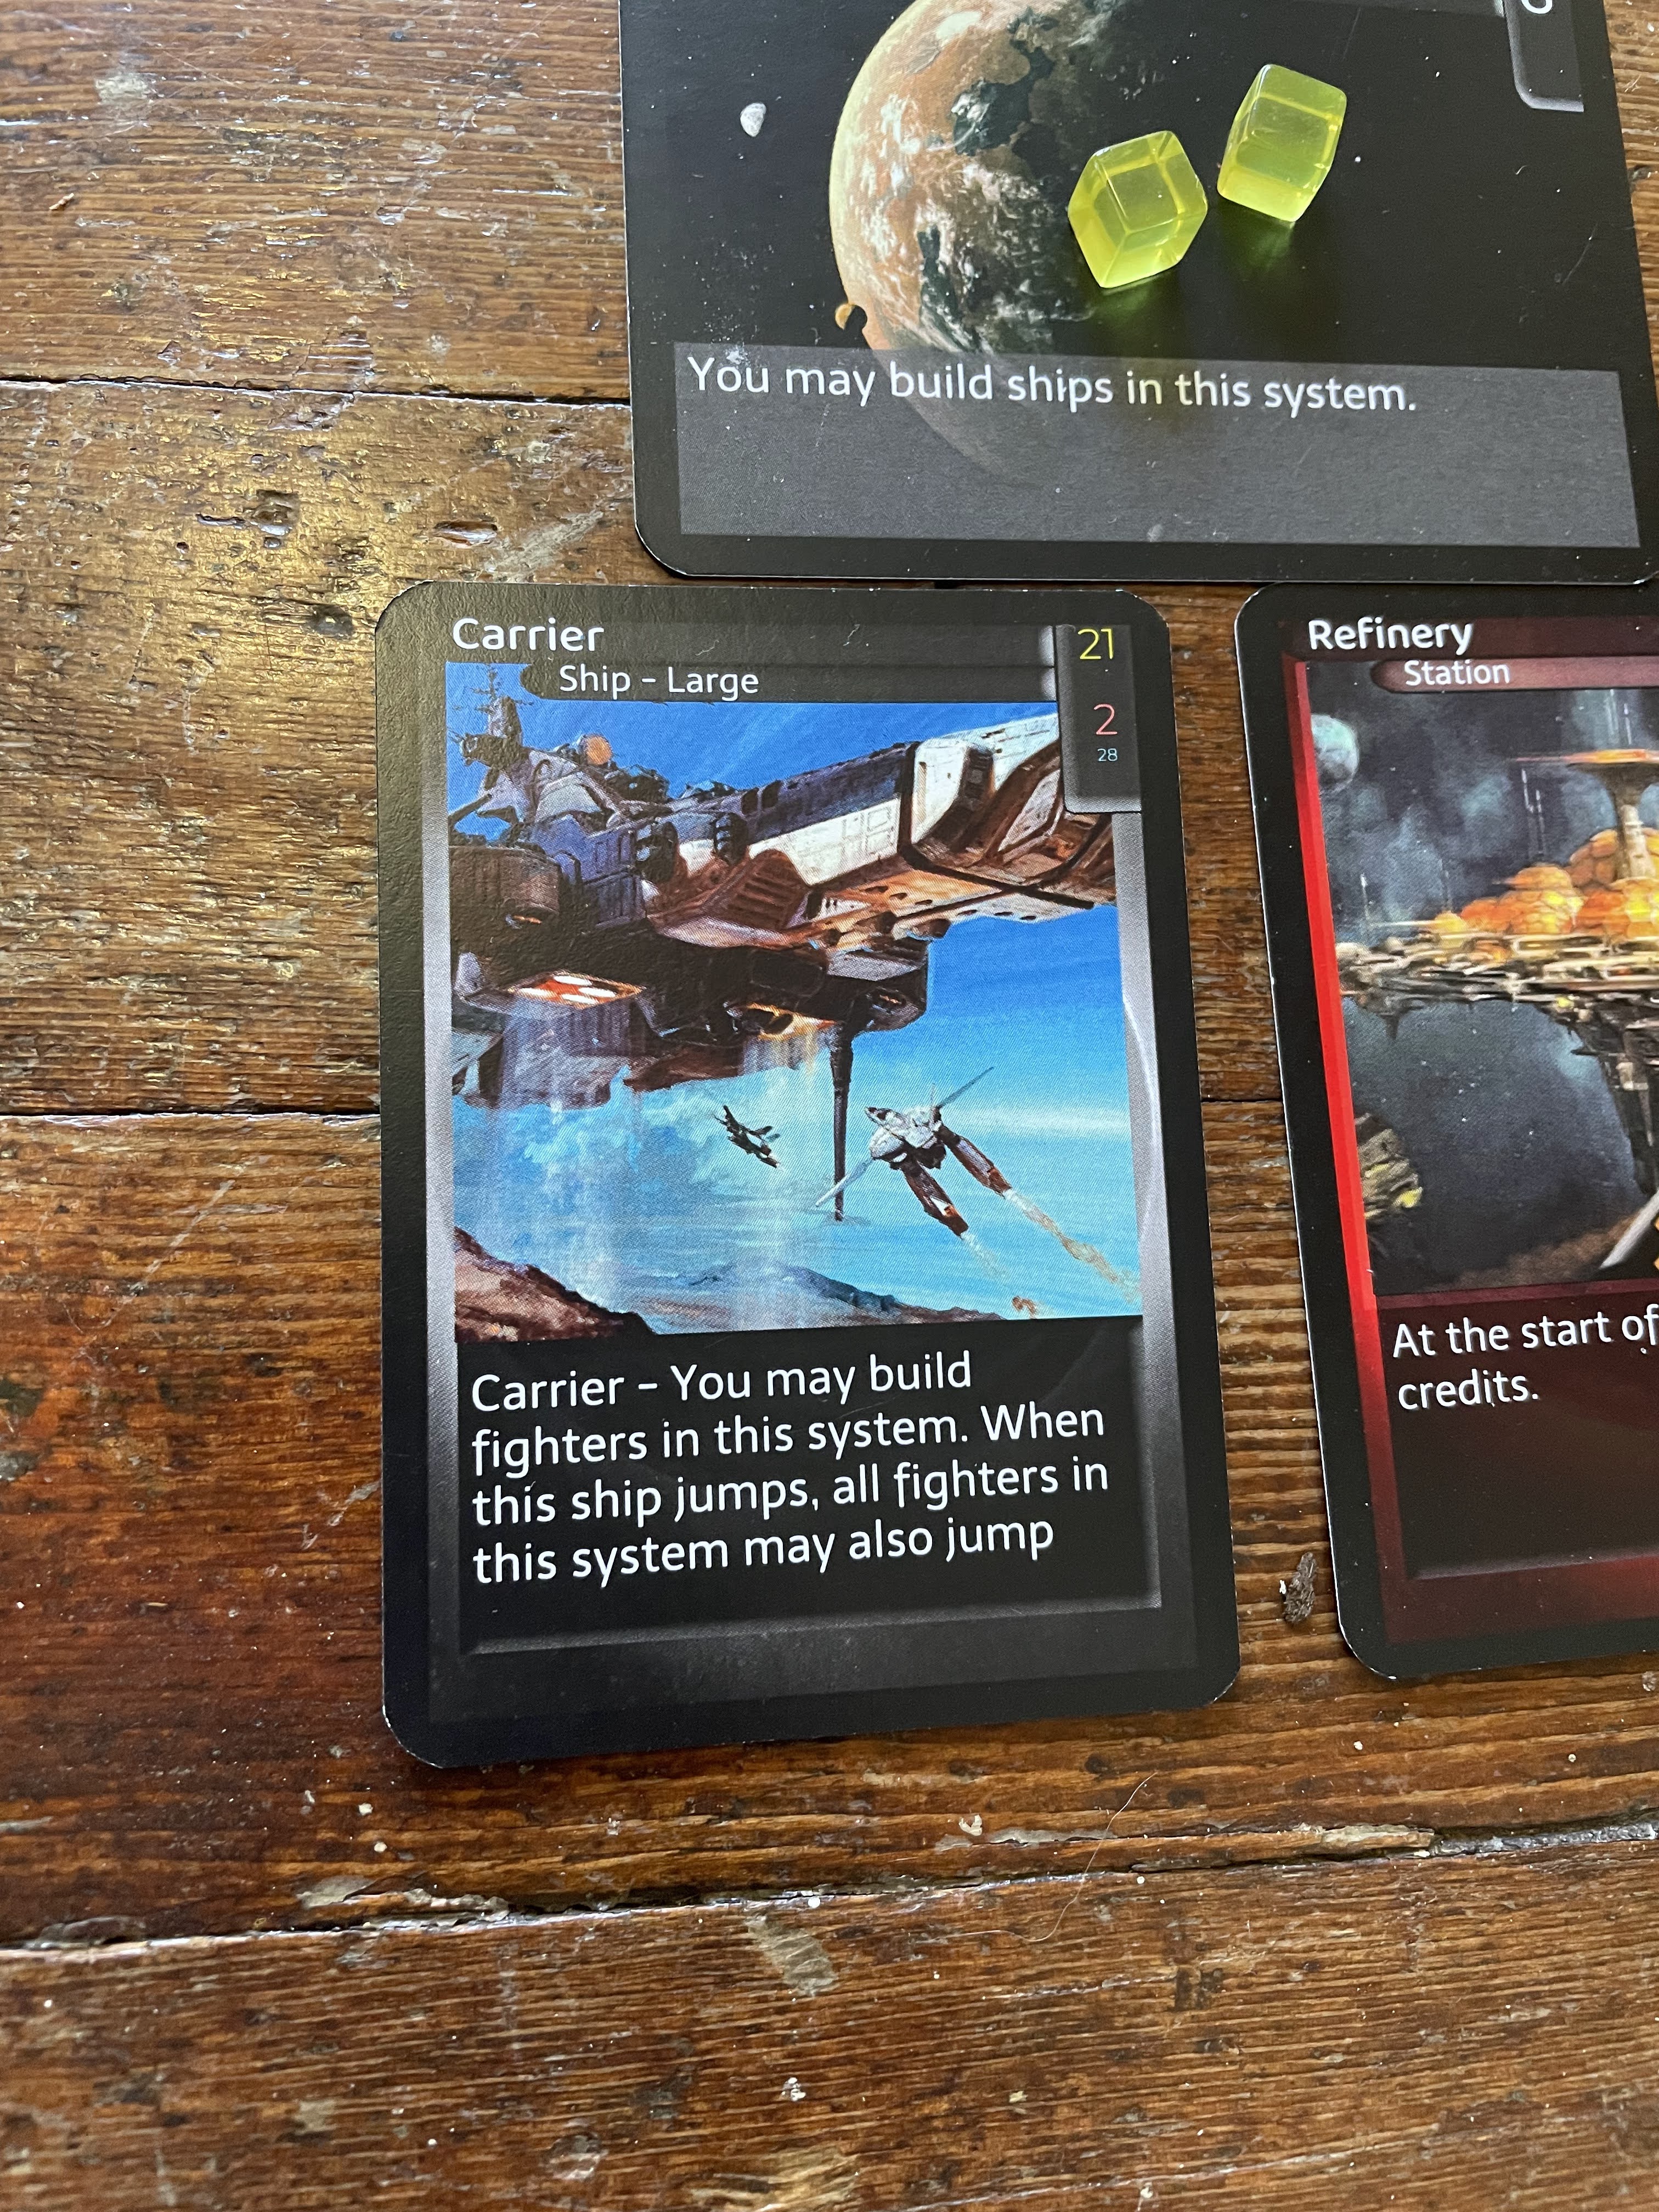
The yellow player has constructed a Carrier!
Fighters also cannot be built unless you have the Fighter Bays technology or a Carrier. Unlike other ships, fighters are built in the same location as the ship or station that is used to construct them.
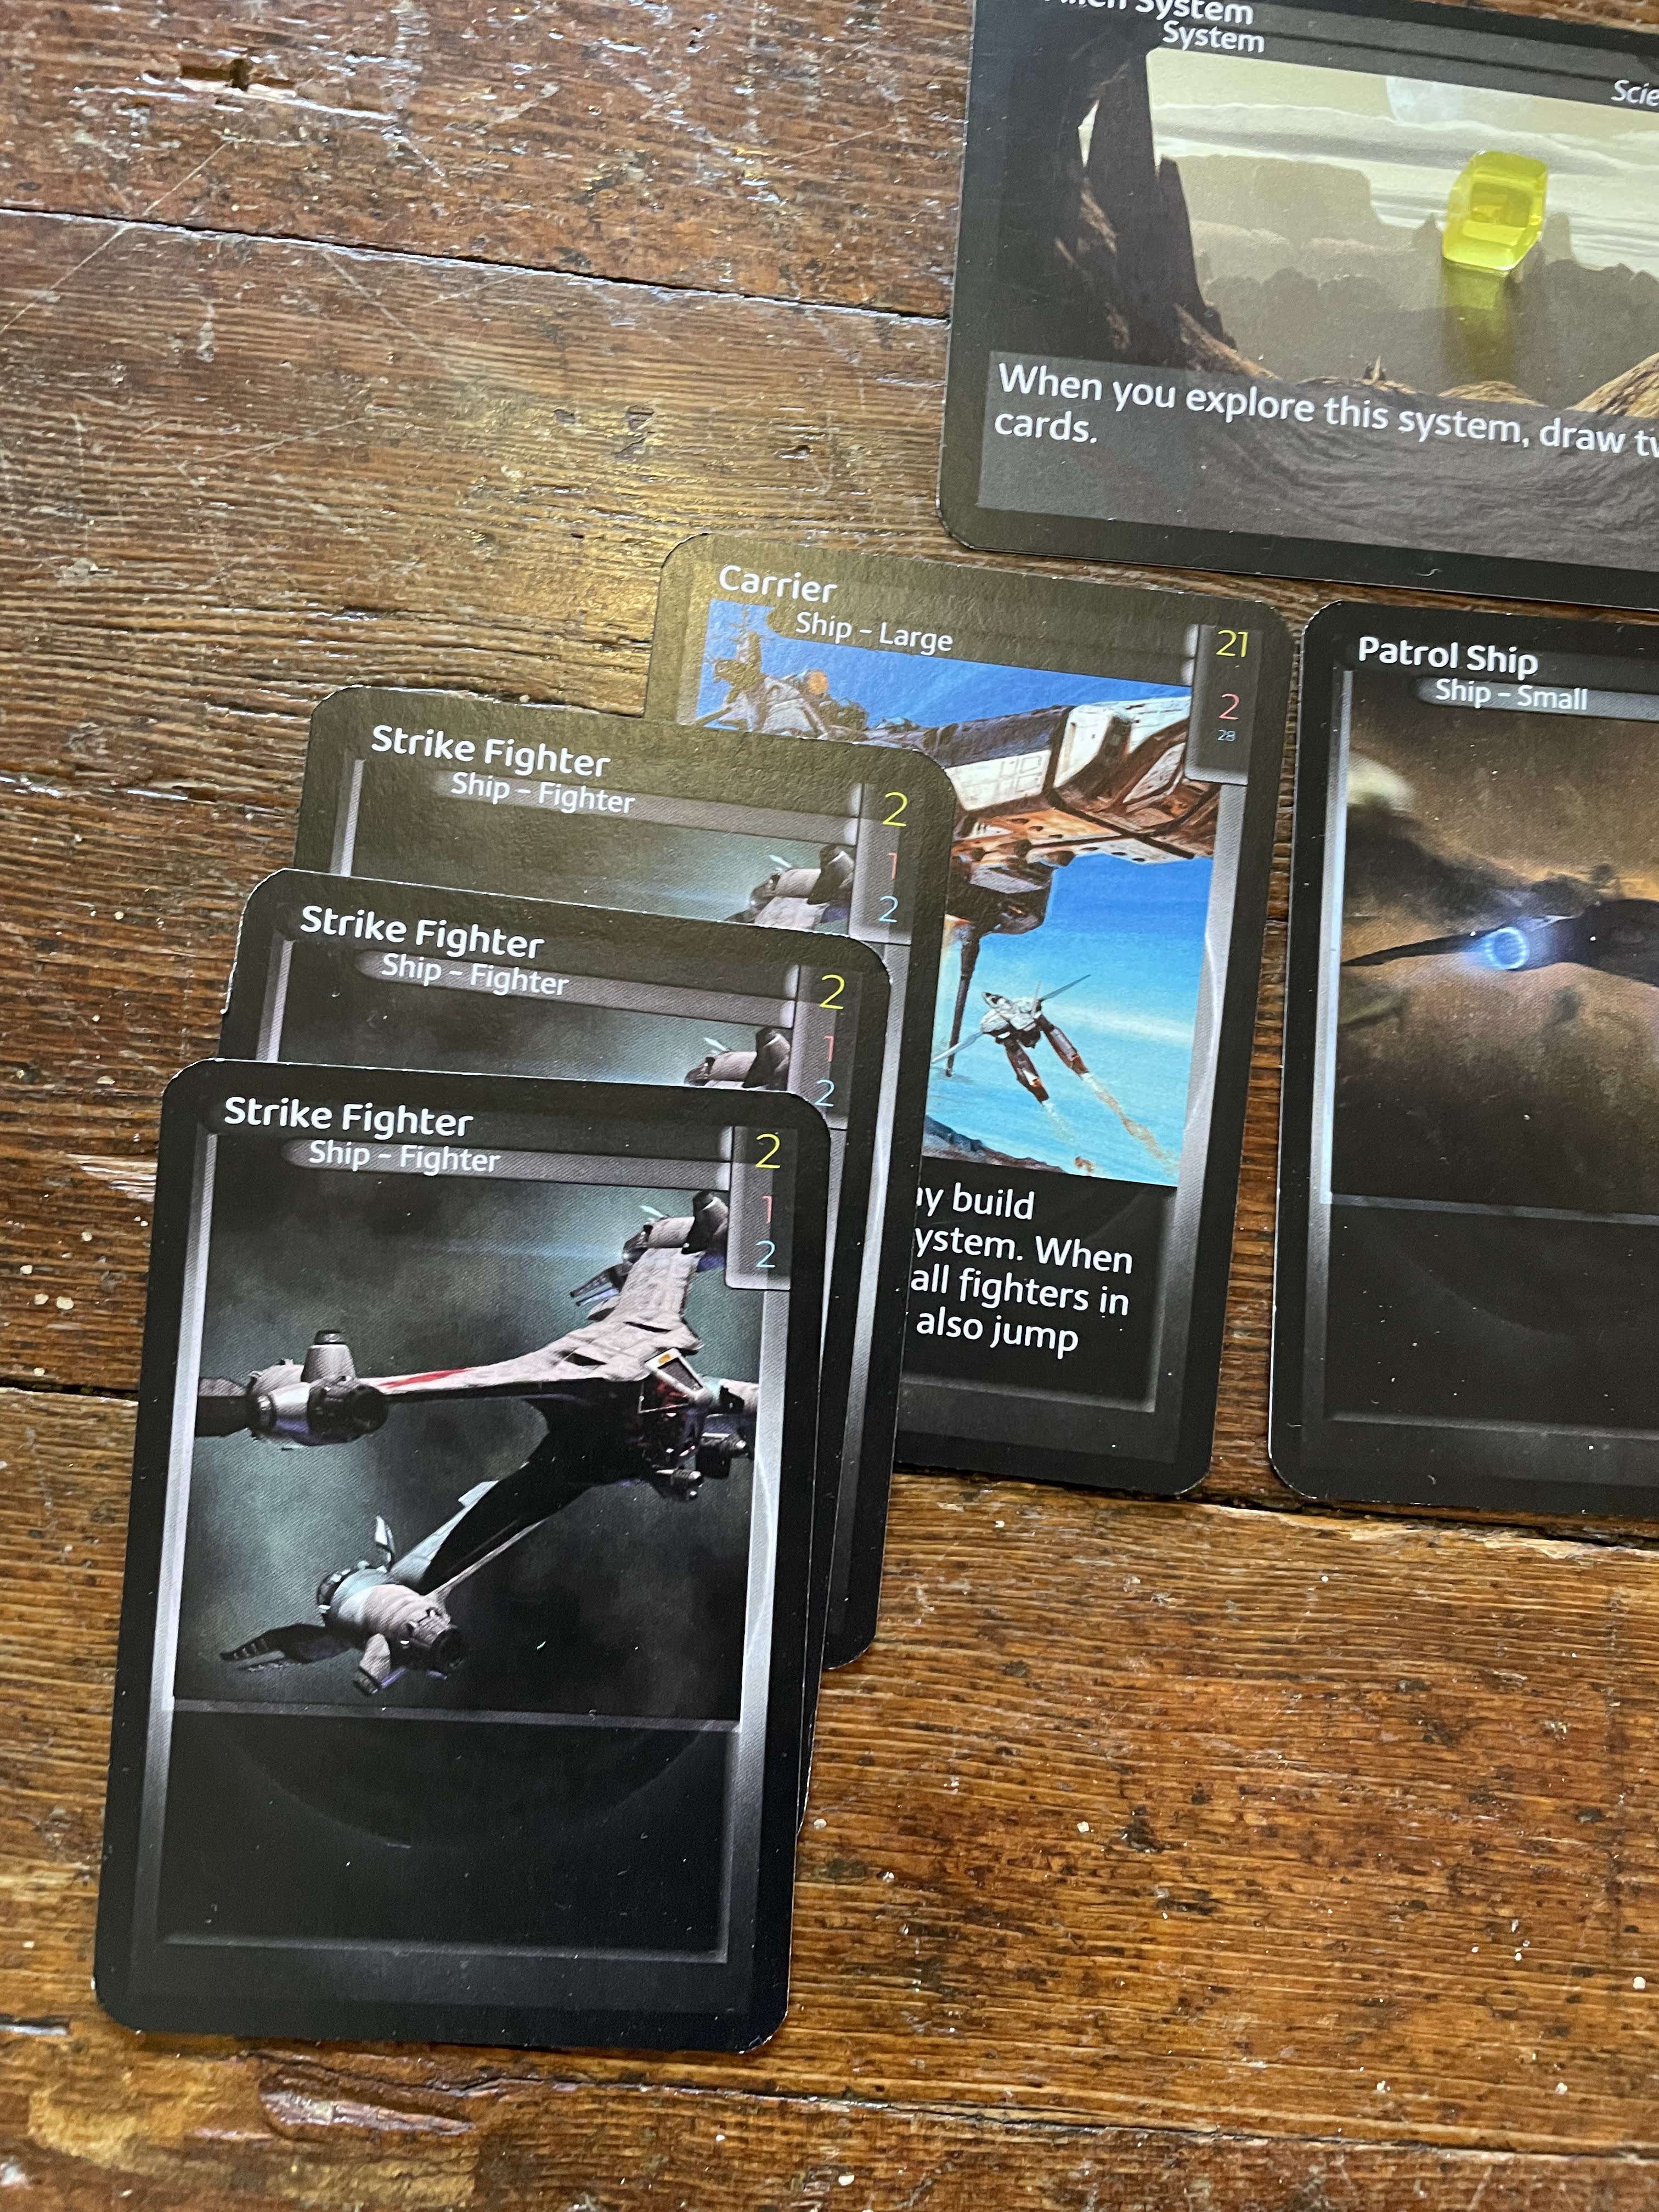
The Carrier is now supporting a handful of Strike Fighters.
Fighters are fairly cheap and weak, but with the proper technology and support they can become much more powerful. Also, while small, they can become powerful in numbers!
Into the Action
The game we've been following has progressed well for the red player. While the yellow palyer had some initial successes (and found two Trade Worlds, providing a massive credit boost in the early game), the Science and Politics domains have been very useful for the red player to hold them back. A surprise attack (using the Enhanced Jump Drives) allowed them to seize a Trade World from the yellow player, which in turn funded the construction of defensive stations in their Research World.
The yellow player, seeing an opportunity to attack, has moved their Carrier (with five fighters) into the central system. Unfortunately for them, it's an Empty System, which means there aren't any planetary bodies upon which to build developments.
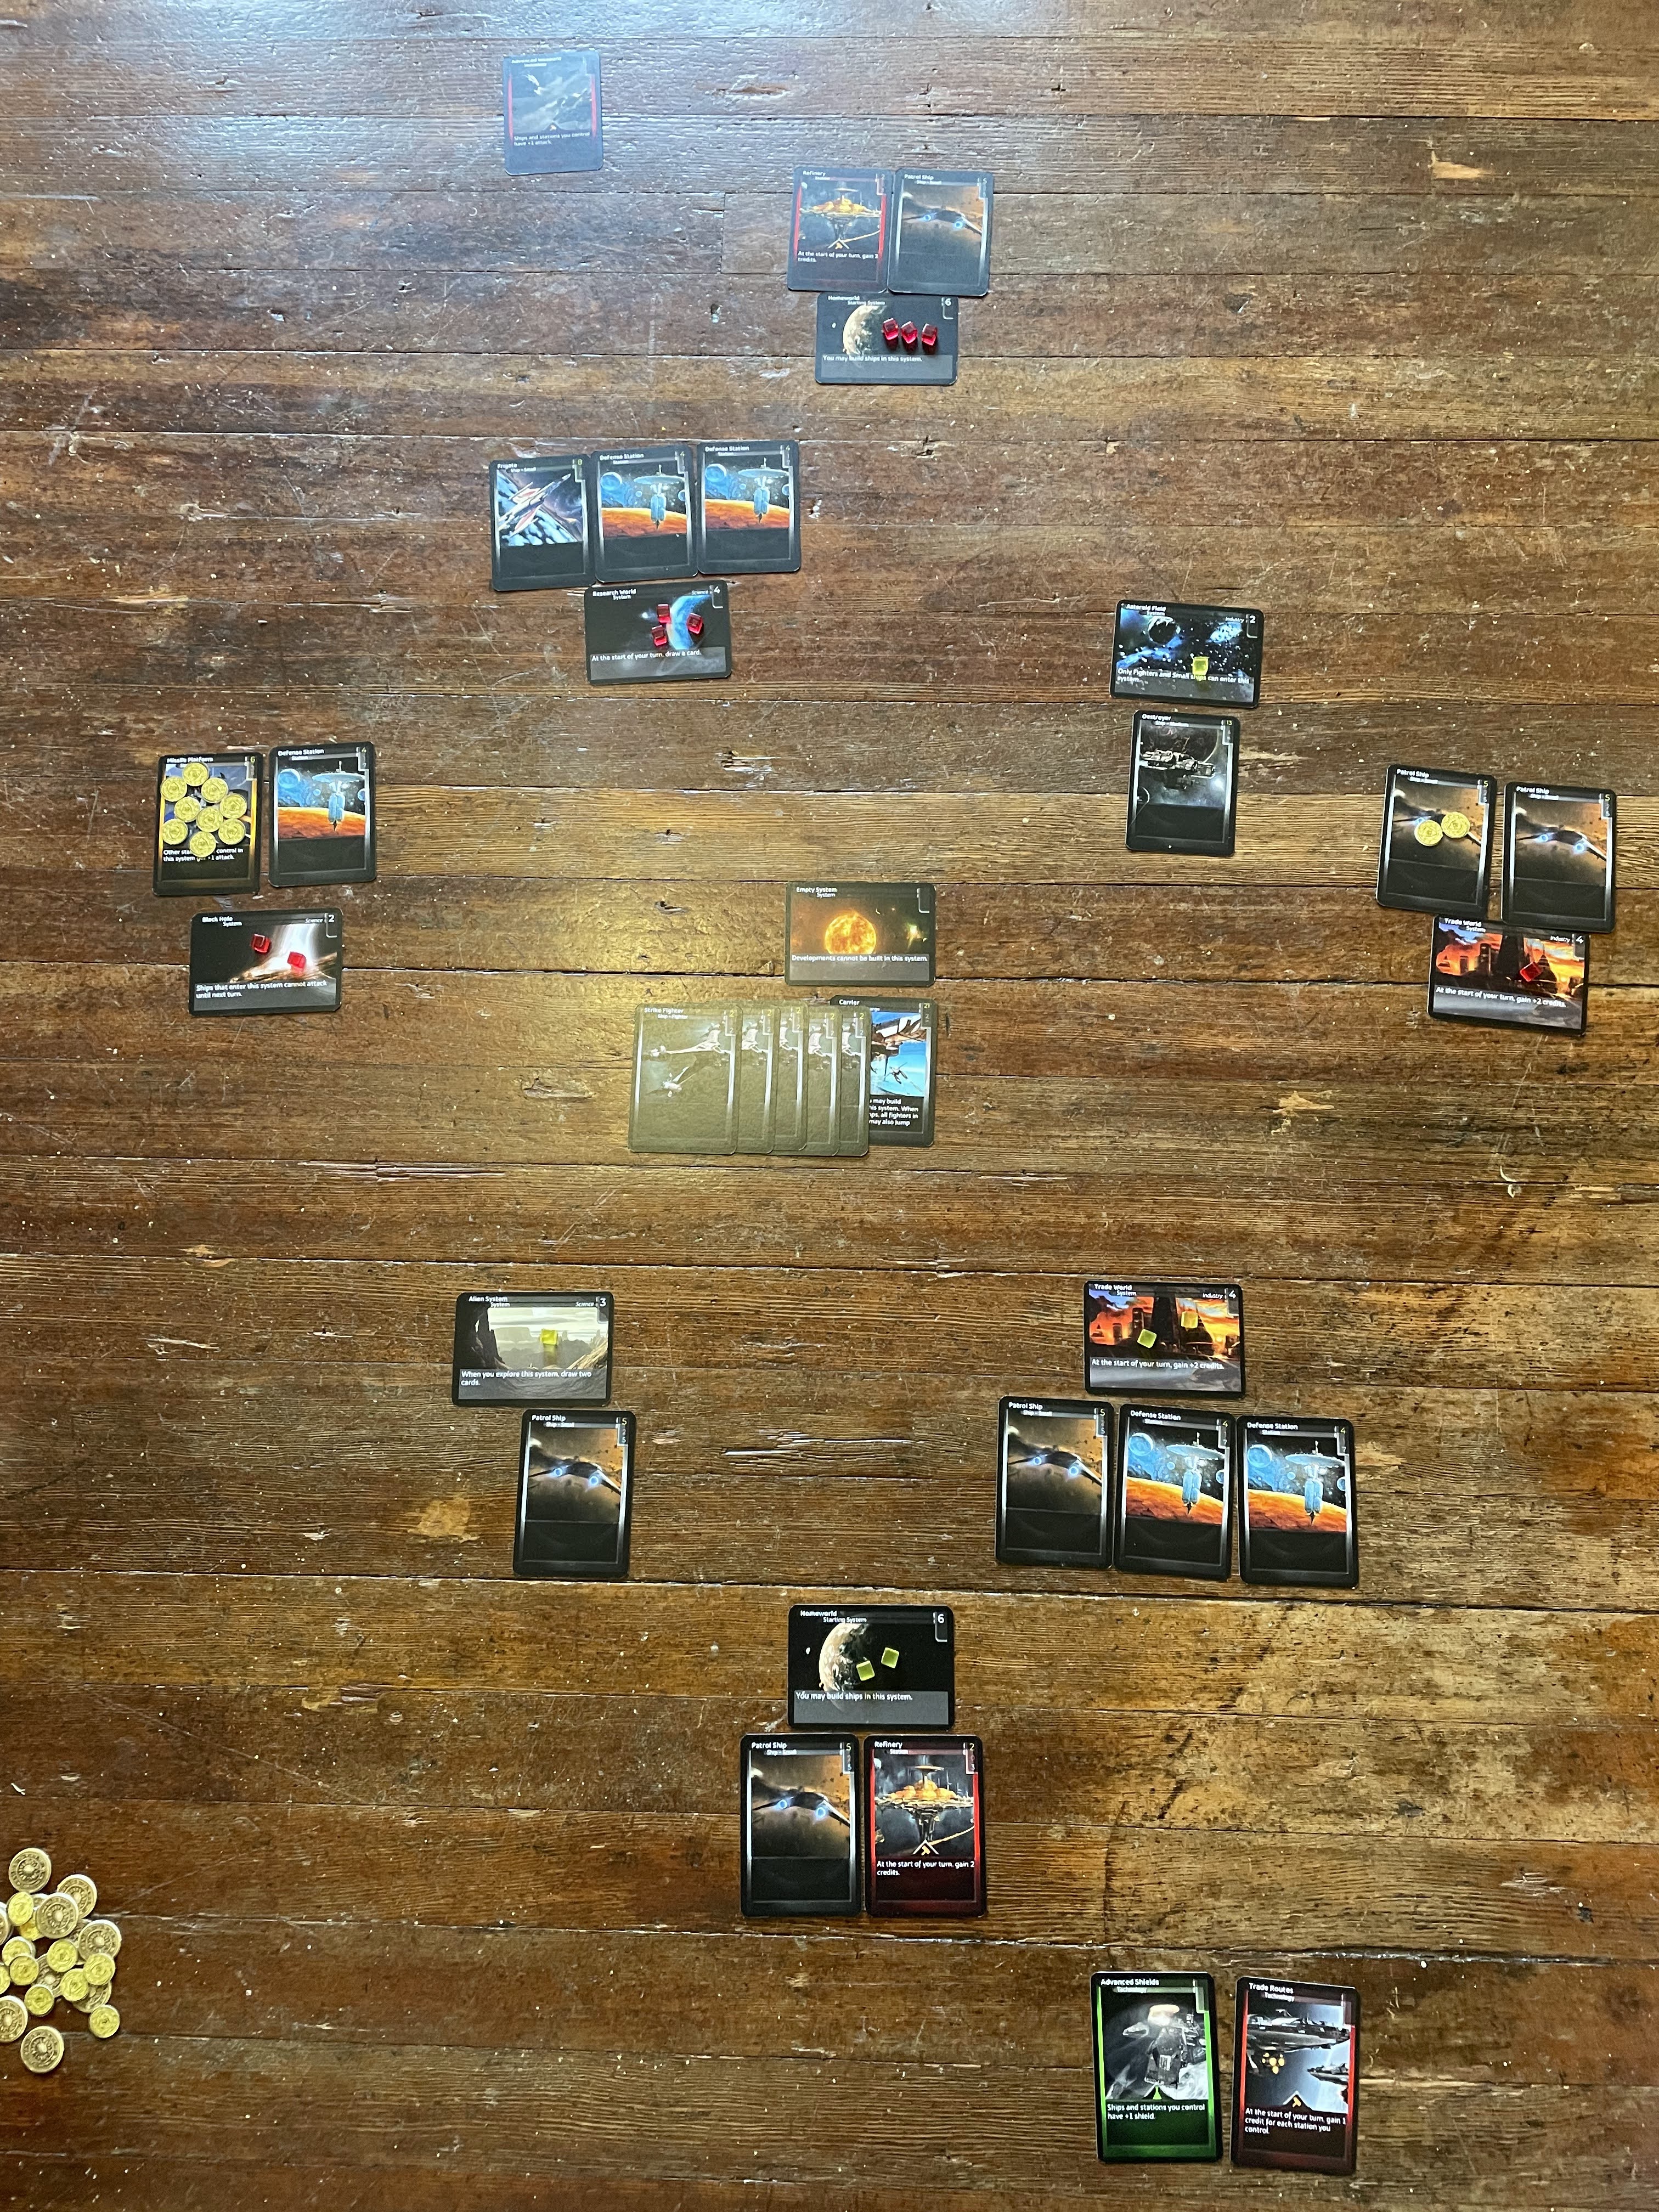
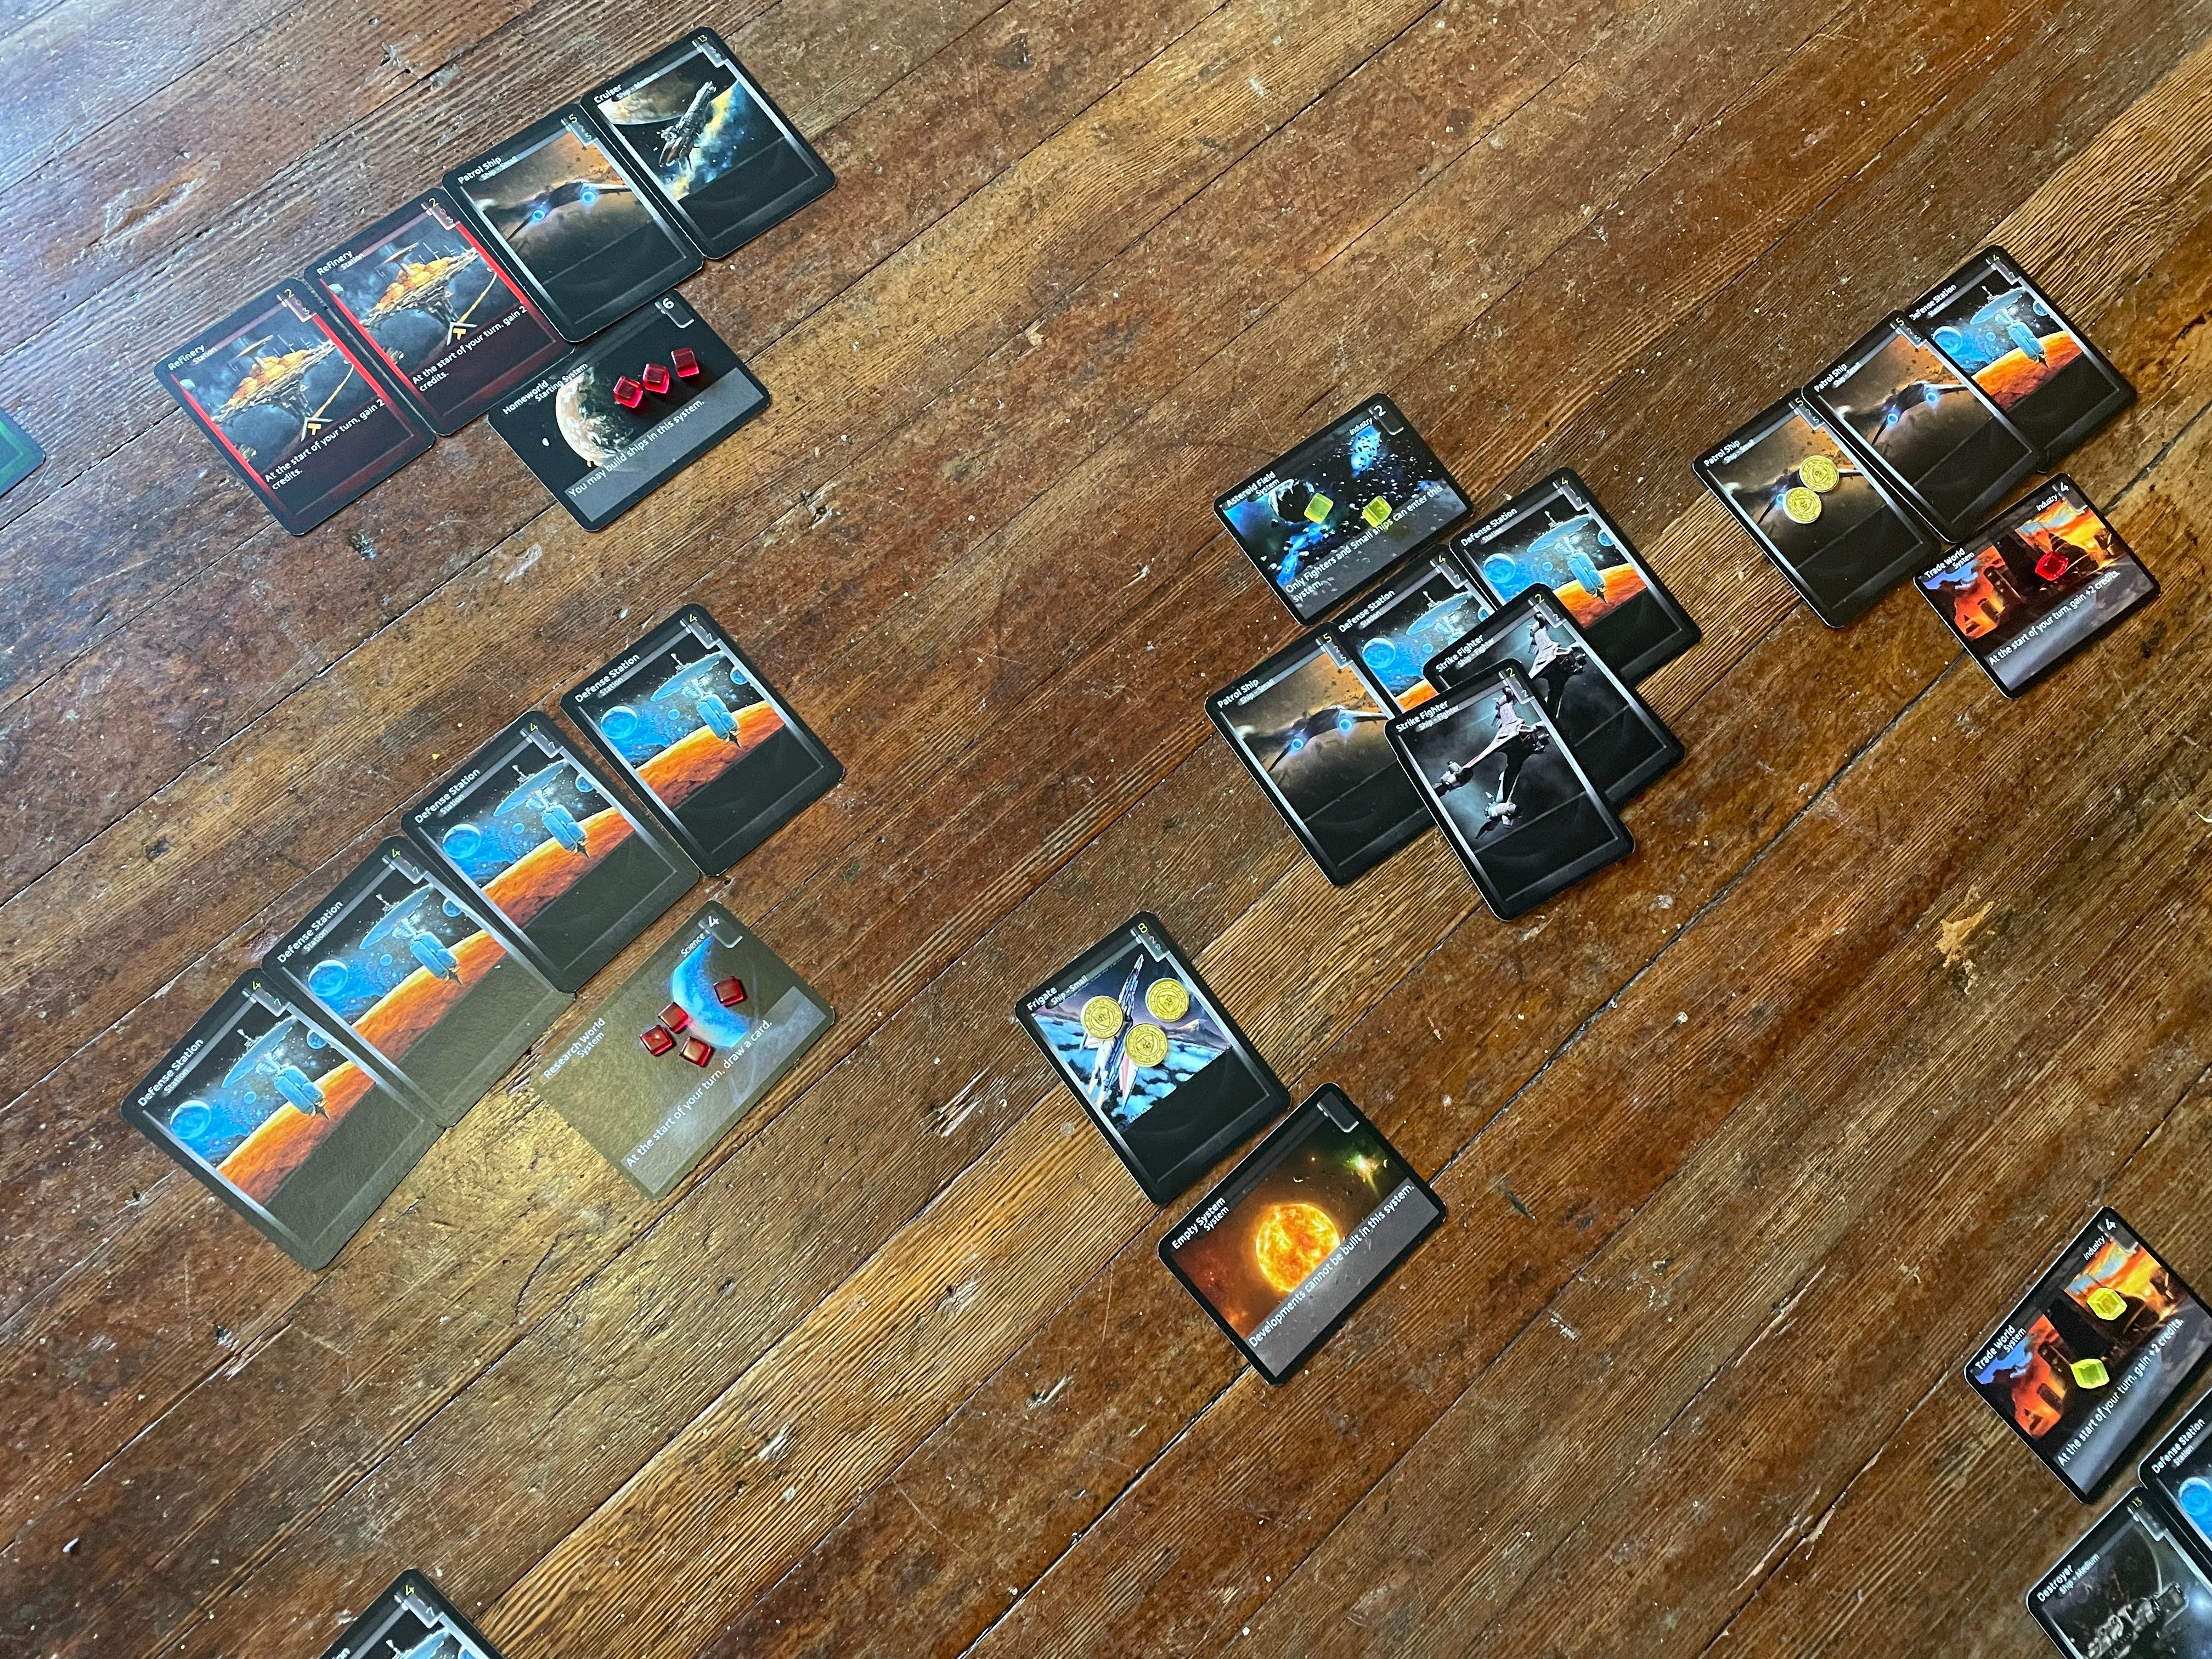
The game so far. The yellow and red players each control four systems. The red player has some defenses, but their fleet is spread out right now.
It is the red player's turn. They gain 13 credits (9 for developments, 2 for the Trade World's ability, and 2 for the Refinery in their home system), and draw a card. It's a Sabotage, which allows them to destroy a single ship in a system. After building a couple more Defense Stations, they decide to go on the offensive (fortune favors the bold!), and move their Frigate into the central system to face off against the Carrier.
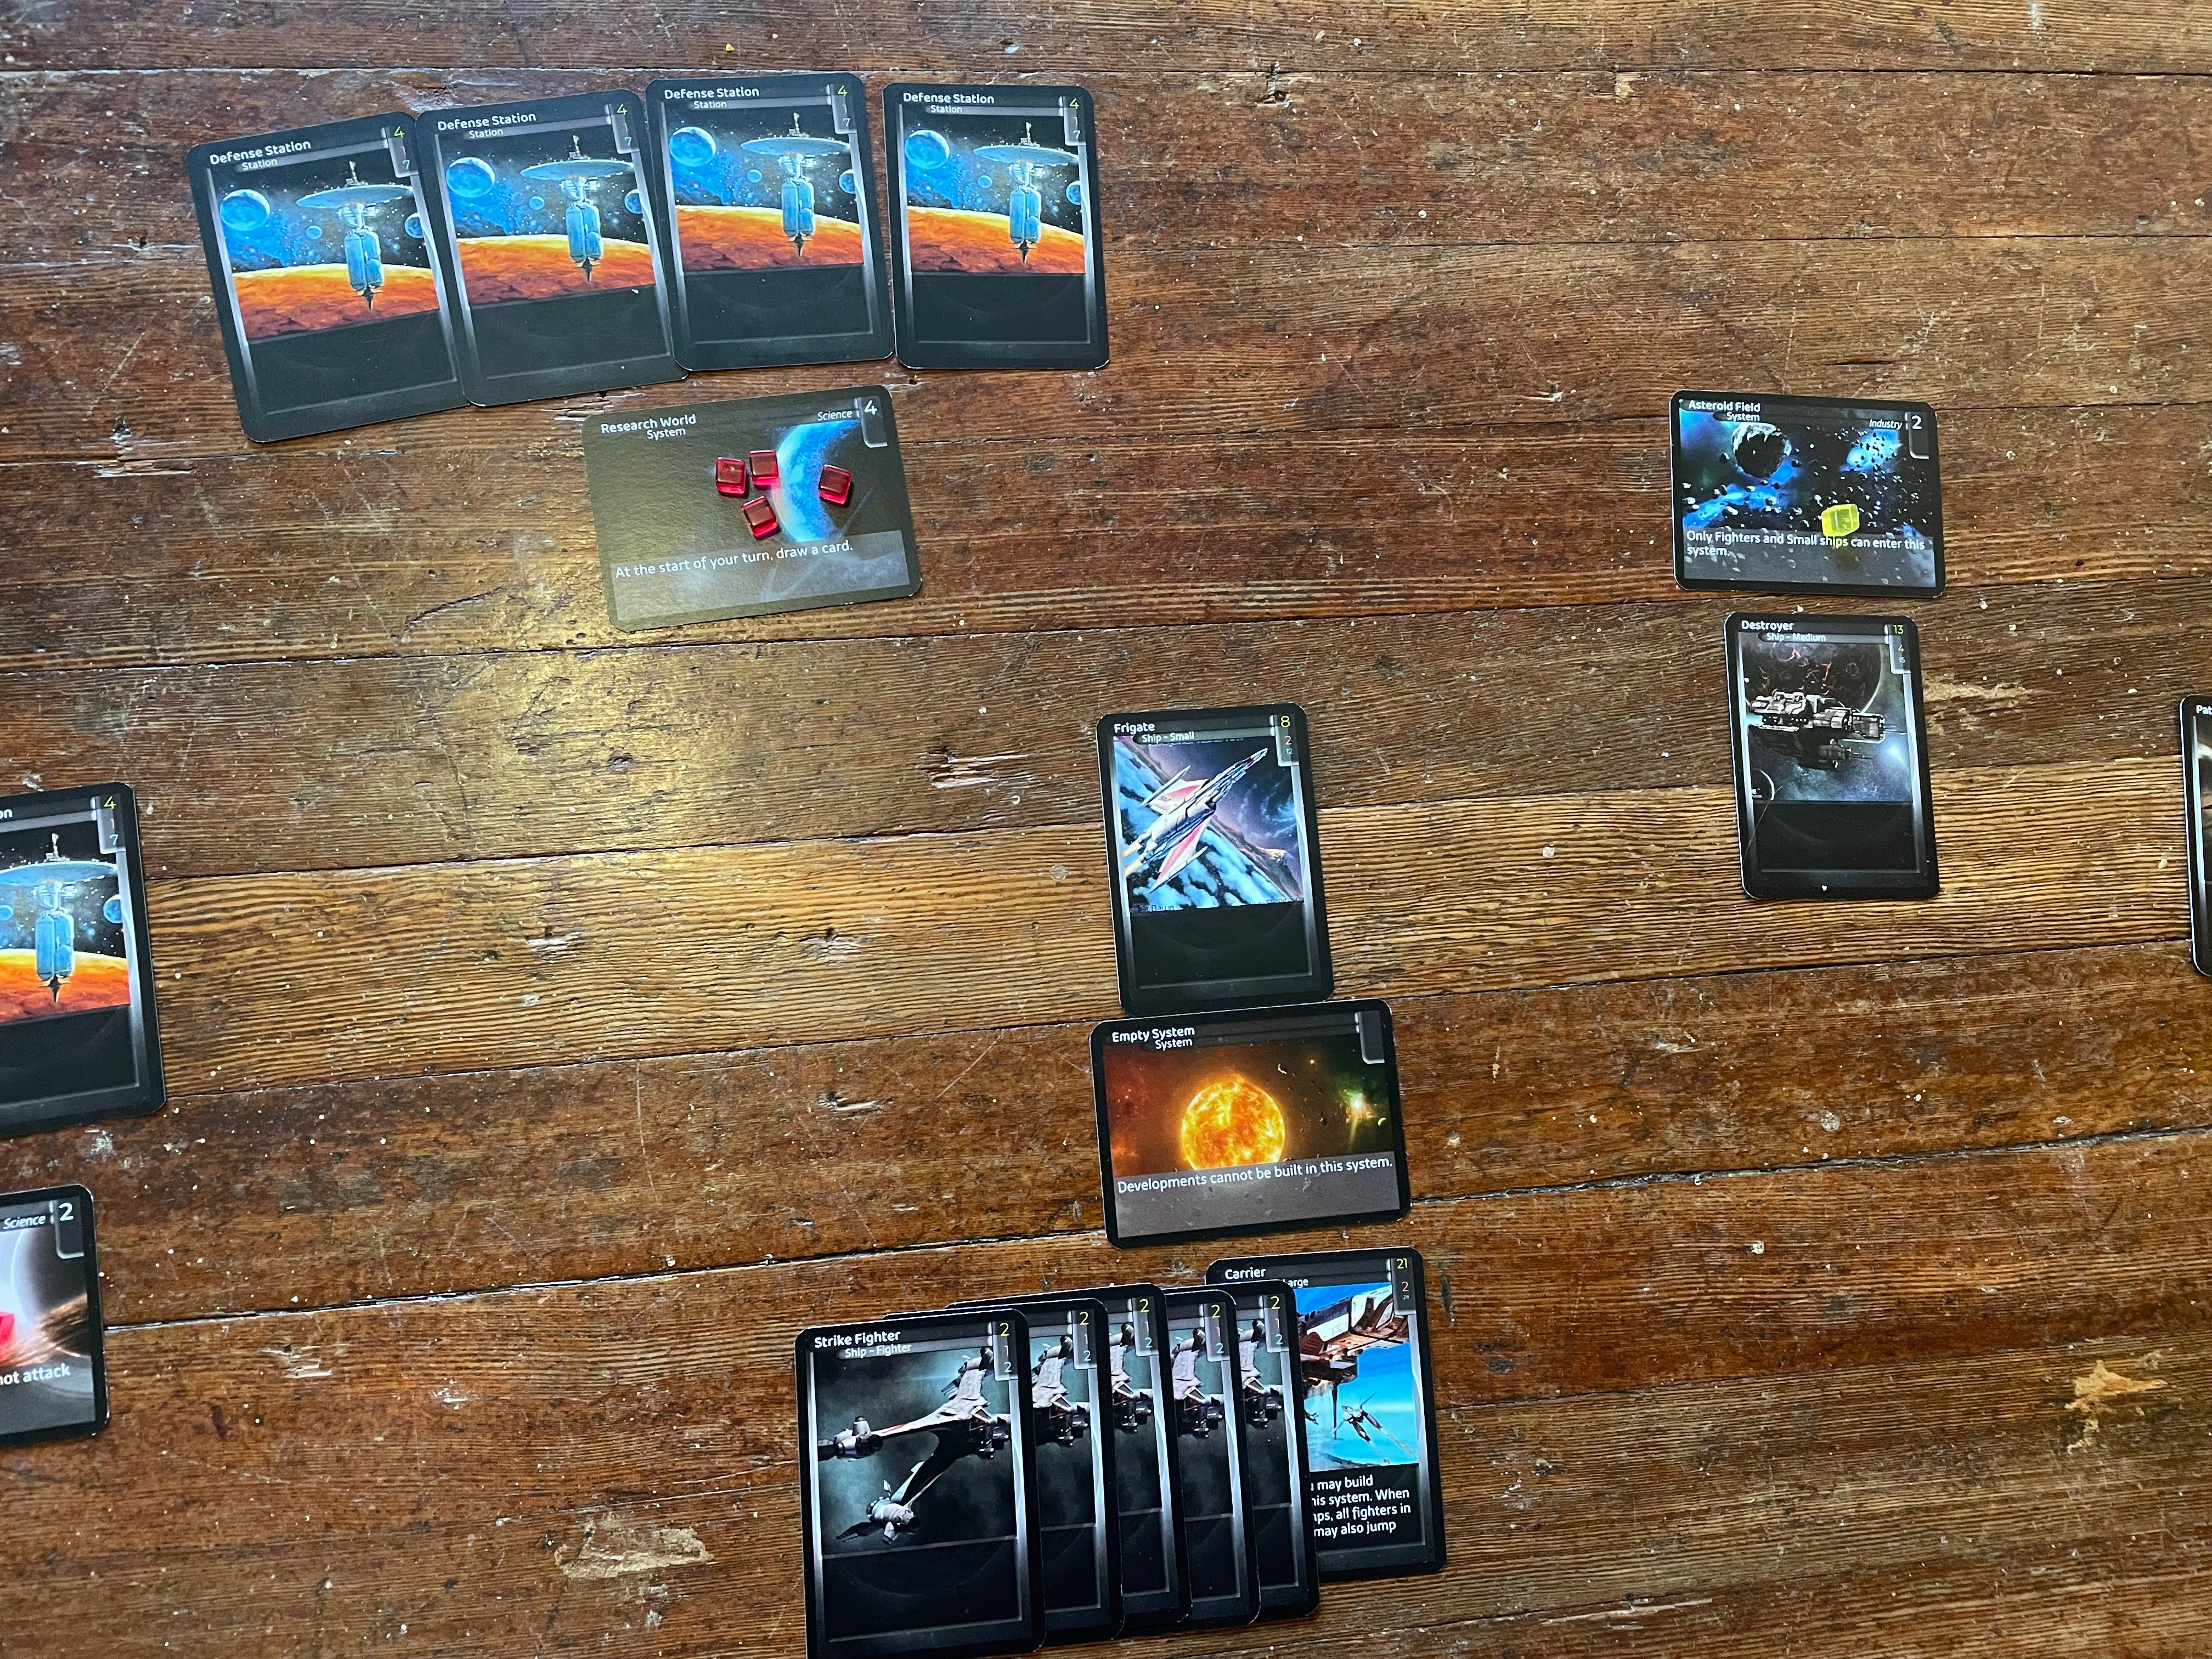
The red player's Frigate has moved into the central system to face down the Carrier and it's attack wing of fighters.
Surprise! The Sabotage works as expected, destroying the Carrier and preventing any further deployment of Strike Fighters. The Frigate now only has to deal with the fighters, which are unable to retreat since they cannot jump themselves.
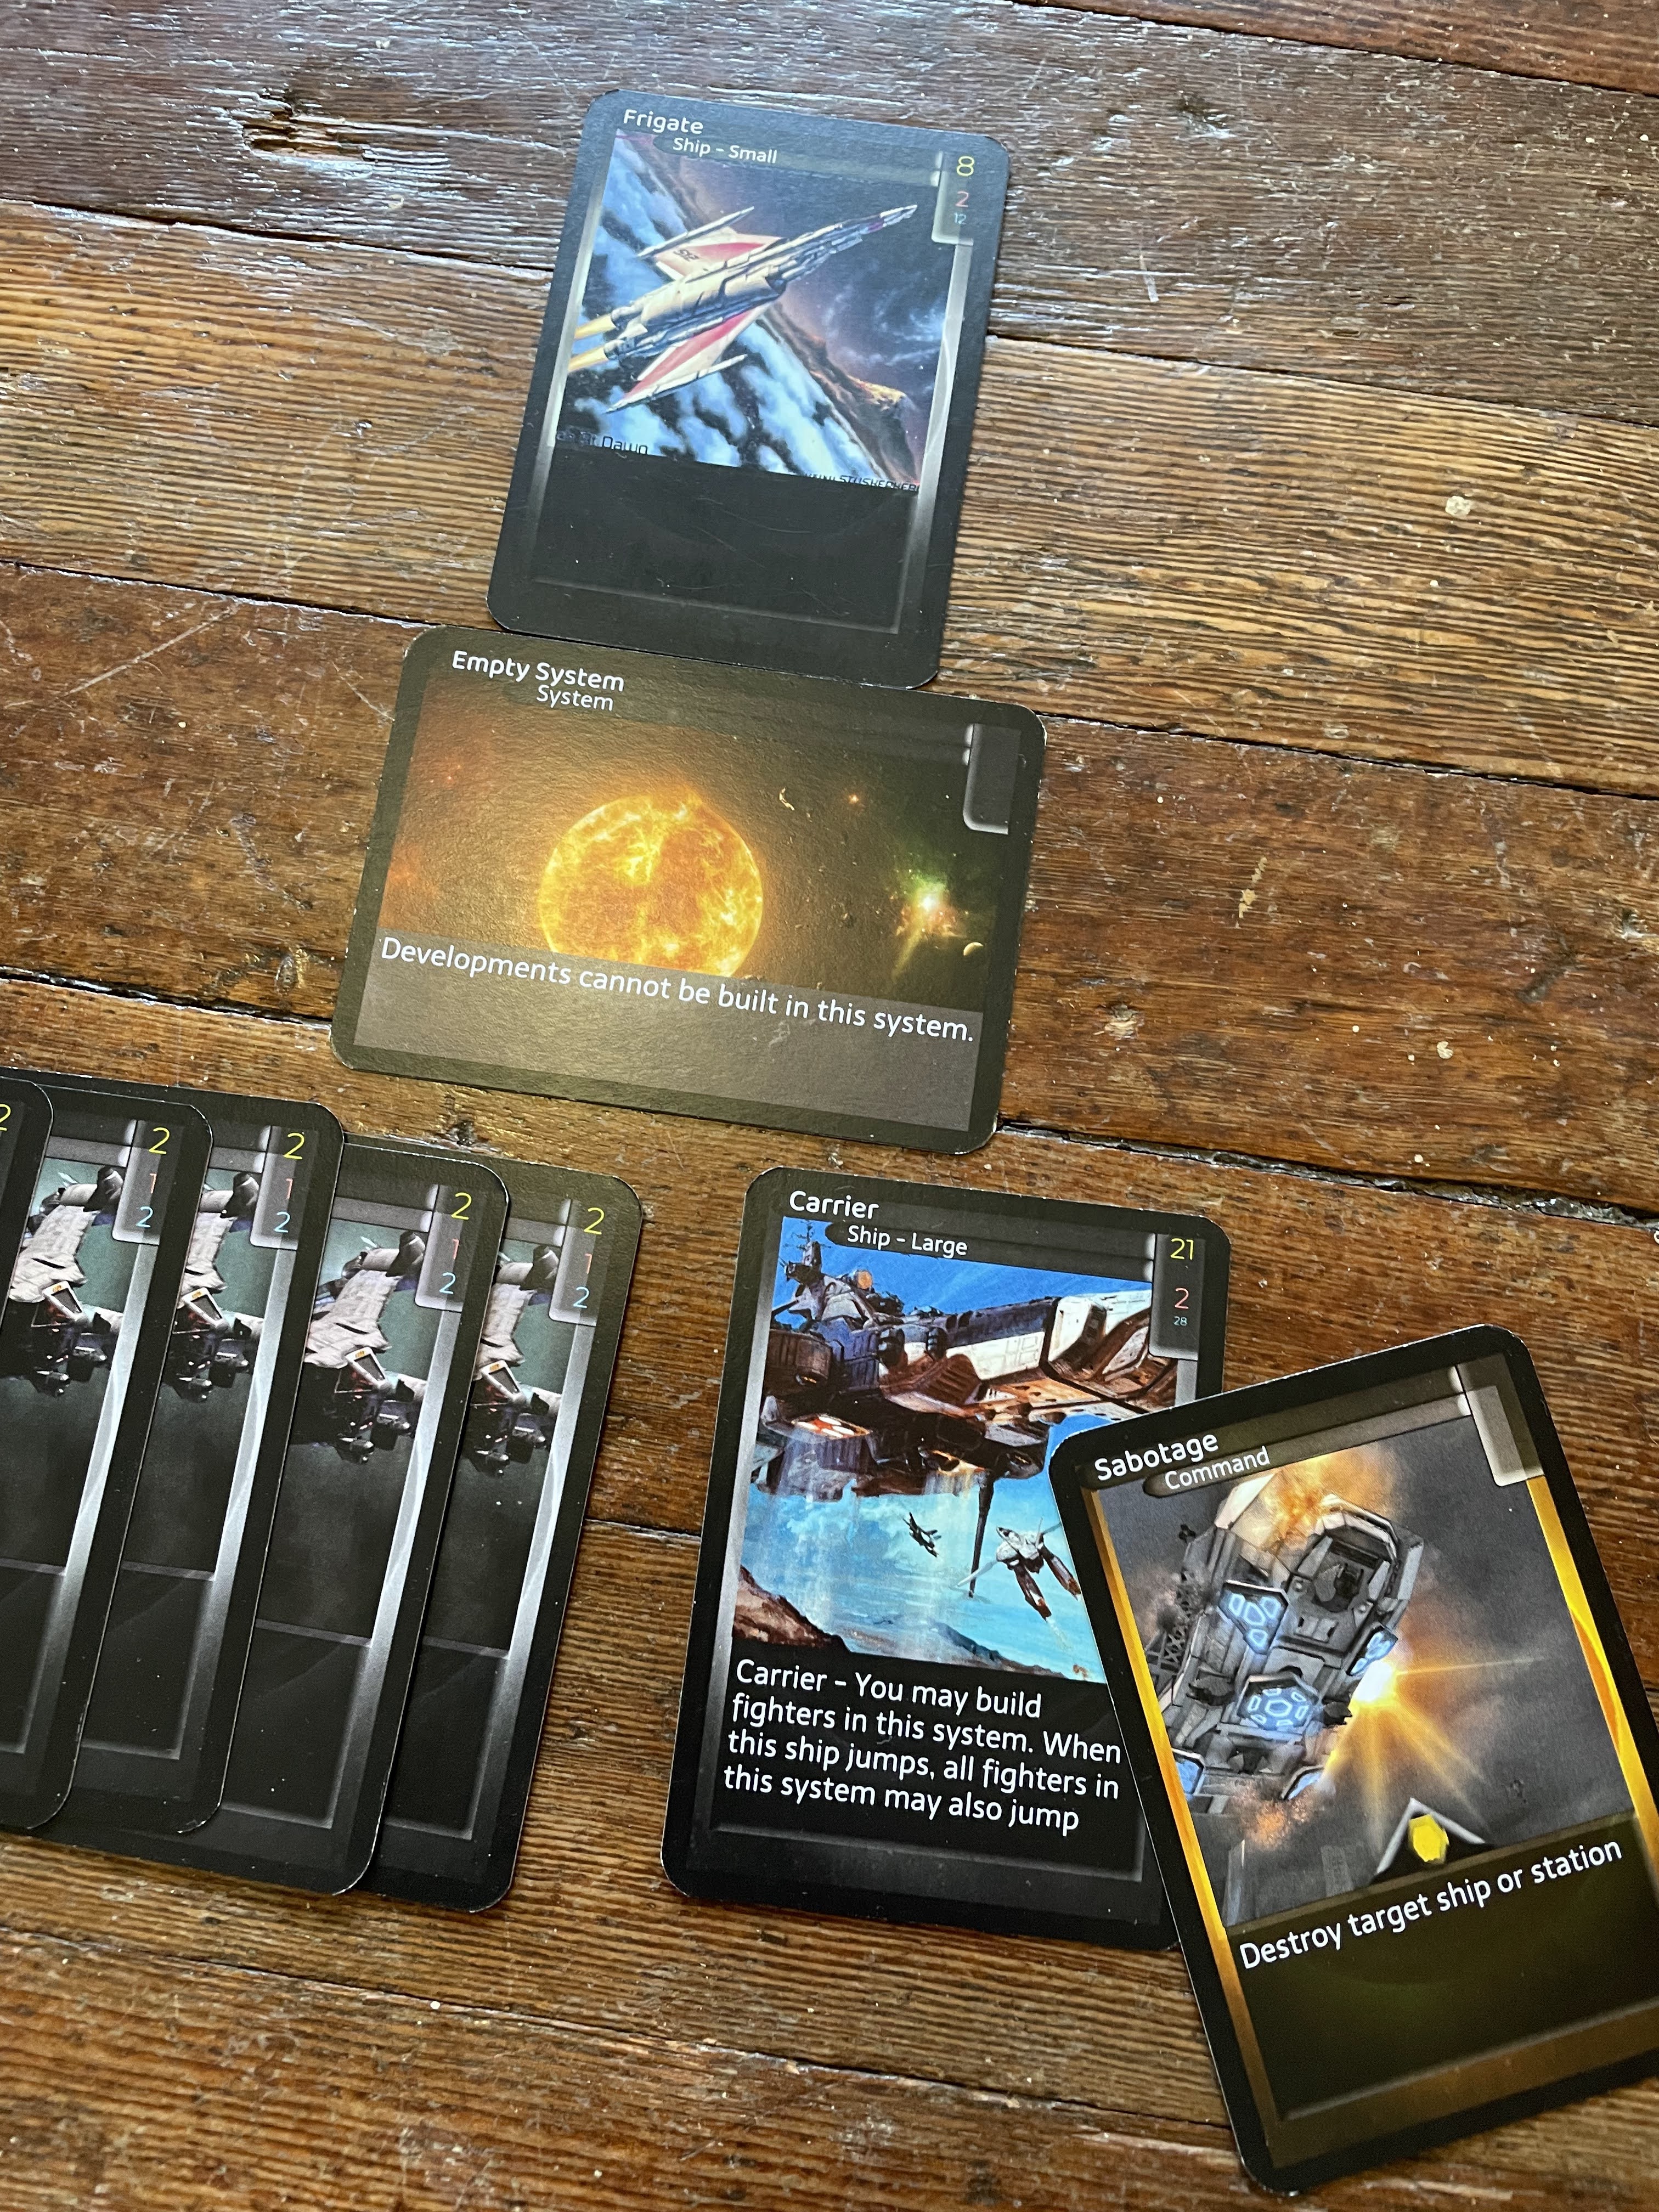
The red player has played Sabotage on the Carrier, destroying it without having to deal any damage!
However, the fighters have the Frigate severely outnumbered. While the Frigate can destroy any of them in one hit, it can only target a single ship at a time. Meanwhile, each fighter deals 1 damage, which is going to eventually overwhelm the poor Frigate.
The Frigate is outnumbered against the remaining four fighters, and has taken some damage.
It's now the yellow player's turn. They draw a card off the Domain die, a Science card... Miniaturization! Now they are capable of moving their fighters like any other ship. Does that change their gameplan? At the moment, it seems unwise to retreat (after all, they still control the central system, and the Frigate is going to be overwhelmed in the end).
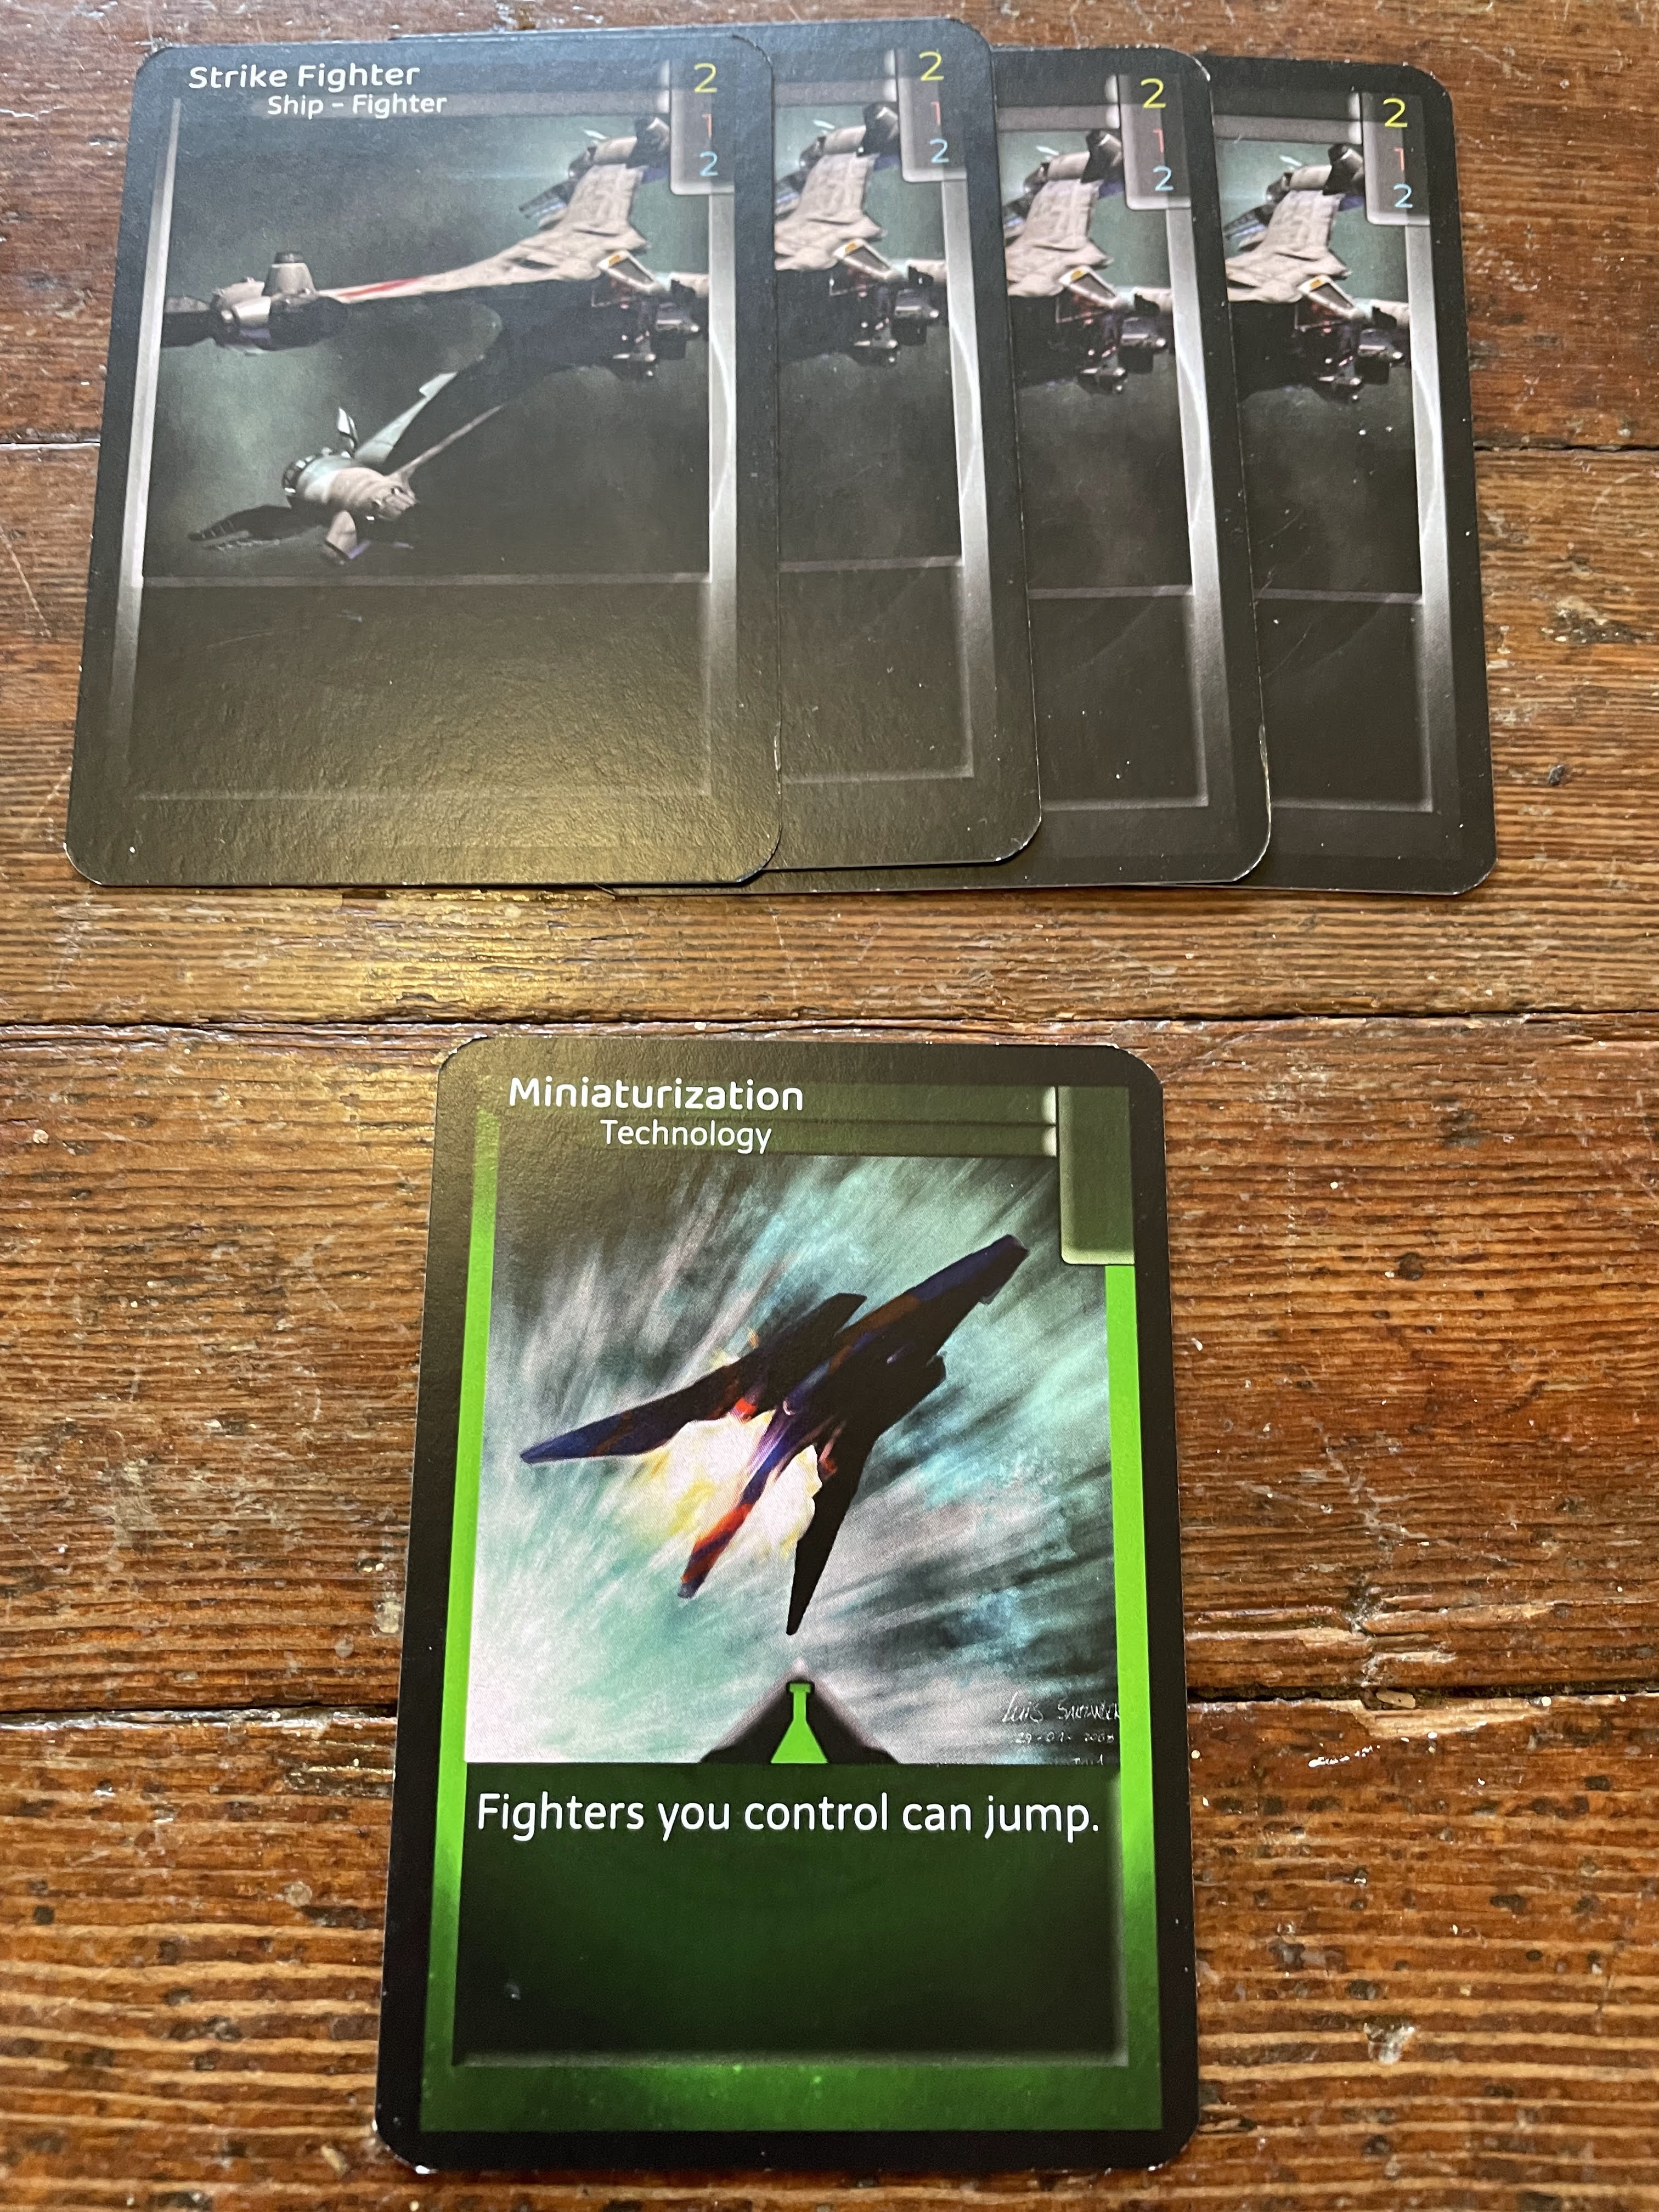
The Miniaturization technology allows fighters you control to jump.
After combat, another Fighter has been destroyed, but the Frigate is on its last legs. The red player decides now is the time to play Repair Crews, which removes all damage from the wounded Frigate. Now it's ready to defeat the remaining three fighters!
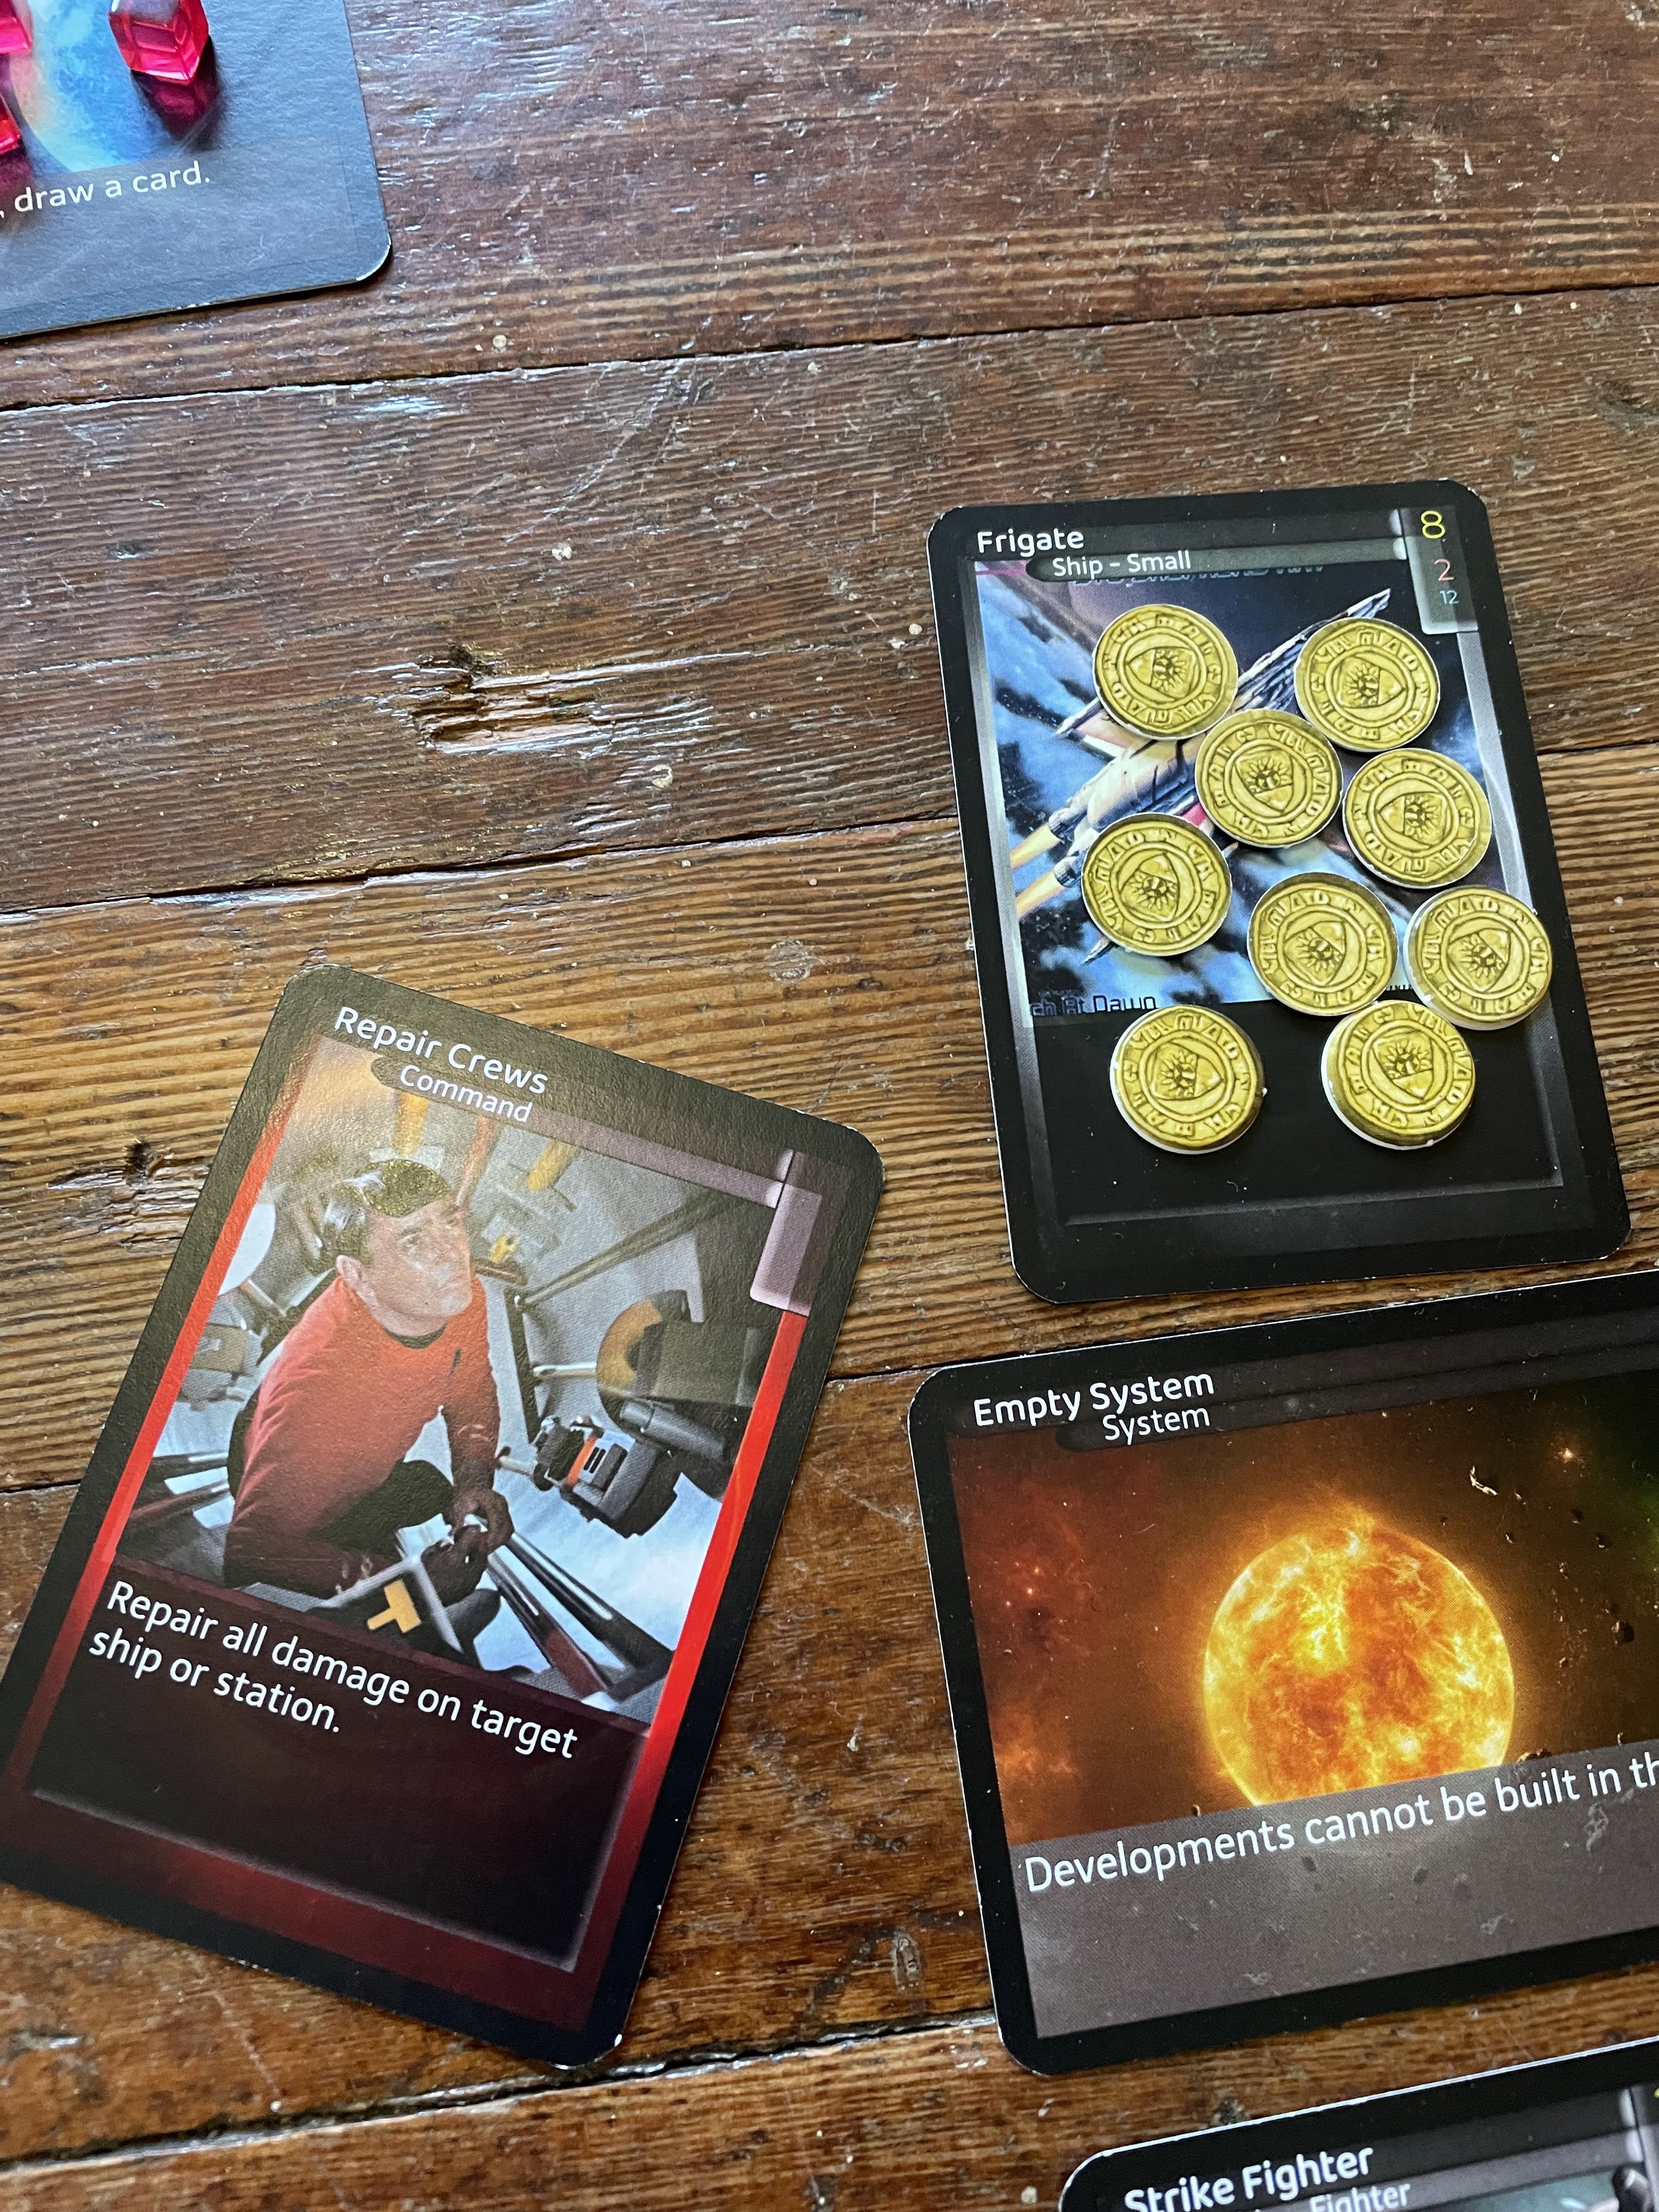
Repair Crews, played at the right time, can turn defeat into victory.
The red player continues the assault on their turn, and destroys another fighter while taking minimal damage. The yellow player, seeing the writing on the wall, decides to retreat the remaining two fighters into another system they control.
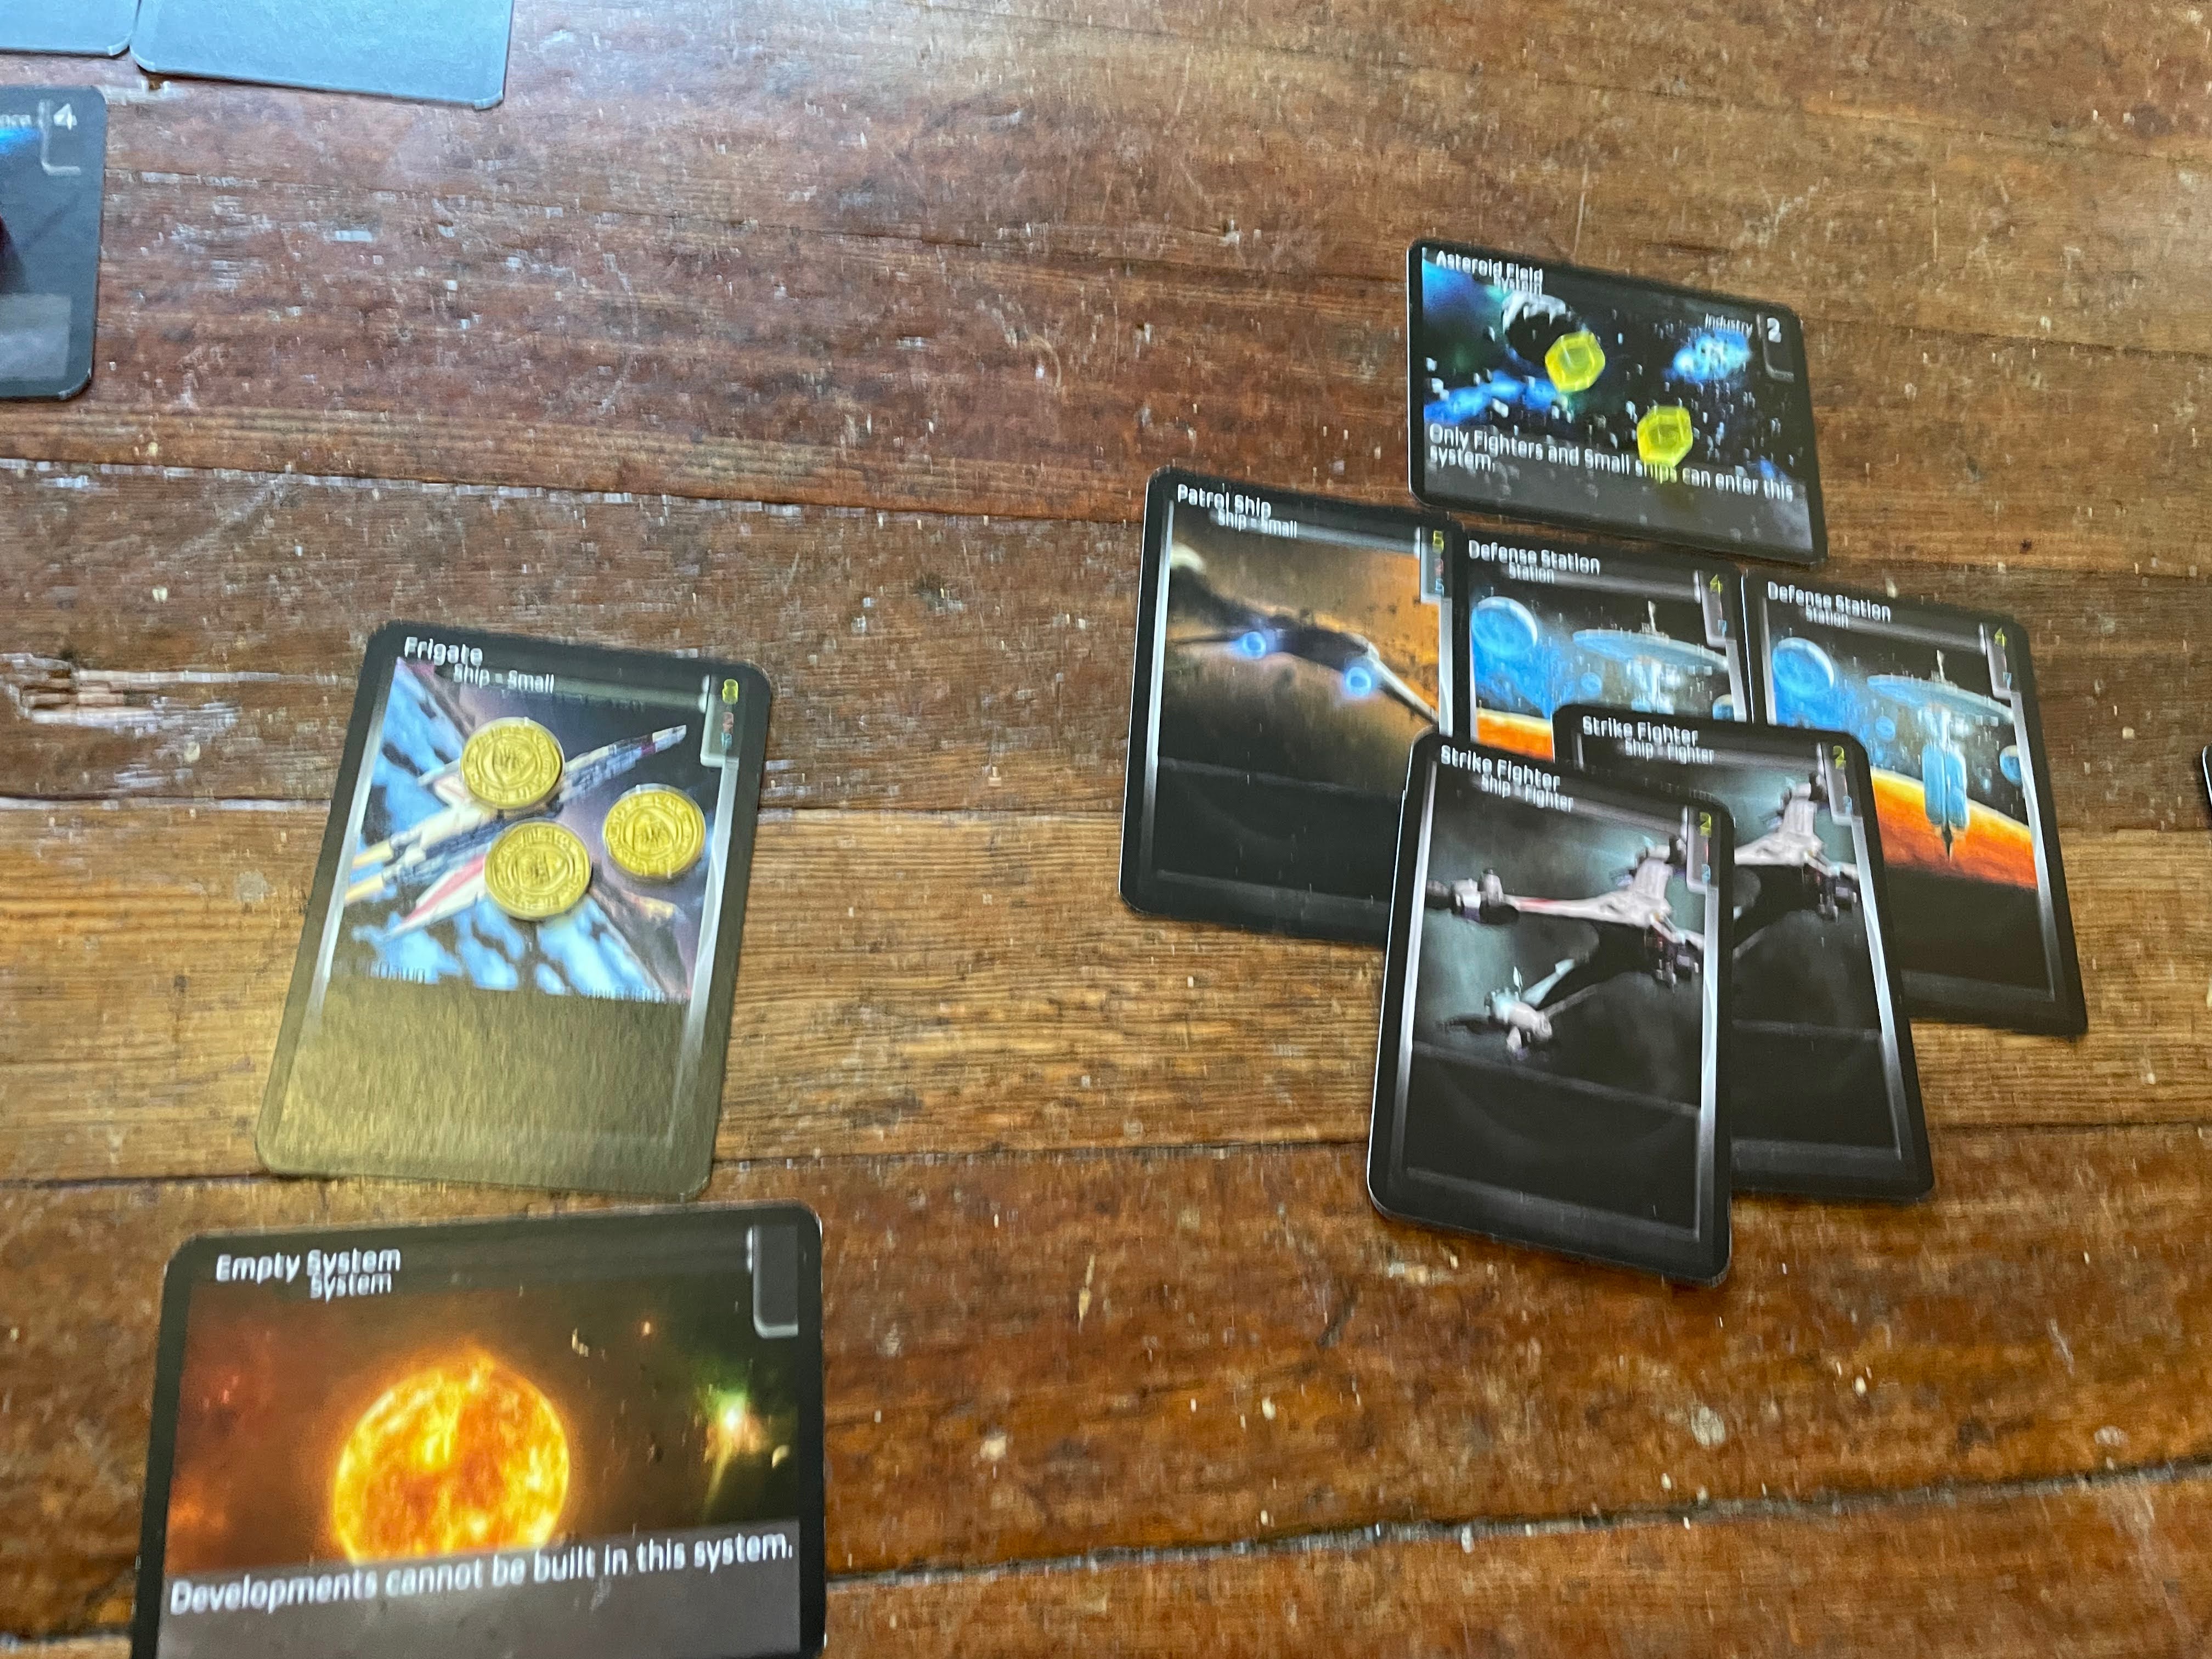
The two surviving fighters retreat to fight another day, joining the other forces in the Asteroid Field system.
Aftermath
The above actions are just a taste of what the two players did during their turns. The red player extended their control of the Trade World, ensuring that it wouldn't be immediately taken back. Meanwhile, the yellow player has solidified their control of the Asteroid Field, preventing the red player from reinforcing the Trade World and (hopefully) allowing them to take it back shortly.
Each player still controls four systems. Ships and stations have been moved and repositioned in order to strengthen each player's defenses and forward their goals.
Conclusion
This has been just a taste of how Star Commander works as a game. Through the course of drawing cards, gaining credits, building new ships and stations, and conquering your opponent's systems, you will be able to wear down your opponents and take over known space. When your opponent loses control of their home system (and controls no Capital Systems), they lose. When no opponents remain, you win!
I hope you enjoyed this example playthrough of Star Commander. The game is still in active development, and any cards referenced above may change or be altogether removed before the official public reveal. If you are interested in trying the game out for yourself, feel free to download and print the prototype cards and game rules. Until next time!